Classics Club, Book #17: The Door In The Wall

This is my third post about 2015’s books for The Classics Club.  I’ll be reading one classic book a month through 2018.  Track what I’m reading for the Classics Club here.  I’ll try not to include too many spoilers in my review but I may need to discuss some in order to fully review the book. I’ll warn you if I’m going to mention one.  

The Door in the Wall by Marguerite de Angeli

003 (640x427) (2)I was so desperate to actually publish this post in June (making it the first time since book #5 in May 2014 that I’ve managed to do that) that I took this picture with Mark, after he’d fallen asleep tonight.  Luckily, we cosleep so his bed is my bed and I could easily lie down next to him! 🙂

  • Year Published: 1949
  • Reread? Or new to me?:  new to me
  • Number of Pages: 121
  • Date Finished: 6/4/15
  • Number of Days it took me to read it: 3
  • Page/Day ratio:  40:1 (I could have read it in one sitting if my brain hadn’t been completely fried by Les Miserables.)
  • Will I reread this?: Perhaps yes, if/when my kids read it.

Review:

My plan all along has been to read a Newbery Award winner following each huge classic I read, knowing that I will probably need a break from the really difficult books. This was the first time I tested out my plan and it is a sound one.  I went on an easy reading fiction binge following my slog through Les Miserables and The Door in the Wall was just the right book for me to read.

I’ve seen this book recommended for kids in several places recently.  Because it’s not one I read during my childhood, I decided to read it, particularly to preview it for Ellie and Mark.  My verdict?  I loved the, “it doesn’t matter if you’re disabled, you will find your own way,” message.  I was less enthralled with the focus on war, and in particular the demonizing of the Scots and the Welsh while upholding the English as perfect.  Certainly, if/when we do read this, we’ll need to talk about how every country/people sees themselves as right and their enemies as wrong.  I’m sure the Welsh and the Scots would write a different version of the story!

004 (640x427) (2)

How about you?  Have you read much about this particular time in the history of the Scots/Welsh/English?

 ***************

Would you like to join me in reading Till We Have Faces by  C.S. Lewis in July? I recently heard someone recommend this book, with the caveat that you have to read it several times to really understand it.  So I think I’d better get started!

This post contains affiliate links, meaning any purchases you make through them support our blog.  See the full disclosure here.
Posted in books | Tagged , | Leave a comment

Making Progress on My Wedding Introvert Recovery Program

Two Saturdays ago, I had the fun and honor of being the wedding coordinator for a friend’s daughter’s wedding.  It was a great weekend and a great day but by the time I got home at around 6:00 pm, I was ready for some non-talking/non-people time!  Nik and the kids had spent the afternoon at Yiayia’s house and Mark fell asleep on the way home.  This meant that we had a nice long evening ahead of us.  So I headed up to my sewing room and spontaneously decided to make a quilt.  I haven’t made a quilt since Mark’s quilt over a year ago.  It’s my favorite kind of sewing so I decided it was time for another one.  I’m using the measurements from one of the quilts from Patchwork City  but just using one fabric for each block (the same fabric, actually, in every block).  I’ve been a bit obsessed with sewing this over the past two weeks and I have all the blocks finished!

011 (640x426)It will be around 70″x70″ when it’s done.

Now I just have to sew them together, add a border, make the back, and quilt it!  My goal is to have it done by the end of July, just in time to enter it into the state fair.  After that, it’s destined to be our “picnic/relax on the lawn” quilt.

And in case you’re wondering, yes, I’m definitely an introvert.  I can play a pretty strong extrovert when I need to but when I’m tired, give me a book or sewing!

Posted in sewing, wedding | 3 Comments

Our 8-year-old Marriage, as seen in our 8-year-old Yard

Today, Nik and I are celebrating eight years of marriage.  Over the past four years, I’ve commemorated our anniversary here on the blog by expressing our thankfulness for Ellie (year #4), by announcing our pregnancy with Mark (year #5), by showing you heart-shaped pizza (year #6) and by showing you one picture for each year of our marriage (year #7).  We even had anniversary mayonnaise for our first anniversary (just posted  a few months late).  So how can I top all of that?

How about taking a tour of our yard?!?! (That’s just as exciting as a pregnancy announcement, right?)

Over the past eight years, Nik and I have learned a lot about what it means to be married and about how to live in the give-and-take and in the happy-and-sad.  We have a lot left to learn, a lot more we want to do, and certainly a lot of room left to grow.  As I was working in our yard this morning, I was thinking about how our yard is completely different than when we got married eight years ago.  Slowly (OH SO SLOWLY), we’ve been shaping it into what we want it to be and although I’m sure it will never be perfect, much of the major reshaping is finally done.  That’s a pretty good metaphor for marriage, right?  The first few years of marriage are when the major reshaping, pruning, planting and clearing goes on.  After that, I’m know there’s still a lot of weeding, pruning, and maybe even major changes to be done but just not so many at once (I hope!).

So, in honor of eight years of marriage, I’m giving you a tour of our eight-year old yard. Faithful long-time readers of my blog will know that I used to blog about yard work fairly frequently.  I haven’t in the past couple years so I suppose it’s about time for an update!

When we started working on our yard in the summer of 2007, it had clearly not been cared for in many years (other than mowing the lawn).  The bushes and trees were really overgrown/dying and the beds had almost disappeared underneath weeds.  We also had a vision for edible landscaping (thanks in large part to my aunt’s influence – thanks Aunt Zona!).

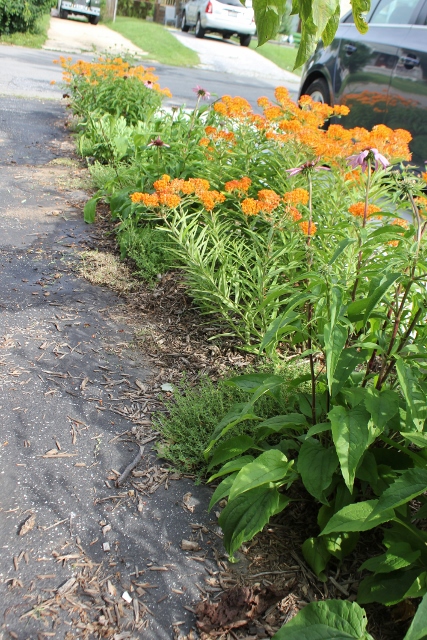
The beds on either side of our front driveway were covered in awful, evil grass.  Over the course of a couple summers, I dug out the sod and replaced it with creeping thyme on one side and a bunch of different native perennials on the other.

001 (640x427) 002 (427x640) 003 (640x427)
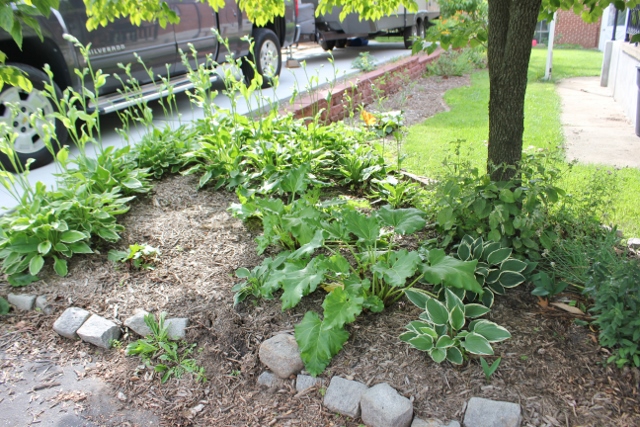
At the top of that same driveway, the bed used to be dominated by overgrown old azaleas.  One summer, Nik’s mom and I cut them way back and then a couple years later, I dug them all out.  Now, we have lots of rhubarb growing in them, as well as hostas. I’m still figuring out what else to do with it but at least it’s starting to be useful.

004 (640x427)This long bed is what has taken us so many years to finish. Along with ripping out the old concrete block retaining wall/ old chain link fence and putting in that new retaining wall, we also had to design and dig out an brand new bed.  In this bed, there are blueberry bushes, rhubarb, perennial herbs (rosemary, thyme, oregano), other perennial flowers/plants, an apricot tree, and a peach tree. I want to add a lot more plants but it’s looking better. (This post gives you a good idea of what we had to start with while this post tells you what we were thinking about initially. Here it is in progress at the end of 2011.  I can’t believe we’ve been working on it for eight summers!)

005 (426x640) 006 (640x427)  
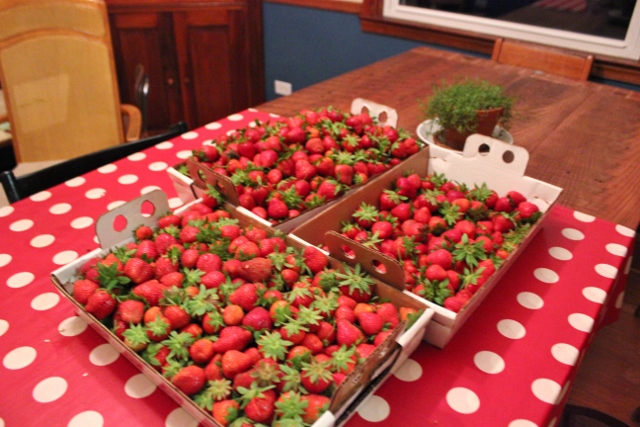
blueberries to come soon!

Along the back of our house, we’ve planted three fig trees.  The harsh winters we’ve had the past couple years have killed them back to the ground, but they keep on coming back and we’re excited to be eating more fresh figs this year.

007 (640x427)Our vegetable garden area is in complete disarray right now, but lest you think our yard (and our marriage) is in perfect shape, I’m going to show you that too. We’re in the process of getting rid of a couple really large shrubs and completely overhauling our raised beds.  In the midst of the mess are our temporary beds for this summer’s tomatoes, peppers, squash, basil, beans, and cucumbers.

008 (640x427) 009 (640x427)No marriage/yard is ever done, right?

On the other side of our house from the long bed, I’m working on beating back our ivy (complicated by the invisible poison ivy presence).  I’m partially done and have filled in the empty space with hostas and other shade-tolerant plants. Battling the ivy is an ever-present problem, sadly.  It’s been part of our marriage from the very beginning.

010 (640x427)You can see the line of ivy at the back where I stopped digging it out.

Our front rock garden now has strawberries in front of it and nearby, two apple trees!

011 (640x427) 012 (427x640)Finally, we planted the maple and red bud in 2008.  At that time, they were both just barely taller than us and now look at them!

013 (640x427)hooray for afternoon shade for our car!

Bless you if you’ve managed to read this far down through my own processing of the work that we’ve done on our yard since 2007.  It’s pretty easy to look at our yard and think that we’ve haven’t changed much and that we have so much work left to do.  But I am grateful to say that, just like our marriage, we’ve come a long way from where we started and we’re so grateful for what we have.

And, lest the start of this post be forgotten, I love you, Nik!  Here’s to eight more years and many, many more after that!

P.S. This is my favorite yard work post, EVER. (This one is pretty cute too.)
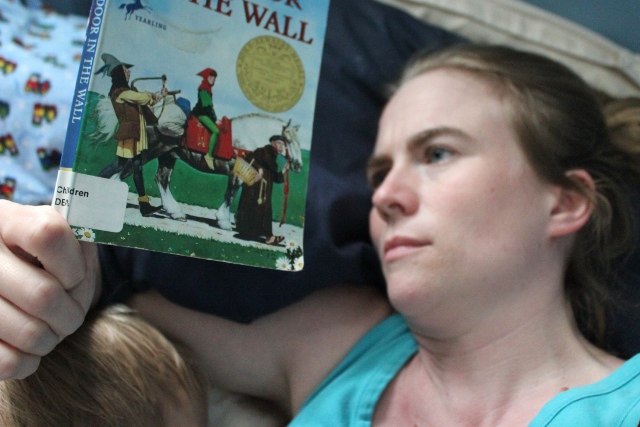
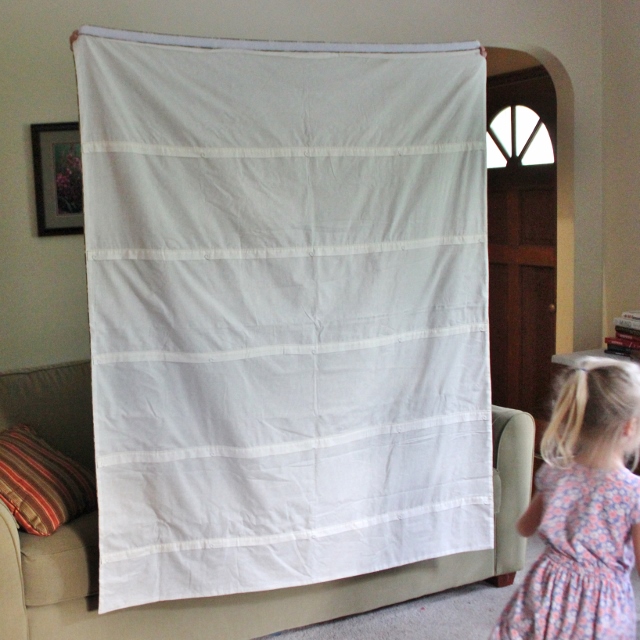
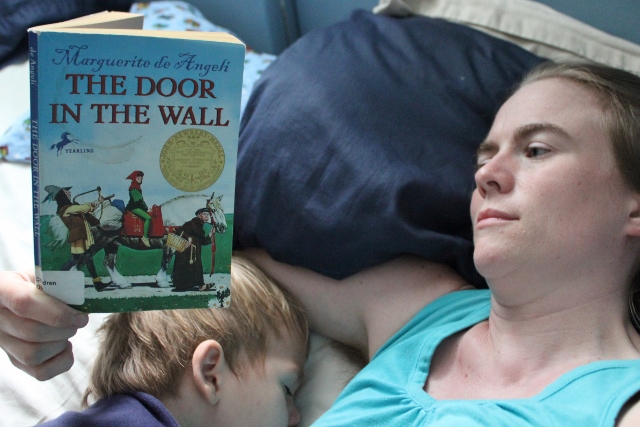
Posted in gardening, marriage | 2 Comments

June Sewing: Crayon Rolls Galore (as designed by Ellie)

A couple weekends ago, Ellie and I went on a bit of a sewing streak, and made up four of these little crayon rolls.  You can find my tutorial for them here.  What I forgot to show in that tutorial was the action shots.  So here there are!

001 - Copy (640x426) 002 - Copy (640x426) 003 - Copy (640x427) 005 - Copy (640x640)

Ellie chose these fabrics specifically for each recipient.  Here are the inside and outside of each one.

015 (640x427) 016 (640x427)And so you can appreciate fully the amount of “letting go” practice this collaboration afforded me, here is each one with the front and back together.

017 (640x427) 018 (640x427)I insisted on choosing the solid background for each one.  Otherwise, I think my head might have exploded with all the clashing. 🙂

Now, I just have to get my act together and get these delivered to their new owners!

Posted in Ellie, sewing | 2 Comments

Ellie the Baker! (and a review of Kiwi Crate in case you’re interested)

Ellie’s aunt and uncle gave her a very fun present for her birthday last fall – a subscription to Kiwi Crate.  A box arrived every month for six months.  Each box had a theme, as narrated by Steve the kiwi [bird], with two projects to complete on that theme and an accompanying magazine.  I doled them out sparingly (as needed for my sanity) and we ended up covering a 9-month span.  So we just finished our last box a couple weeks ago.  It had a baking theme.  First, she got to decorate a “cake” (made out of foam), with “frosting” (really soft clay).

IMG_0975 (480x640) IMG_0973 (480x640)After the initial layer of frosting, she added some dots and swirls and then also stuck on the decorations, like candles and berries. 

She also decorated an apron and chef’s hat with special crayons and stencils.

IMG_0978 (427x640)

Over the course of the six boxes, we explored baking (awesome!), castles and catapults (super fun!), dinosaurs/archeology (OK), cowboys/Wild West (not so great), sports (OK), and winter (pretty fun).  Those reviews in parentheses indicate not my assessment of the subject matter but rather the quality of the projects.  As you can see, they were fairly uneven.  I wanted them all to be open-ended and engaging, projects that would allow Ellie to be her usual engaged creative self.  And for the most part, they were.  There were several projects, however, that were fairly closed-ended (i.e. able to be made or used only one way) and not that fun.  Those were the ones that ended up in the trash by the end of the day.  Ellie played with the cake and apron/hat for several days.

So I’m conflicted as to whether or not to recommend Kiwi Crate to you.  On the one hand, it was awesome.  Ellie loved opening the green box and sorting out all the supplies.  The green box also folds out flat to a scene with Steve the Kiwi, which Ellie painted almost every month. She had fun making the projects and loved telling friends and family about them.  On the other hand, some of the projects just weren’t that great.  Maybe my standards are too high?  In the end, Ellie would probably tell you that I’m crazy, that she loves Kiwi Crate, that Steve the Kiwi is a really cool bird, and that it was an awesome present.  So perhaps you should listen to her! 🙂

Kiwi Crate didn’t sponsor this post nor do they even know I exist.

Posted in Ellie | Tagged | Leave a comment

Finish It Up Friday – Final Update of 2015 (don’t fall over in shock)

I know, I know, you thought this would never happen, but it has.  I finished sewing our dining room Roman shades!  Please don’t fall over in shock after reading read this.  I know, I know, I have been writing about these things for five years.  Here’s the first blog mention, here’s where I lament all my procrastinating (as really a symptom of fear), here’s my new motto, and here’s my “final” post about the living room shades.

Here’s one of them from the front. (I made two exactly the same.)

006 (640x640)

Here’s the back, with all the pockets/rings for the rods and strings.

013 (640x640)014 (640x640)Thanks to the time I get to spend sitting calmly during our moms’ group at church, I sewed on 50 of those little rings. 

They’re not installed yet, but that’s not a sewing project.  So I’m crossing them off of my sewing list and moving on to much more fun things.  (Don’t worry, I am determined to also get them installed soon and then I’ll do a proper post on them.)

**********

Here’s the fun stuff that’s still on my list (as updated from this post):

  1. Quilt for us to use when picnicking/sitting outside (It’s already begun!)
  2. tote bag for the library
  3. A big-girl quilt for Ellie. She wants rainbows.  (She’s outgrown her first quilt. Sniff!)
  4. backpack for Mark (poor neglected second child)
  5. apron for Mark (like Ellie’s)
  6. a surprise project for a special friend of ours
  7. hot pads for us (like Mom’s) (and a blog tutorial)
  8. tutorial for the felt string of Christmas lights
  9. headbands for Ellie
  10. napkin rings for our table
  11. bath towel capes for Ellie and Mark
  12. clothes for me (particularly I want to take my Craftsy class about altering patterns, which will result in a new summer (or maybe fall?) dress for me)

**********

This is my entry for Finish it Up Friday at Crazy Mom Quilts.  Somehow, for the first time in the three years I’ve been doing this, I’ve managed to complete my WIP list! HOORAY!

Posted in sewing | Tagged | 6 Comments

My No-Shave Experiment – The RANT (207 Days and Counting)

This is part 2 in my “No-Shave Experiment” mini-series. Here’s part 1 and 1a.

So it’s been almost three months since I REVEALED my “No-Shave Experiment” to you all.  In that time, I’ve had to start wearing summer clothes and no, I haven’t started shaving.  Rather, I just think about it all the time now because I’m not all covered up in warm clothes. Now that I’m thinking about it all the time, it’s time for me to RANT about the whole issue.  (Also, I have to read Plucked: A History of Hair Removal and get it back to the library so I need to rant a bit before I educate myself. Ha!)

Here’s what makes me mad about the state of body hair in America today:

Discriminatory gender double-standard:

  1. Men get to choose (for the most part) whether or not they want to show body hair.  Leg and armpit hair is considered normal.  Barring a few exceptions (like the military), if a man wants to have facial hair, it’s considered a fashion choice.  Usually, I observe men getting compliments over their facial hair, as in, “Hey!  Cool beard!”
  2. Women are expected to be clean-shaven.  I don’t get the easy choice of choosing whether or not to shave my body hair.  I’ve decided not to but I feel angst about it all the time. For the record, no one has told me, “Hey! Cool leg hair!”  One friend kindly congratulated me the first time she saw me in a tank top, not because of my arm pit hair (which was visible) but for what it represented – a conscious consideration.

Shaming of Women (particularly by other women):

Armpit hair was trending on Facebook the other day, evidently, because a couple different friends sent me links to articles about how girls/women are starting to flaunt their hairy pits.  I’m not on Twitter but some of what is tweeted about these pictures is really revolting.  Why it is such a big deal when a women decides not to alter her body?  Why isn’t it OK for a woman to let her hair grow, just like a man does?  I frankly just don’t understand why it’s OK to shame a woman for something that her body is created to do.

The Lack of Acknowledgement that Shaving is Big Business

Who benefits when women are convinced that they have to shave their legs and pits?  Obviously, it’s the companies that sell razors, shaving cream, and antiperspirant. I’ve seen and heard so many women say, “I just like to be clean-shaven.” OK, well, yes, this is true but who taught you to shave in the first place?  It was probably either your mother or your friends and they had to buy a razor and shaving cream to teach you. And who taught them how to shave?  Other women who have been indoctrinated by media and culture.  There’s such a huge financial incentive to keep women shaving so of course, the marketing machine is going full-swing to make sure that the pressure is on women to do so. I’m mad at the media and big business too.

My Own Inability to Stop Obsessing About This

I realize that I shouldn’t be surprised about how hard it’s been for me not to shave. After all, I am 38 years old.  It’s really difficult to reverse almost 40 years of inculturation and habit.    I certainly shouldn’t expect that it would be easy to make a change like this, particularly when it’s so counter-cultural.  On the other hand, I am so thoroughly angered by the whole thing (clearly – I’m ranting) that you would think I wouldn’t have a hard time making the decision to be unshaven permanently.

The Impossibility of Keeping Ellie From Being Tainted

Right now, Ellie is on-board with arm pit hair.  She talks rather excitedly about how she get some when she grows up.  She also likes watching Nik shave.  Right now, I think she thinks that men shave and women don’t.  I know it won’t be too long before she notices that other women shave.  My guess is that unless I manage to find her a bunch of crunchy friends whose mothers also don’t shave, come puberty, she’ll be wanting to shave her legs too.  I just get mad when I think that she’ll have to face the same questions of self-worth/self-confidence when it comes to her body.

001 (640x427)random cuteness – breakfast on our porch a couple weeks ago

The Lack of Relevant Pictures In This Post

I’m not even brave enough to post a picture of my own hairy pits and legs on this post. That’s annoying in itself.

I know there’s more I want to rant about (such as how I haven’t even approached the fact that I also pluck facial hair or that I felt the need to write this blog post mini-series in the first place to feel less weird about being unshaven in public) but I’m cutting myself off.  Care to add any ranting in the comments?  I’d love to hear it!

Still to come: the RESEARCH and the RESOLUTION.

Posted in health and beauty, KIOS, reflecting | Tagged , | 7 Comments

May/June Sewing: A Bag For Me (and I’m already planning its replacement)

I finally let myself work on a project for myself and had a lovely time sewing this little bag.  My beloved Tabitha purse finally wore out and has joined our other play purses.  I need something for those rare times when I’m going out by myself and don’t want to lug around a big diaper bag.  Having just sewn this bag for my friend, I decided to make myself one too.  I had been saving the print fabric for myself since our summer 2013 trip to Montana. The blue duck cloth was left over from Katie’s diaper bag – a perfect match! I felt like it needed a little oomph though and so paired it with Kona Coral.

025 (427x640)I wanted more of the leaves, so I added some for fun to the bottom of the straps.

026 (640x427)

I also changed the construction of the bag (to facilitate adding interior pockets and so had to add a strip of binding to the bottom of the quilt.  I like the full coral border.

027 (640x427)In the interior, I added a small pocket for my keys as well as a pocket for my phone (which is almost too small – oops) and a larger pocket for other stuff.  On the outside, I also added Velcro to one of the smaller pockets.

028 (640x427) 029 (640x427) 030 (640x640)

Now that I’ve been using it for about a week, I have a few complaints about its functionality/design and some ideas for how to fix it.  So I just might relegate this one to library book duty and make another one soon.  In the meantime, though, I am enjoying using it and I do love the color combination!

Thanks to the Purl Bee for the tutorial!

Posted in sewing | Tagged , | Leave a comment

Tutorial: Portable Crayon Carrier (new and improved!) (and a great way to use up scraps)

I made two crayon rolls over the past year – first one as a blog giveaway prize (which ended up with my friend Kim in Israel!) and one for Ellie.  After living with Ellie’s for almost a year, I decided to redesign it to be a little more kid-friendly.  Primarily, the dimensions of the one I made (loosely based on this tutorial) made it difficult to keep it on a clipboard or a plane tray table.  It was so long that it kept falling off, a frustrating occurrence for a child! So, here you go, new and improved, an easy-to-use, SUPER easy-to-sew portable crayon carrier!  I can make one in around 45 minutes so it’s fast-to-sew also! The great thing about this carrier is that it’s significantly shorter (by seven inches) but you can carry 14 crayons in it, only two less than the original.

005 - Copy (640x640)Don’t judge me for my fabric choices, OK?  I made four of these last weekend (to be revealed at a later date) and Ellie did all the fabric choosing! 🙂

Fabric/Cutting Instructions:

  • Fabric 1 for outside: cut 1 – 9.25″ x 5″
  • Fabric 2 for inside lining: cut 1 – 9.25″ x 5″
  • Fabric 3 for inside pocket: cut 1 – 9.25″ x 6″ and then iron it in half the long way, right side out (so that it measures 9.25″ x 3″)
  • Fabric 4 for ties: cut 2 – 1.5″ x 12″

008 (640x427) (2)The ties and pocket are already folded in half in this shot. The owls are the outside fabric.

Start sewing!

1. Make the ties.  You’re making double-fold bias tape for this step so if you know how to do that, just go ahead and make it.  Here’s how to do it if you don’t know.  Take one 1.5″ x 12″ piece and iron it in half down the length.  Then open it up, fold the two long edges to the middle, and iron it again so that the raw edges are touching along the center line.

009 (640x426)I use the iron to keep the edges folded while I’m positioning the next inch or two of fabric.

010 (640x427)

At one short end, fold down about .25 inches and then fold the long edges back to the middle.  Use the iron and iron the piece in half again down the long edge. You’ve made bias tape! (Technically this isn’t bias tape because we didn’t cut the fabric on the bias.  I’m just not sure what to call it otherwise!)011 (640x427) 013 (640x427)

Sew/edge stitch the finished end and down the long side to turn the piece of bias tape into a tie.  Repeat for the other piece of fabric. You only have to finish one end because the other end will be sewn inside the crayon carrier.

014 (640x427) (2)

2. Prepare the inside piece: Line up the pocket piece with raw edges touching the bottom edge of the right side of lining piece. Line up the left side of the piece with the grid on your rotary cutting mat.  Then, using your ruler and a marking tool, make a line every 1.25″, starting at 1.5″ from the left side.

015 (640x427)I like to use a marking tool whenever I can because it’s so much easier (and cheaper in the long run) than using a fabric marker.  I use what’s pictured, which is really a tool for scoring card stock.  A Hera Marker is the official tool to use for this.  It’s especially useful in quilting. If you don’t have one, you can use a disappearing fabric marker instead, like this one. (This post has a nice explanation for how to use a Hera.)

You’ll have six lines when you’re done, with the two outside sections measuring 1.5″ (to allow for the seam allowance). Ellie took a couple of in-process pictures for you. 🙂

016 (640x427) (2) 018 (640x427) (2)

After you’ve marked your lines, pin securely on all three edges of your pocket piece.

019 (640x426)Starting on the pocket piece, sew down each of the lines, continuing off the pocket piece onto the lining piece and to the edge of the fabric.  This forms the pockets for the crayons and gives a bit of structure to the carrier.

021 (640x426)Structurally speaking, the sewing on the top half of the lining piece is unnecessary. I do think it makes it look more interesting and visually separates the top part into sections, making it easier for little ones to put those crayons away!

Using a 1/8″ seam allowance, sew the two unfinished ends of the straps to the middle of one side of the inside piece.  Either side is OK. Loop the strap so that it’s sitting in the middle of the lining piece (to be out of the way for sewing it together).

022 (640x427) (2)3. Sew the carrier together: Place the outside piece on top of the prepared lining piece, right sides together.  Pin securely.  Sew around the perimeter of the carrier, using a 1/4″ seam allowance, leaving a 4″ turning hole on the TOP side of the carrier.  Secure both starting and stopping points of this seam.

Clip the corners and turn the carrier right side out.  Push out the corners completely and then press it carefully so that it lies flat, paying special attention to the turning hole so that both sides of the fabric are pressed inside neatly.  Edge stitch around the whole carrier, to finish the edge and close the turning hole.

023 (640x427) (2)This is hard to see but edge stitching means stitch very close to the edge of the project, usually at around 1/8″ or less.

Fill with crayons (two per pocket), roll it up, and enjoy your useful, portable, potentially-beautiful-if-your-four-year-old-doesn’t-choose-the-fabric creation!

024 (640x427)

This post contains affiliate links, meaning any purchases you make through them support our blog.  See the full disclosure here.
Posted in sewing, tutorial | Tagged , , , | 1 Comment

Picking In The Rain! Just Picking in The Rain!

Through a series of unfortunate events (mostly rain-related), we ended up deciding to go strawberry picking very last minute last Thursday evening.  We threw some food in the car for dinner and headed to the farm about 20 minutes after we’d decided to go.  Despite the bad weather in the days preceding, there were plenty of ripe berries, the kids were in a great mood, and Nik and I set to picking.  Then the rain came, a bit earlier than had been forecast.  Nik took the kids to the car, I kept picking in the downpour, and with 10 more pounds of strawberries picked, we called it a day.

IMG_0981 (480x640)just a little soaked and muddy! (Clearly I enjoy this kind of work.)

We went home via Broom’s Bloom for ice cream and of course forgot to take pictures of the adorable faces covered in chocolate and vanilla. It was a delicious way to end our evening!

After we got the kids asleep, we settled into strawberry processing mode.

001 (640x427)33 pounds total!

002 (640x427)The berries on the cooling rack were drying for eating in the next few days.

003 (640x427)beautiful!

The next day, my friend Emily very kindly brought her kids over to my house to occupy my kids while I made jam.  36 cups of strawberry puree and 18 cups of sugar (almost 10 pounds!) later, we have 25 pints of jam, hopefully enough to last us for two years.*

004 (640x427)25 seals for the win!

007 (640x426)I’m not a foam skimmer because I frankly just don’t care how it looks plus it does taste delicious.  Do you skim foam off your jam?

33 pounds of strawberries also yielded about 1.5 gallons of frozen berries for the winter plus a good amount for eating.  Hooray for the beginning of summer!

**********.

More on how I make strawberry jam here (and also about where we pick our strawberries – we only go to Lohr’s now)

Another strawberry jam post, including adorable 20-month old Ellie!

In case you want to see the disgusting mold-covered strawberry jam again

**********

*I do feel the need to point out that most canning guidelines/ regulations state that food in home-processed jars are considered expired after 18 months.  We haven’t had any trouble pushing ours out to two years (the moldy jam being the exception that does not matter because the jar wasn’t actually sealed). However, you’re taking your life into your own hands when you go against the rules.  So just be warned. 😉 (And I’ve heard of people using home-processed food for more than two years so we’re not living that close to the edge.)

Posted in canning | Tagged , | 8 Comments