
I made two crayon rolls over the past year – first one as a blog giveaway prize (which ended up with my friend Kim in Israel!) and one for Ellie. After living with Ellie’s for almost a year, I decided to redesign it to be a little more kid-friendly. Primarily, the dimensions of the one I made (loosely based on this tutorial) made it difficult to keep it on a clipboard or a plane tray table. It was so long that it kept falling off, a frustrating occurrence for a child! So, here you go, new and improved, an easy-to-use, SUPER easy-to-sew portable crayon carrier! I can make one in around 45 minutes so it’s fast-to-sew also! The great thing about this carrier is that it’s significantly shorter (by seven inches) but you can carry 14 crayons in it, only two less than the original.
 Don’t judge me for my fabric choices, OK? I made four of these last weekend (to be revealed at a later date) and Ellie did all the fabric choosing! 🙂
Fabric/Cutting Instructions:
- Fabric 1 for outside: cut 1 – 9.25″ x 5″
- Fabric 2 for inside lining: cut 1 – 9.25″ x 5″
- Fabric 3 for inside pocket: cut 1 – 9.25″ x 6″ and then iron it in half the long way, right side out (so that it measures 9.25″ x 3″)
- Fabric 4 for ties: cut 2 – 1.5″ x 12″
 The ties and pocket are already folded in half in this shot. The owls are the outside fabric.
Start sewing!
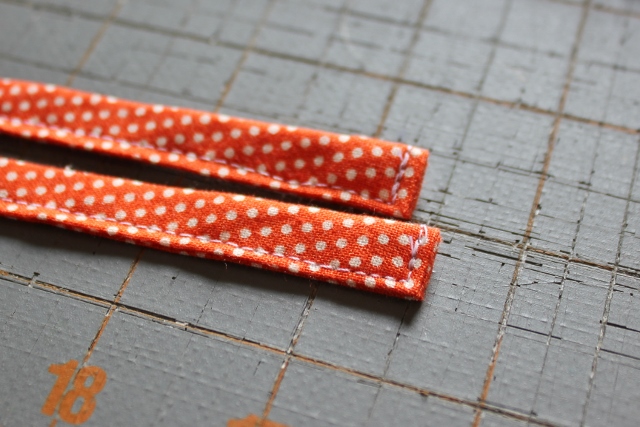
1. Make the ties. You’re making double-fold bias tape for this step so if you know how to do that, just go ahead and make it. Here’s how to do it if you don’t know. Take one 1.5″ x 12″ piece and iron it in half down the length. Then open it up, fold the two long edges to the middle, and iron it again so that the raw edges are touching along the center line.
 I use the iron to keep the edges folded while I’m positioning the next inch or two of fabric.

At one short end, fold down about .25 inches and then fold the long edges back to the middle. Use the iron and iron the piece in half again down the long edge. You’ve made bias tape! (Technically this isn’t bias tape because we didn’t cut the fabric on the bias. I’m just not sure what to call it otherwise!)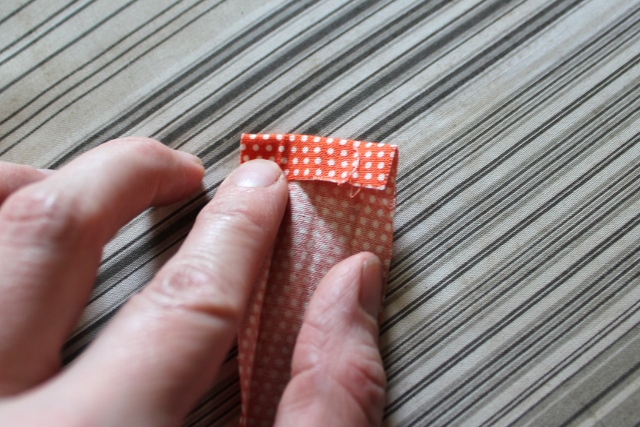

Sew/edge stitch the finished end and down the long side to turn the piece of bias tape into a tie. Repeat for the other piece of fabric. You only have to finish one end because the other end will be sewn inside the crayon carrier.
2. Prepare the inside piece: Line up the pocket piece with raw edges touching the bottom edge of the right side of lining piece. Line up the left side of the piece with the grid on your rotary cutting mat. Then, using your ruler and a marking tool, make a line every 1.25″, starting at 1.5″ from the left side.
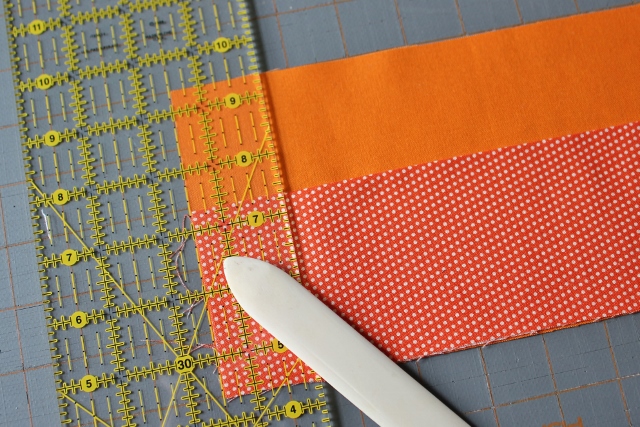 I like to use a marking tool whenever I can because it’s so much easier (and cheaper in the long run) than using a fabric marker. I use what’s pictured, which is really a tool for scoring card stock. A Hera Marker is the official tool to use for this. It’s especially useful in quilting. If you don’t have one, you can use a disappearing fabric marker instead, like this one
. (This post has a nice explanation for how to use a Hera.)
You’ll have six lines when you’re done, with the two outside sections measuring 1.5″ (to allow for the seam allowance). Ellie took a couple of in-process pictures for you. 🙂


After you’ve marked your lines, pin securely on all three edges of your pocket piece.
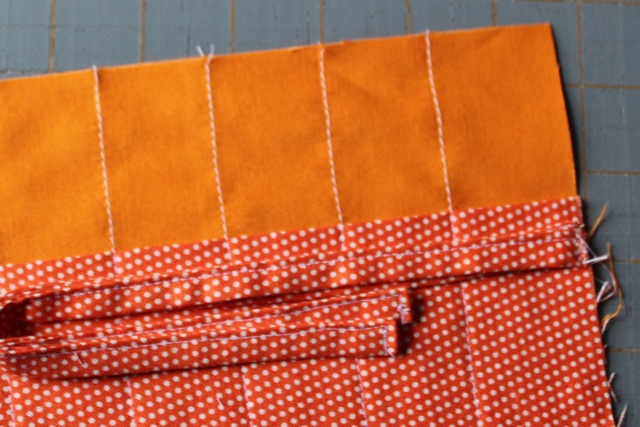
 Starting on the pocket piece, sew down each of the lines, continuing off the pocket piece onto the lining piece and to the edge of the fabric. This forms the pockets for the crayons and gives a bit of structure to the carrier.
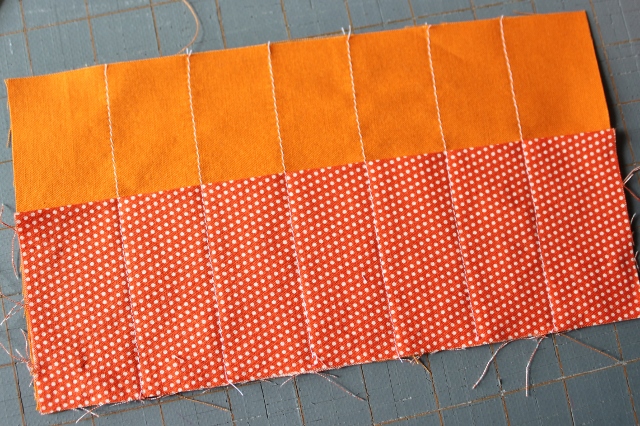 Structurally speaking, the sewing on the top half of the lining piece is unnecessary. I do think it makes it look more interesting and visually separates the top part into sections, making it easier for little ones to put those crayons away!
Using a 1/8″ seam allowance, sew the two unfinished ends of the straps to the middle of one side of the inside piece. Either side is OK. Loop the strap so that it’s sitting in the middle of the lining piece (to be out of the way for sewing it together).
 3. Sew the carrier together: Place the outside piece on top of the prepared lining piece, right sides together. Pin securely. Sew around the perimeter of the carrier, using a 1/4″ seam allowance, leaving a 4″ turning hole on the TOP side of the carrier. Secure both starting and stopping points of this seam.
Clip the corners and turn the carrier right side out. Push out the corners completely and then press it carefully so that it lies flat, paying special attention to the turning hole so that both sides of the fabric are pressed inside neatly. Edge stitch around the whole carrier, to finish the edge and close the turning hole.
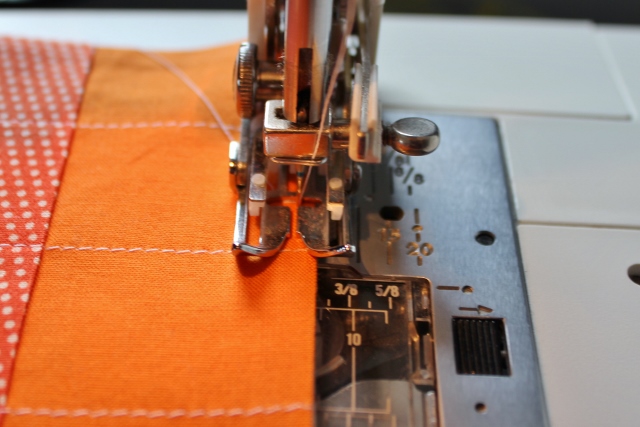 This is hard to see but edge stitching means stitch very close to the edge of the project, usually at around 1/8″ or less.
Fill with crayons (two per pocket), roll it up, and enjoy your useful, portable, potentially-beautiful-if-your-four-year-old-doesn’t-choose-the-fabric creation!


Pingback: June Sewing: Crayon Rolls Galore (as designed by Ellie) | Salmon and Souvlaki