My No-Shave Experiment – The Research (860 Days and Counting)

This is part 4 in my “No-Shave Experiment” mini-series. Here’s part 1 – the reveal, 1a – a call for personal experience, part 2 – the rant, and part 3 – the reflection.

Back in September 2015, I finally finished reading Plucked: A History of Hair Removal, by Rebecca Herzig. I typed my notes into a draft blog post and it sat there for many months. Lately, I’ve felt the need for some closure on this “No-Shave Experiment”, begun in November 2014 (because it’s really not an experiment for me any more) and so I’m going to try to push through and finish the final three posts in the series.

Rather than try to mold my notes (taken almost 18 months ago) into any sort of coherent report, I’ve organized them into categories but just left them in note form. For the most part, these are my own summaries of what I read.  Sentences/phrases in quotation marks are taken directly from Plucked. (Any errors in the quotations are definitely mine.)

Hair Removal (HR) through the ages:

  • Overall impression: hair removal as both racist and sexist (the more hairy the person, the more crass, visible body hair = “dirty foreigner”)
  • HR among non-native women in the US started around 1910/15 as hemlines started to rise – considered essential for sleeveless gowns
  • HR as a way for middle-class American women to “separate oneself from cruder …lower class, and immigrant [people]”
  • shaving = with the need for private bathroom/indoor plumbing, therefore a mark of the well-off
  • By 1938, for women, any hair not on scalp is considered excessive. Also, Gilette’s need to sell more shaving stuff after World War 1 (to keep up higher sales due to the bare faces needed for gas masks) motivated them to start advertising to women. Advertising avoiding mention of blade and instead referring to “caring for niceties of personal habit.” Shortages of nylon/silk in WWII meant women started to go bare-legged and wanted to maintain the look of stockings, hence needing to shave.

Hair Removal (HR) in more recent times:

  • unshaven armpits as political statement – feminism, symbolic reminder of the often “repetitive, expensive and often invisible labor of maintaining hair-free flesh” – either as trivial nuisance or very embodiment of women’s oppression.
  • For advocates of Black Power and Black Nationalists, revised treatment of head hair became a vital element of resistance to racist perceptions of beauty and Eurocentric standards of appearance. [I think that this was a direct quote from the book because they don’t sound like my words but I didn’t have the quotes in my notes so I’m not sure.]
  • “The treatment of armpit, facial, or leg hair…provide women’s liberationists with a malleable and visible symbol of their commitment to the ‘natural,’ unconfined body. Simply by ceasing shaving, advocate of women’s rights might quickly establish their identification with larger social movements.”
  • Another [maddening] example of “gendered social control”: the forcible, mandatory shaving of pubic hair at the beginning of labor. (This is a practice that thankfully has almost completely died but still makes me furious to think about it happening.)
  • “visible body hair on women signals political extremism” – like the radical PETA activist in the [possibly a hoax] NRA advertisement.
  • “If God gave it to me, why should I shave it off?” (A question I ask myself a lot and found it interesting to see it expressed in this book, not written at all from a Christian viewpoint.)
  • About waxing: Waxing depends on “conversion of petroleum waste into valuable by-product” – i.e waxing is NOT a carbon-neutral activity.  The Brazilian wax came out of porn (if everyone has shaved legs, how can we make porn more shocking?). Waxing brands/formulas are not regulated like cosmetics (i.e. no mandatory testing procedures). Brazilian waxing is SO incredibly painful for the client but also bad for the workers (repetitive strain injuries, noxious chemicals/fumes) and primarily depends on cheap immigrant labor.

On why people say they shave

  • “Over time, hairlessness, once perceived as characteristic “deficiency of the continents” (i.e. of indigenous peoples), [has become] normalized – a persistent standard of health, beauty, cleanliness, and desirability.”
  • “When asked, however, Americans tend to downplay the influence of such norms and values [see above].  Instead they attribute their own hair removal practices to “personal” goals of increased attractiveness, elevated self-esteem, and enhanced sexual pleasure.” They attribute their decisions to personal choice, individual freedom = the “right” to shave (To which I have to thing: Really?!?! – as in, you’re glad to have the right to spend a bunch of money and time taking hair off your body?)

In Conclusion

“The uneven effects of “personal” enhancements are distributed broadly, temporally, and geographically.  Those uneven effects, moreover, are routinely excluded from ethical and political debates.  Plucked is,first and foremost, a call to remember those excluded others: the staggering volumes of sweat and blood and imagination and fear expended to produce a single hairless chin.”

As you can probably tell from my editorial asides, I just kept getting more annoyed, the further into the book I read.  If you’re interested in the history of hair removal, I really do highly recommend reading the whole book.  I’ve barely scratched the surface with these notes.

P.S. Want to read more? Check out this article in The Atlantic. It quotes quite a bit from Plucked and the comments section was really fascinating to me. (I NEVER read the comments section these days but got sucked into this one for some reason.)

Still to come: the [anecdotal] RESEARCH and the RESOLUTION (Can you guess what it will be?)

Posted in health and beauty, KIOS, reflecting | Leave a comment

Handmade Christmas 2016: Owls and Stars and Colors, Oh My!

I can finally reveal the final four presents that I sewed for my family for Christmas. These four were definitely sewn in 2017 but they still count as Handmade Christmas 2016, right?

My niece and nephew were both two this Christmas (or close to it) so I made them color books! I used my own tutorial, which I’m so glad I wrote because otherwise I’d have to be reinventing the wheel every time I make these! The last one I made was for Marko, over two years ago.

img_0406img_0407
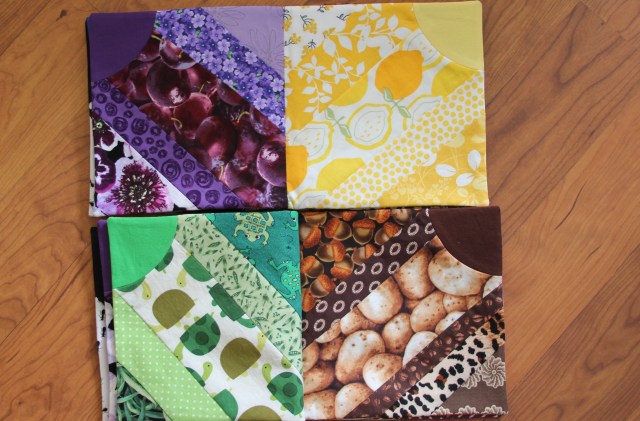
And because I know my mother likes to see the inside of these also, here are the inner pages. Finding all the different fabrics for these books is probably my favorite part of sewing them.

img_0408img_0409img_0410

I figured I shouldn’t totally ignore Annika and Andrew’s families however, so for Chris and Katie (Annika’s parents), I sewed an owl from the Fancy Forest quilt pattern (same pattern that Rachel’s fireflies came from). For those of you who follow me on Instagram, here’s the front of that crazy bunch of orange seams!

img_0396
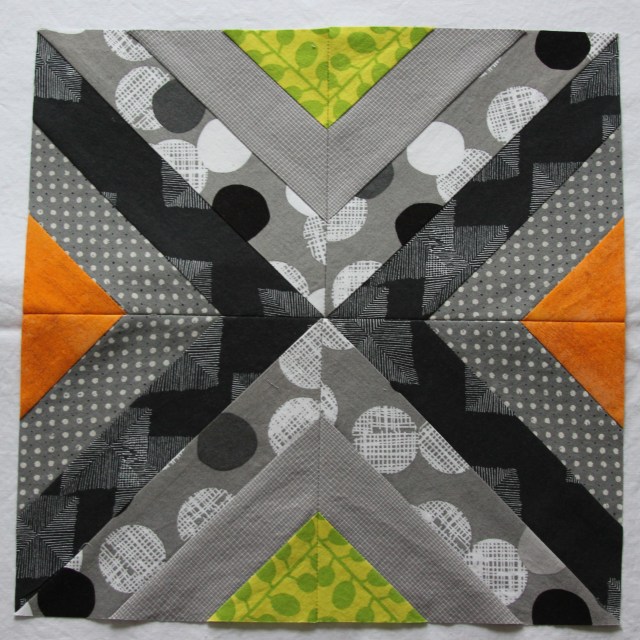
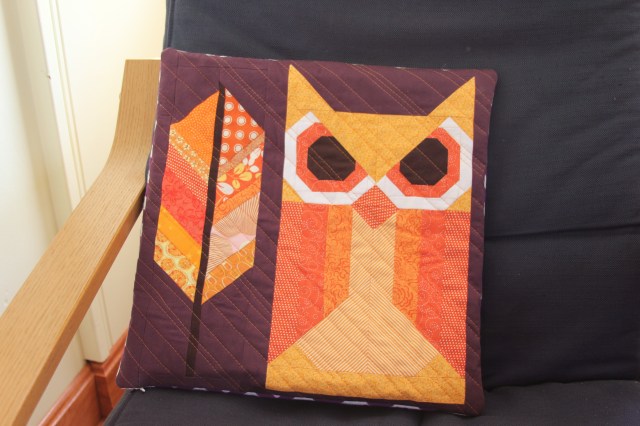
I drafted the paper piecing pattern for that arrow myself.  It’s not perfect but it was fun!

img_0398had fun doing some irregularly-spaced diagonal quilting on this one!

For Jon and Leah (Andrew’s parents), I sewed them a Striped Star in blues and greens. I thought I knew the lesson that the less you use a color, the more you notice it but was still fairly surprised by how noticeable the tiny strips of green came out. I also had fun using the leftovers from Ellie’s Easter dress as the back ground.

img_0394img_0395
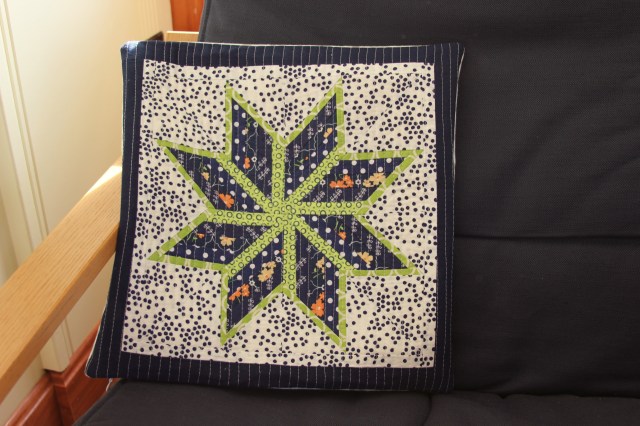
inner green fabric also seen in Marko’s quilt and the blues seen in this table runner

As with the other pillows I made this Christmas, I closed them with an invisible zipper (using this tutorial) and backed them with soft, fuzzy flannel.

img_0399

Here they are, all best buddies before the owl and Annika’s book headed to Alaska and the star and Andrew’s book headed for Belfast, Northern Ireland.

img_0400

These four projects are also Finish-along finishes for first quarter, 2017!

Save

Posted in family, holidays, sewing | 3 Comments

Beehive, March 2017 – Here We Come!

This post is primarily for the other quilters in the #beehiveswarmmerrilee but if you want some paper piecing tips or just are curious about my quilting life, read on. 🙂

This year, for the first time ever, I’m participating in an online quilting bee, organized by Alyce at Blossom Heart Quilts, called The Beehive.  I’m the “Queen Bee” for March so this is my post to give instructions to my bee-mates.

First, my block:

I’ve chosen the “Treasure Hunt” block. It’s paper-pieced but it’s a really simple design with no crazy angles.  So if you’re new to paper-piecing, this will be a great first project and for those of you who know how to paper piece, it will be super easy.

Here’s my sample block:

052
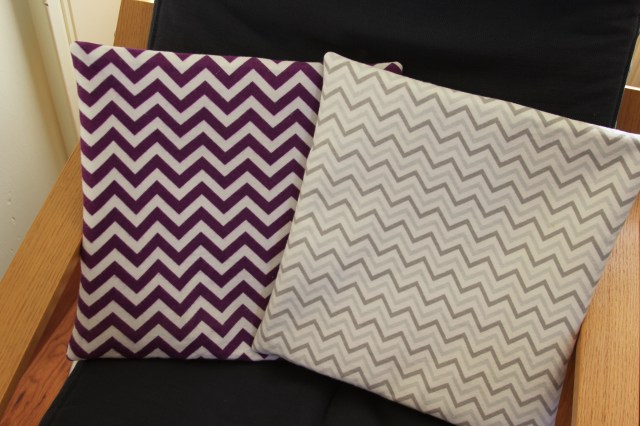
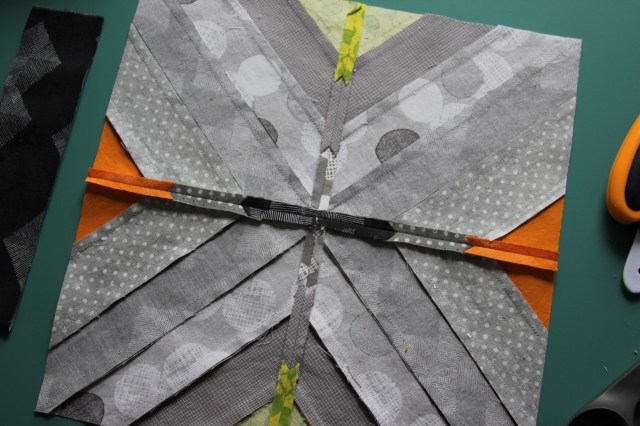
colors of tools not purposefully matched to colors of block 🙂

Color Choice

I’d like the block to contain a variety of monochromatic grays of different value (i.e. dark gray to light gray). I’d like them to be as close to true gray (if that’s a term) as you can, so not veering into blueish-gray, reddish/purplish-gray, etc. I’d also appreciate leaving out any florals or stereotypically feminine patterns as this is a quilt for my husband and me to share.

055 
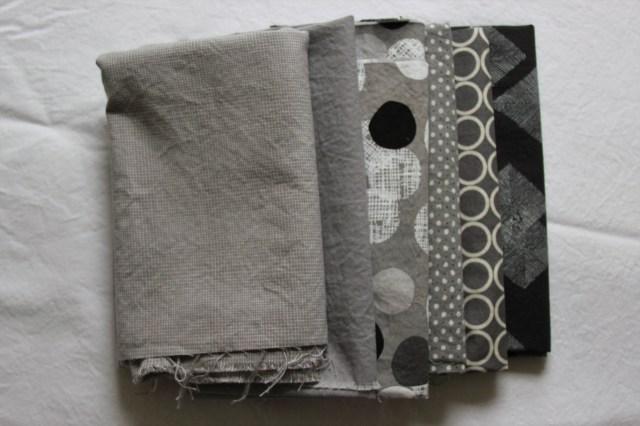
the grays I am using

061examples of grays from my stash that didn’t work – either wrong color (the gray/white polka dots are way too blue) or wrong design (those bikes are a nice gray but the print has blue in it too)

In real life, these two piles look very different but they were super difficult to photograph (even when playing with warmth, saturation, etc during editing). So I hope the side by side comparison helps a bit.  The blues on the left are either too blue/green  or too pink to work (plus the one with flowers – no thanks!).

062

For the two accent colors, I’d like bright green and bright orange, matched to these two colors if you can:

So, in summary, you’ll need four grays, plus green and orange.

Color Placement

In the interest of helping the repeating pattern really show itself, I’d like the darkest gray to be on A1 and the lightest gray to be on A5.  For the accent colors, please make A3 orange and A5 green. When I sewed my sample block, I wrote a description of each fabric directly onto the template to ensure I put the correct fabric in the correct place.

img_4237
I wrote on all four templates as you can see, and then lined them up before sewing, just to make sure that I had written the colors correctly. A little anal perhaps but I hate making mistakes and seam ripping with paper-piecing is a HUGE pain!

Some paper-piecing tips:

Alyce has a great paper-piecing tutorial so definitely read that if you’re new to paper piecing.  And please, pay particular attention to measuring the template after you’ve printed it.  When I first printed it, even though I thought I’d told the printer to print the correct way, it still shrunk it a bit.  So be sure your template measures 6.5″ before you start sewing.  Remember to print 4 templates!

This blog post has a couple introductory videos if you want a paper piecing visual.  I don’t agree with her assertion that you have to use fancy paper.  I just use plain old copy paper and it works fine! (And Carolyn Friedlander agrees with me – she’s the one who told me to use it when I took her class last spring!) I also don’t bother pre-perforating my lines.  Just the actual sewing makes the paper plenty easy enough to rip out.  I do pre-crease all my lines before I start sewing though.  That way, I don’t have to stop after every seam to crease the next line.

A few other thoughts:

1. As Alyce and Carolyn recommend, I use cheap copy paper and don’t have any issues with it other than when ironing open seams after joining sections.  The ink usually smears so I use a press cloth to keep the ink on the press cloth and not on the iron (and consequently my block).
048

2. I don’t use the printed seam allowance as my guide for the edge of the block.  Rather, I cut that off a bit (with scissors in advance) and then use my ruler to add a 1/4″ just like I do for all other seams in the block.

047
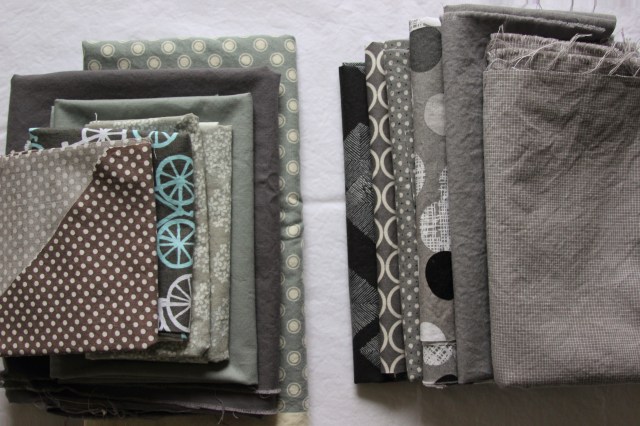
looks off but it’s correct because I cut down the paper before sewing!

3. When joining sections, Wonder clips are your best friend! Also, I first join the section using my longest stitch (which is a 4 on my machine) and then check to see that the sections are lined up correctly and that the back line is correct also. If it’s lined up correctly, then I just go back to my usual paper-piecing stitch length (1.5) and sew back over the seam to finalize the seam.  If it’s off, the long basting stitch is really easy to remove from the fabric without ripping the paper.
044

looks pretty good!

4. When the instructions say, “Remove paper from the seam allowance”, it means remove the paper from the SA after you’ve joined two sections.  (This didn’t make any sense to me until I started.

049paper gone from the seam allowance (on both sides)

5. After I make the final seam to join all sections in a block, I remove all my papers before ironing that final seam.  I find it a lot easier to get the last seam ironed accurately with the paper gone (plus you don’t have to worry about ink smearing).
050

6. I know some people like to keep the papers in their blocks until the whole quilt is pieced but I do NOT.  So please, pretty please, take out all the papers before sending your block to me.  It will be easier for you to mail and so much easier for me when completing my quilt top!
051

7. Finally, this block produces a lot of fun tiny triangle scraps.  If you don’t want them, I’d love it if you send yours along to me.  I have thoughts of trying to make something out of them.
053

And now that I’ve totally overwhelmed you with way too much information for one little block, I hope you have fun sewing! Thank you SEW much! 🙂

063

Posted in sewing | Leave a comment

Finish It Up, 2017 Edition

As has been my practice for the past few years (2010, 2014, 2015, 2016), near the end of 2016, I made a list of all the sewing projects that I have outstanding. I have already made good progress on them but, as has been par for the course of my blogging life, haven’t written anything until now.  I did manage to post something on Instagram in order to join up with the Finishalong and I’ve posted a few updates there.  I do want to have a more comprehensive list for myself though so here it is!

Here’s my official Finishalong list (find the picture of everything here):

Finished already:

  1. Marko’s birthday shirt (finished but not blogged about yet because I haven’t managed to convince him to wear it even though he requested that I sew him one. Sound familiar?
  2. The Hobbit quilt (now finished!)
  3. The Firefly quilt (now finished!)
  4. surprise project #1 – there are two of these and I just finished them but can’t reveal them until they’ve been delivered!
  5. Finish last details on Ellie’s birthday dress (buttonholes, buttons, etc.) (also now finished but not blogged but I do have tons of adorable pictures! Here’s one to keep you happy for awhile.)
    img_0270
  6. Make a change purse for my niece Selah (finished! See it here.)

Still to do (before the end of March hopefully!):

  1. surprise project #2 and #3 – These need to be finished and mailed along with surprise #1 before they can be revealed.
  2. Two B-More Bags totes (I have the kits but haven’t started them)
  3. Make Ellie’s family reunion skirt a bit bigger and make a new reunion flower for me.
  4. Finish two more flowers made from a bridesmaid’s dress from my wedding.
  5. Finish my Carkai Hexies project and turn it into our guest room bathroom curtain.
  6. Finish my Facing East mini-quilt.
  7. Make a storage case for the “Happy Birthday!” bunting.

Additionally, I have several more projects I really would like to get done this spring (some of which will likely end up being on my quarter 2 Finishalong list):

This is what I’ve already finished:

  1. Fix Ellie’s knitted doll’s hat.
  2. A pouch with zipper for my bullet journal markers

Still to do:

  1. Hem my new jeans and Nik’s new jeans.
  2. Put Ellie’s Easter 2016 dress back together so she can wear it again. (Clearly I made it too big last year.)
  3. Finish the curtains that I made for our community association hall’s upstairs bathrooms.
  4. Make the cupboard door cover for our upstairs guest bathroom.
  5. Make fancy dinner napkins (to match the tablecloth I made last year during this time).
  6. Make Christmas stockings for Nik and me.
  7. Make several more corn sacks for our family.
  8. Make napkin rings for us to use at our dining room table (to hopefully reduce the number of cloth napkins we go through in a week).
  9. A new curtain for our main bathroom (from last year’s list)
  10. Fix our bathmats (also from last year’s list)
  11. A new wallet for me (to match my sidekick tote)
  12. Add Easter words to the back of the “Happy Birthday!” banner!
  13. Fix our wool pillows.

Think that’s enough to do? 😉

Posted in Uncategorized | 1 Comment

Handmade Christmas 2016: A Hobbit Quilt

Last year, I had the brilliant idea of making a Gandalf felt ornament for my brother and his family for Christmas.  It didn’t happen so this fall, as I was searching Pinterest for ornament ideas, I came across a site, Fandom in Stitches, that has hundreds of paper-piecing patterns for all kinds of books and TV shows, including the Hobbit and Lord of the Rings.

With this treasure trove, how could I not use a few and make them a Hobbit Quilt instead?

234

Not being a Hobbit expert myself, I ended up choosing blocks based on general familiarity (Gandalf and ring) and visual appeal (river and dragon).

239
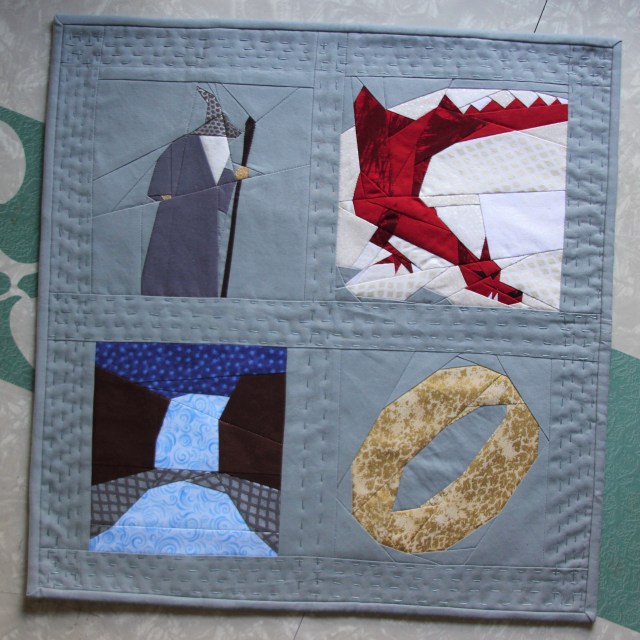
Gandalf: “Tales and adventures sprouted up all over the place wherever he went, in the most extraordinary fashion.” (The Hobbit, Ch. 1)
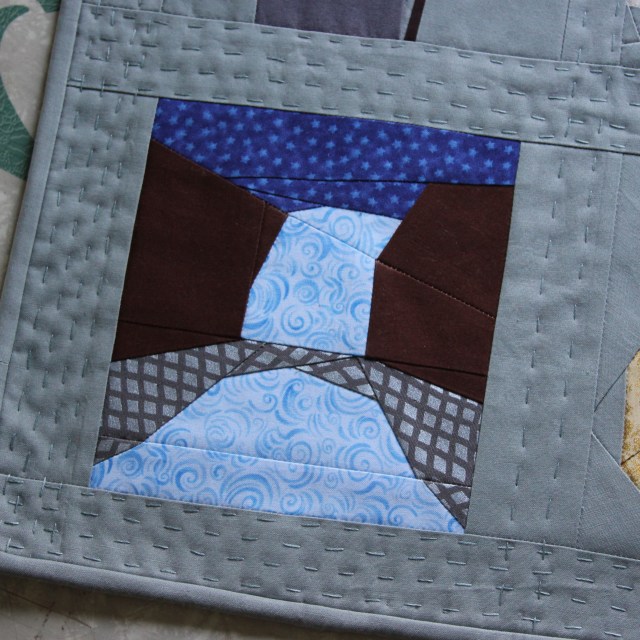
236The Bridge to Rivendell:The elves had brought bright lanterns to the shore, and they sang a merry song as the party went across.” (Ch. 3)

237The Precious: “He guessed as well as he could, and crawled along for a good way, till suddenly his hand met what felt like a tiny ring of cold metal lying on the floor of the tunnel. It was a turning point in his career, but he did not know it. He put the ring in his pocket almost without thinking; certainly it did not seem of any particular use at the moment.” (Ch. 5)
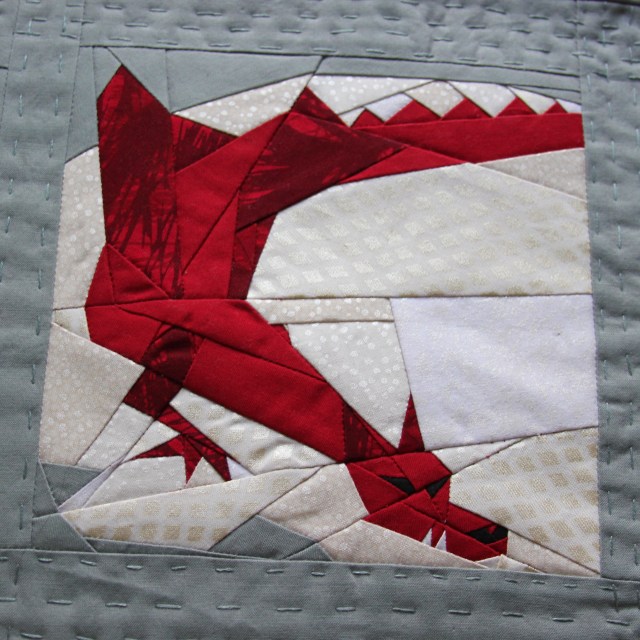
238Smaug:He was just about to step out on to the floor when he caught a sudden thin and piercing ray of red from under the drooping lid of Smaug’s left eye.” (Ch. 12)

For the backing, I used the last of this original Denyse Schmidt Flee Market Fancy.  I had no idea what I was buying when I bought it way back when and it was years before I realized that FMF was a super popular fabric line.  Anyway, I love how it looks with the other colors in the quilt and now feel slightly justified for hoarding it for so long.

241243

For the first time in my quilting career, I decided to do some big stitch hand-quilting to finish off the quilt and had a lot of fun figuring it out as I went.  I still much prefer the speed and precision of machine quilting but I can definitely see adding some big stitch details to future quilts!

Throughout the quilt, I had fun using some of the low-volume, shimmery fabrics that the members of the Baltimore Modern Quilt Guild had given me. I like how each block has the added dimension of shimmer in some way (Gandalf’s hat and beard, the bridge, the ring, and Smaug’s background). It’s one unifying factor in the quilt.  The other is that I tried to be intentional in how I used the background fabric.  Unlike the block samples, I wanted Gandalf and the ring to float on the quilt (i.e. to seem as if they weren’t in a block). And I wanted Smaug’s block to be sort of shattered, partly block-ish, partly fading into the sashing.  All in all, I’m so pleased with how this turned out and I hope their Hobbit-loving family loves it too.

Finally, thanks to this quilt, now Ellie wants me to read her The Hobbit.  I need to reread it myself to figure out when she’ll be ready to hear it.  I haven’t read it in probably at least 25 years!

**********

One note on the paper-piecing patterns.  I found the patterns themselves to be really easy to use.  But when I started to trim the blocks to sew them together, I discovered that they finished at all different sizes (some smaller and some larger than the stated 7″ finished size). So if you do use these patterns, just be prepared to do some creative sashing to get them all together.  I can hardly complain though. The patterns are free, after all. 😉

Posted in family, holidays, sewing | 4 Comments

Handmade Christmas 2016: Star Wars and A Star

Earlier in the year, I came across Quiet Play‘s paper piecing patterns and knew that the [free!] Star Wars themed patterns would be perfect Christmas presents for Nik’s brother and nephews. I also bought the “Striped Star” pattern from the same shop, not wanting to force my sister-in-law into having a Star Wars pillow of her own but wanting to have somewhat of a theme. 😉

And so, I present to you, “Star Wars and a Star.”

img_9860

I chose these particular colors because I wanted the pillows to match the Twister quilt that I made them in 2013. (I still need to make one of those for my family!)

img_9857
AT AT for Andreas

img_9859
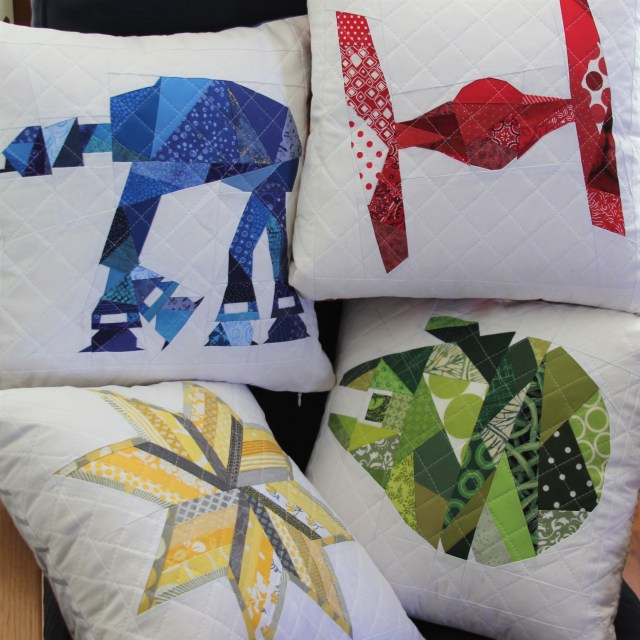
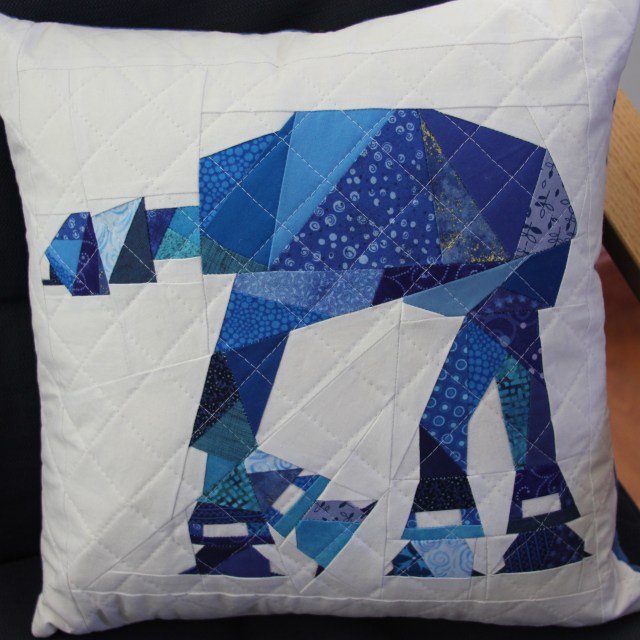
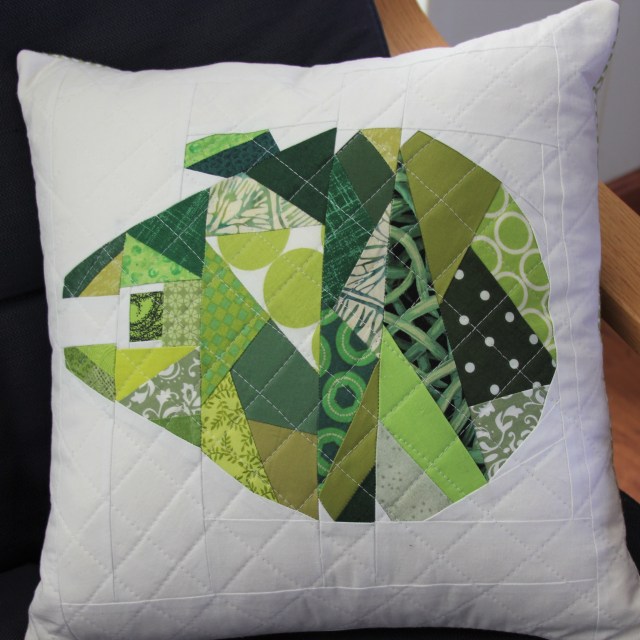
Millennium Falcon for Alex

img_9856
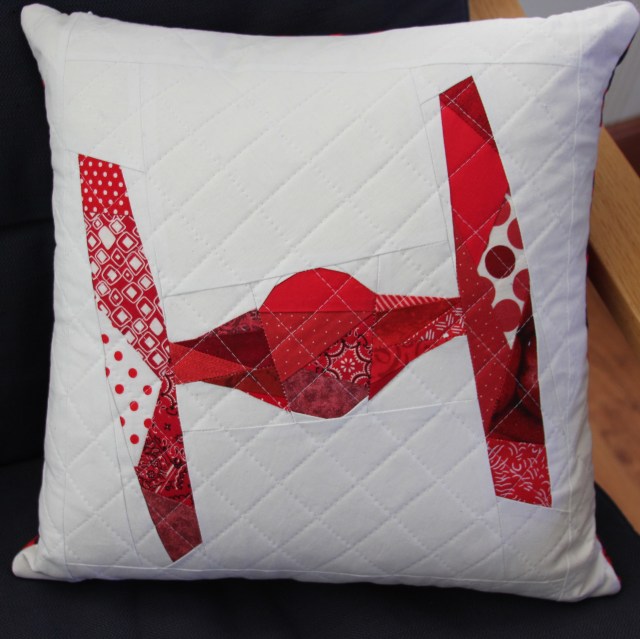
Tie Fighter for Luke

img_9858Striped Star for Nikki

The quilting plus the many pieces from the paper piecing meant that the front of the pillows were fairly uncomfortable.  So I backed the pillow covers with flannel strengthened with Pellon SF 101 (my new favorite interfacing) and used invisible zippers along the bottom seam.  This made for a warm, cozy back and will hopefully extend the life of the paper-piecing front too.

img_9861My flannel stash being what it is, I only needed to buy the blue. 😉

**********

A few thoughts about my process, the technique, etc. for those interested:

1. I love paper piecing but  I didn’t realize what I was getting myself into when I decided to sew these particular patterns.  The AT AT in particular had some super teeny tiny pieces. But once I got into the rhythm of sewing them, I really enjoyed the process and the final product. And now that I’ve conquered these, I know I can paper-piece anything.

img_9862I should have included something for perspective to help you understand how small those pieces are.  The quilted squares are about one inch square, so that should tell you that each one of those “feet” took forever!

img_3888so many tiny pieces to rip out

img_3842

2. I had no idea how long these geometric patterns would take.  Making these four pillows ended up being my full-time job for a couple weeks (albeit the most fun full-time job I’ve ever had!). I did the bare minimum needed to keep my kids alive and fed and just kept sewing.  If you are considering the patterns, just be sure to factor in more time for completion than you think you need.

img_3859another process picture – so you can see how the AT AT was slowly assembled.

3. Generous quilty friends are the best.  Back in November, I put out a plea for scraps to my friends at the Baltimore Modern Quilt Guild, knowing that my stash of scraps wasn’t even close to sufficient for this project.  They delivered!  I’m so grateful to everyone who contributed scraps, and especially to Nancy, who gave me a whole set of shimmery charm squares, which were so fun to use!

img_9863

4. What is paper piecing anyway? This blog post gives a pictorial overview but basically, you sew fabric to the back of a paper pattern and the paper gives enough stability to allow for sewing tiny shapes and awkward angles. I learned how to do it at the Baltimore Modern Quilt Guild Carolyn Friedlander workshop in April and right away, I knew it was a technique I would be glad to use again and again. 🙂

img_0040

Blurry pillows because immediately upon receipt the “good guy” had to fight the “bad guy”! Ha!!

Posted in family, holidays, sewing | 7 Comments

Handmade Christmas 2016: France Firefly Quilt, delivered in person!

I’m just going to pretend that it hasn’t been months since any regular blogging has happend and just write this blog post as if everything was its normal old self. 😉

I had a lot of fun with the Christmas presents that I made this year.  Some of them didn’t even get sewn until 2017 but I’m still counting them as Handmade Christmas 2016! 🙂

First up, the mini-quilt I made for my sister, Rachel.  Ellie has requested that I sew her a “Fancy Forest” quilt so I bought the pattern and this is two of the Frances Firefly block from that quilt. Rachel told me she liked gray (grey?) and red, hence this color scheme.

img_4164front (the quilt is about 16×18)

img_4165back (with loops for inserting a dowel for hanging)

I do love straight-line quilting and hand-sewn binding!

img_4166img_4168
The light of fireflies is one of my favorite parts of early summer!

Rachel and her kids came to visit us in January (from New Mexico!) so I had the fun of giving this to her in person.  Actually, I sewed down the binding to the back while we were hanging out in the evenings!  What a gift to have my sister with me! 🙂

img_4032attempting to recreate a very silly picture our three brothers took before my wedding in 2007 – couldn’t quite do the “hang off the front of the cannon” trick that Eric pulled off!

img_4033

Thanks to Rachel for taking all the quilt pictures in this post – I was so excited to give it to her that I finished it off and handed it over and she was back in NM before I remembered that I hadn’t done a photo shoot!

p1100406
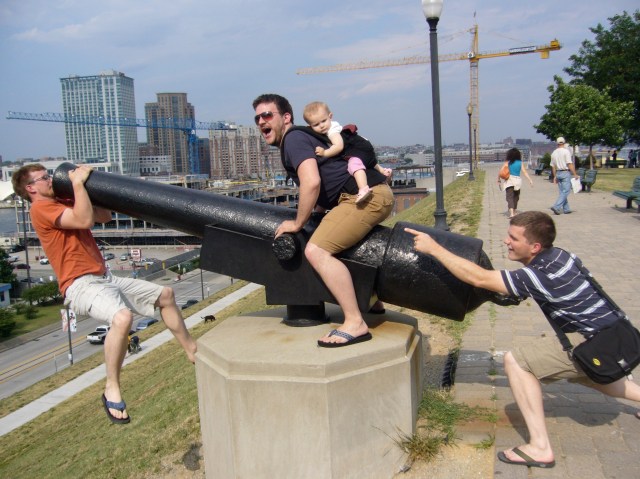
Eric, Chris, baby Adella, and Jon, circa June 2007 🙂

Save

Posted in family, holidays, sewing | 6 Comments

That night the great I AM came down!

img_9934Merry Christmas!

Love, Nik, Laura, Ellie, and Marko

(For the rest of the words, and the tune, to the lovely Christmas carol from which the title of this post is drawn, see last year’s Christmas post. )

P.S. Want to watch our children grow? Christmas 2015, 2014, 2013, 2012, 2011, 2010

Save

Posted in Ellie, family, friends, holidays, love, Mark | 3 Comments

And For My Fourth Year At The Fair…

Yes, I know, it’s been over a month since I blogged.  Sorry about that, everyone! If you follow me on Instagram (where’s I’m also salmonandsouvlaki), you’ll know that we spent 2.5 weeks up in Alaska with my family and had a fabulous time. That’s my excuse…

This year, I entered six items for the fair. (I had plans for three more but Mark refused to let me take his apron out of his house, the potholders were surprisingly dirty and worn already, and I didn’t get one last mini-quilt finished.)

Here’s what I entered:

fair entries 2016Ellie’s Greek Parade dress, Ellie’s Easter dress, my totally awesome new bag, my stuffed Thanksgiving turkey, Nik’s Easter tie, and a table runner/mini-quilt (not yet blogged)

So, if you’re going to the Maryland State Fair, be sure to go to the Home Arts building because it’s the coolest one (literally, the AC is awesome and also because the best things to look at are there)! While you’re there, look closely at the baked good section too, FCF friends, you’ll see lots of familiar names there!

The dresses, my bag, and the tie will be in the clothing section, the quilt with the quilts, and the turkey in crafts and decorative arts. Here’s hoping I at least win a little bit of money to spend on lunch! 😉 (Be sure to try the lamb sandwich in the Maryland food section.  It’s the best!)

Posted in sewing | Tagged , | Leave a comment

June/July Sewing: Tiny Hexies and An Awesome New Bag

I didn’t accomplish all that I had hoped to sew in June and July (but when do I ever get to sew as much as I want to, right?).  What I did finish though, I really love!  My major project for June was to sew myself a new bag.  My sister super kindly sent me a gift certificate to Bear’s Paw for Mother’s Day, specifically so I would buy myself fabric for a bag and actually sew one instead of just complaining that I needed a new one!  I already had this really cool heavier fabric so I bought lining/accent fabric to go with it.

IMG_2681 (800x800)me, texting her after the shopping trip to say “Thank you!” 🙂

I chose fabrics by Carolyn Friedlander and Alison Glass and used the Sidekick Tote pattern from Noodlehead.  (As a side note, although I’ve used and loved her free tutorials for years, this was the first pattern I’ve purchased from Anna Graham and it was impeccable – super easy-to-follow instructions, pattern pieces which perfectly fit with each other, and a really lovely finished product – totally worth the really reasonable price.)

I used both pocket options on the outside (rather than just one as the pattern states) and also added an inset zip to the inside to keep lip balm, hair ties, bandaids, etc. all contained.  I also discovered that my vintage wooden spools make great holding places for bias tape!

IMG_2829 (800x800) IMG_2811 (800x800)Here’s the outside, with adjustable strap.  I’ve mostly been wearing it long, cross-body and I love having a purse like that again.

IMG_8230 (534x800) IMG_8231 (800x533) IMG_8233 (800x533) IMG_8234 (800x533)The first time I’ve sewn a bag with a zipper like this! I used hardware a half-inch bigger than the pattern called for (because I already had it) so I made the strap a half-inch bigger too.  You can see that this strains the edges of the bag just a bit but it’s working fine none-the-less.

Inside, I’m really proud of that inset zipper pocket! The zipper came out perfectly.

IMG_2930 (800x800) IMG_8235 (800x533)Here I am, showing it off during the show and share at our most recent Baltimore Modern Quilt Guild meeting.  (Thanks to Elaine for the picture!)

laura with bag (800x800)No, my legs aren’t shaved, in case you’re wondering.

**********

So, enough about my amazing bag. Here’s the other crazy thing I sewed recently – a name tag with super tiny hexagons! We went on vacation with Nik’s family in early July. I, knowing that I would be away from my sewing machine, decided to take on a crazy hand-sewing project.  I signed up for a name tag swap for my quilt guild (which did NOT have to be hand-sewn.  I just assigned that to myself!).  I decided to use half-inch hexagon templates to do some English paper piecing.

IMG_2868 (800x800)My finger and a little friend to give you some perspective on how small these are.

In the end, I hand-sewed the whole blue/brown grid and then fused the letter to the front, machine quilted it to finish it off.  I had a few extra (made nine too many actually) so as not to waste them, I added them to the back. I also couldn’t resist adding a hexagon flower (like Ellie’s but much smaller) to make the back really fancy.

IMG_2896 (800x800) IMG_2897 (800x800)I doubt I will ever sew with hexagons this small again but it was a fun experiment!

*********

This is a project that I’ve been working on since January.  I made much shorter versions of these a couple years ago as Christmas presents but wanted longer strings for our tree and to go all the way around our dining room.  I finished the tree one months ago and I finally finished the dining room one on Wednesday.  There are 134 felt light bulbs on this, making it around 45 feet long! (I know, I’m probably crazy but I did do all this hand sewing when I otherwise would have just been sitting and doing nothing with my hands.)

IMG_8238 (800x533)Christmas in July, right?

**********

Finally, here’s a few other smaller things I sewed in June/July:

some Christmas secrets rainbow projects:

IMG_2780 (800x800)a few quilt blocks to contribute to the Baltimore Modern Quilt Guild’s quilt donations for the victims of the Orlando Pulse shooting,

IMG_2839 (800x800)a couple quilt blocks to add to one of the Baltimore Modern Quilt Guild Quilt Bingo prizes (coming up this fall!),

IMG_8226 (800x534) IMG_8227 (800x533) IMG_8228 (800x534)isn’t that the most adorable selvedge edge?

 and a portable ironing pad (first front, then back) – basically, a really giant pot holder.

IMG_8236 (800x533) IMG_8237 (800x533)**********

If you have made it this far in this mammoth post, then either you love me a lot or sewing a lot so thank you for reading! 🙂  Sewing is my therapy, for sure! And yes, I know, we’re not all the way through July yet but I have one big sewing project that will all consume my sewing time for the rest of the month.  Follow me on Instagram (@salmonandsouvlaki) if you want pictures of that!

Linking up with Crazy Mom Quilts and Finish it Up Friday

Posted in sewing | 6 Comments