Mark and Ellie, who was too busy peeling her stick to look at the camera
Yesterday, we joining a hiking club for homeschoolers. Mark was by far the youngest kid and Ellie was next. She did an admirable job of keeping up with the bigger kids but about half an hour into the hike, I decided to have us turn around. I was getting a bit tired myself from carrying Mark in the Ergo on my back and knew that we faced a significant amount of uphill climbing on the return trip. Ellie was sad to turn around. She even told me, “Mama, I think my legs want a little bit more hiking!” Not too many minutes later, she was complaining of being too tired to walk any more so that confirmed my decision to turn around.
Part-way back, we stopped at the stream crossing to throw rocks, drink some water, and eat some snacks (including Easter chocolate that I’d packed as a bribe!). Mark got down from my back and was THRILLED to be throwing rocks in the stream. It was a bit of a job to get him moving again. Once we started walking again (uphill the rest of the way!), he was a hard worker himself and I didn’t have to carry him any more.
still peeling that stick, even though Mark was fed up with waiting for her!
We had such a lovely time. On the hike back, Ellie was making plans – “Mama, when I’m five and if it’s a Saturday so Baba can stay home, either Baba or Mama can come with me and either Baba or Mama can stay home with Mark and we’re going to come back here and I’m going to walk the WHOLE way and see the end because I’ll be FIVE!!”
holding Ellie’s stick for the photo, at her request
Last night, as we were saying what we were grateful for (how we conclude dinner every night), both Mark and Ellie said they were grateful for hiking and throwing rocks. As we were hiking out, it struck me that although Nik and I have worked really hard to keep Ellie from being obsessed with princesses (and largely succeeded), we haven’t tried nearly as hard to provide her with other images/identities to seize onto instead.
my first hike while wearing my new zero drop, minimalist “barefoot” shoes = success! (more blogging to come on that eventually)
Based on Ellie’s delight in running, exploring, being with the big kids, and being in the woods, Nik and I agreed last night that “hiker extraordinaire” is a great identity for Ellie to seize onto and one that we plan to cultivate. We’re part of two homeschool hiking clubs now (although this was the first hike we’ve managed to do). Give her another year or two and she’ll be big enough to keep up with the bigger kids. I’m excited to keep on hiking!
For anyone local, we were hiking in Loch Raven Reservoir. We’d never been on this trail before and it was fabulous. The street address to get you close is 1704 Providence Rd., 21204. Park wherever it’s legal on Providence Road (somewhere near the houses in the high 1600s) and then walk on the side of the street, just past the “entering the reservoir” sign). From there you’ll see a trail going off into the woods to the left (west side of the road). A bit into the hike, you’ll connect with another broader trail. Follow that one to the left and eventually it ends up at the reservoir (or so I’m told). Hopefully someday we’ll make it far enough to see it! 🙂
This blog post is for Nana, Grandpa, Yiayia, Pappou, and any other Salmon and Souvlaki readers who wish I would stop posting about shaving and baking and books, and just get on with the Ellie and Mark cuteness!
learning backgammon with Baba (they are Greek after all)
Easter egg hunt happiness (shaggy mane and all. Nana – we need you to fly in from Alaska to cut it for us, OK?)
Winter hiking is cold! (from February)
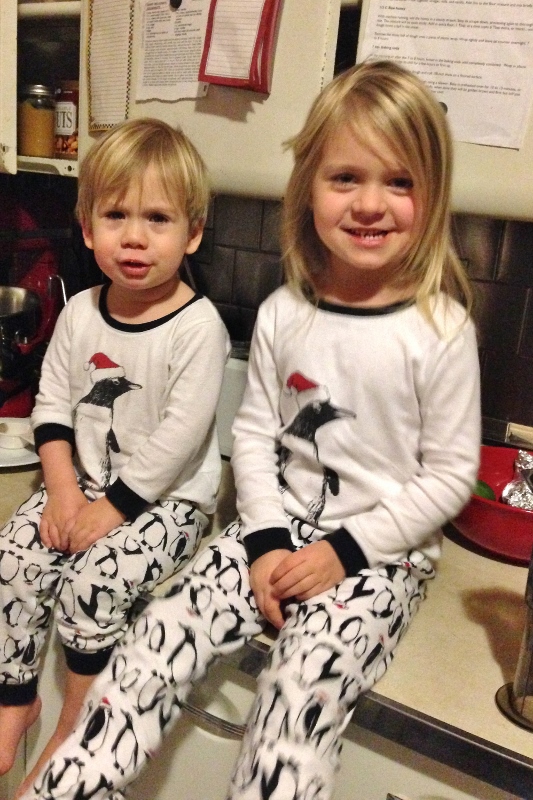
Good “it’s a south pole Christmas” morning! (with pajamas from Yiayia)
“Mark is reading a book in the picture from Baba. This is a plane. You can lie down and take a rest and sit and read books and that’s it what we can do. And we can bring babies on the plane.” (This caption is from Ellie!)
It’s a backrub train! (while I try to get some sewing done)
Switch!
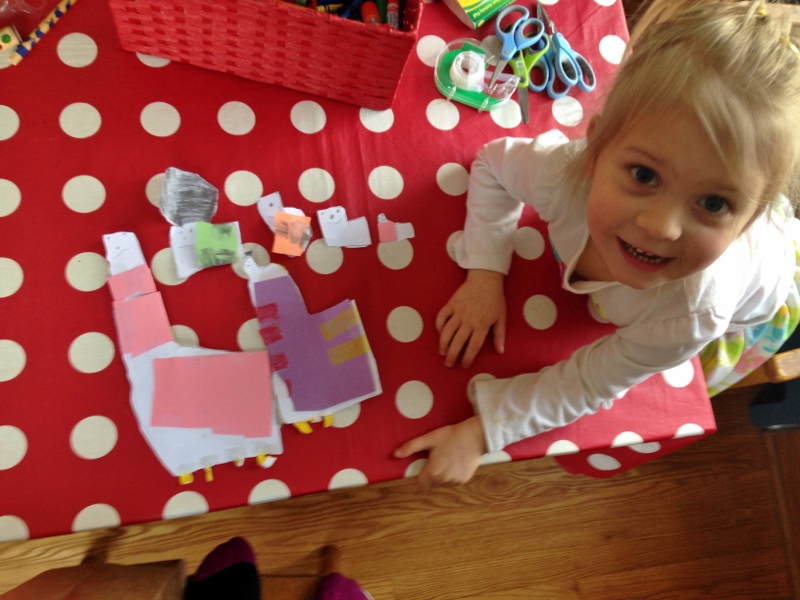
“The giraffes have necklaces on. The Baba giraffe has a necklace. The one with the purple has a dress on and that’s a mama. The other ones are little sisters.” (Ellie describing one example of ultra-cute giraffes that she was obsessed with making a few weeks ago.).
Everybody is walking on the bridge. (Ellie’s words) P and I and Ellie and Marko going on the bridge! (Mark’s words) at the Rawlings Conservatory
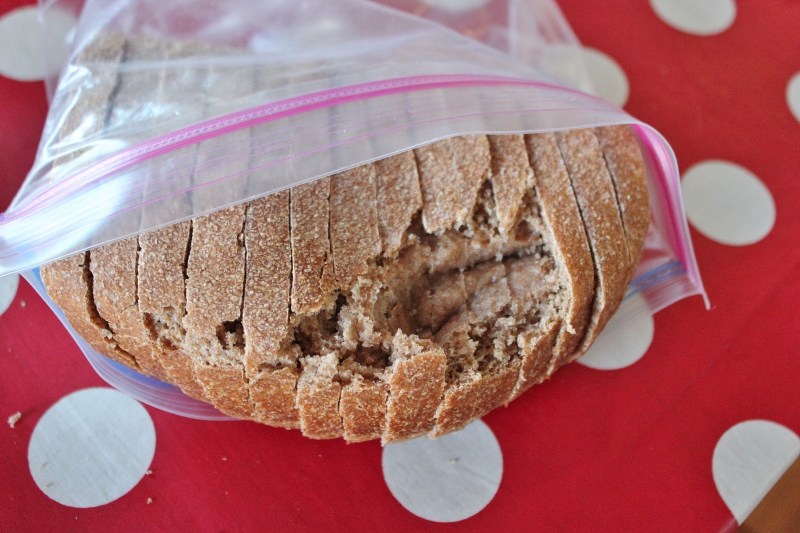
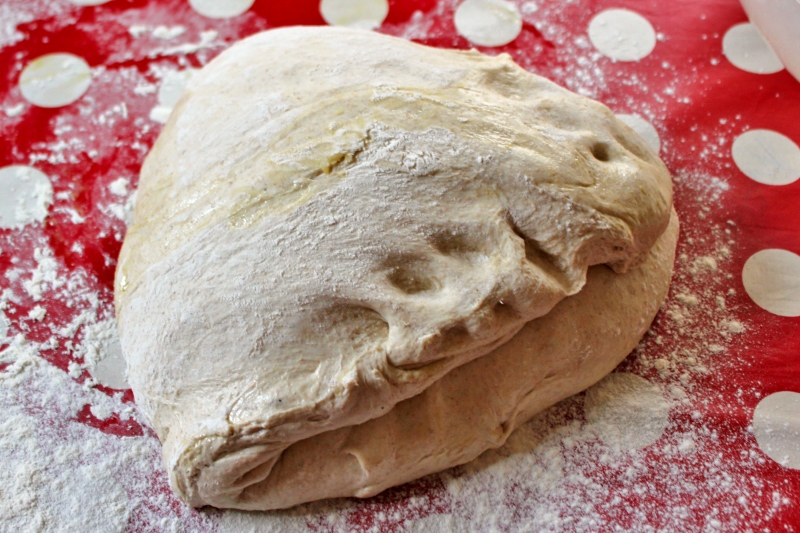
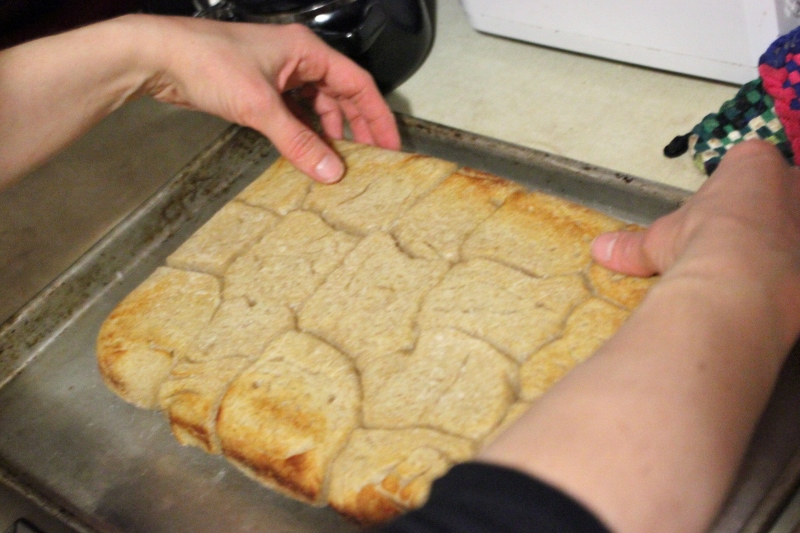
I’ve been posting a lot about baking recently and I think it would be easy to assume that I’m a baking professional who never makes mistakes and always have perfect results. For example, in this post, I only used the pictures of my beautiful loaves, because, well, it’s not as fun to show off the not-so beautiful ones! However, I know I’m not a perfect baker so I figured it was time that I proved to you all I’m not.
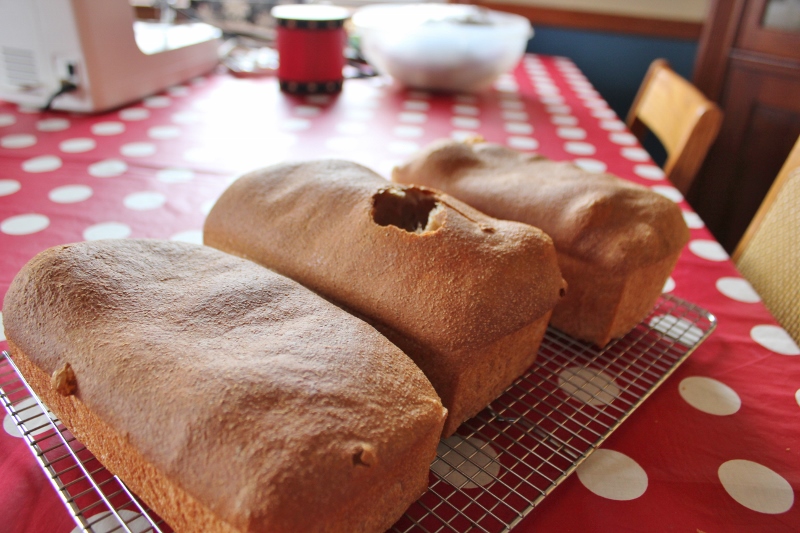
Exhibit A: WAY TOO MANY HOLES!
Last week, I forgot about my bread and it rose probably 1-2 hours longer than it should have. They didn’t fall entirely when I put them in the oven (a small miracle) but when the they came out of the oven , I could tell that they had some giant bubbles on top (and were over-baked as well to seal the disaster).
with just one bubble popped
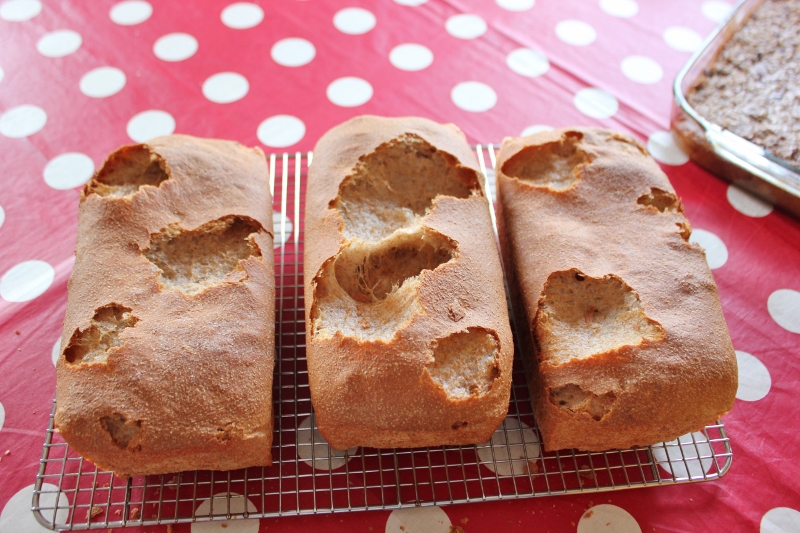
Then I obsessively started pulling off the deficient crust and in the end, had this to show for my day’s efforts.
so frustrating!! (But of course, we’re still eating it because I’m not going to waste all that work just because it has a few ugly holes!)
Later, after it had cooled completely, I sliced it and discovered that there was a big hole inside one of the loaves as well (desirable in rolls but not sandwich bread).
The next morning, when I sliced my sourdough bread, baked the night before, I found holes in that one as well.
This isn’t the first time I’ve had this problem. Here are two crazy loaves from April 2013.
I’m really not sure what’s going on with my bread these days. I had a good run of several months with no issues so maybe I became complacent? I’ve had to use store-bought whole wheat flour for about the last month or so. That’s made me realize how spoiled I am by our locally-ground flour. Also, I think I’ve just continued to bake the way I normally do and haven’t made allowances for the different way my bread might act with different ingredients. I should be stocking up soon on my good flour so I’ll see if that’s what the difference is. If not, then I have no idea why my bread has turned crazy. This just goes to show that baking is both a science and an art! I’ll keep you posted on my efforts to eliminate those pesky holes.
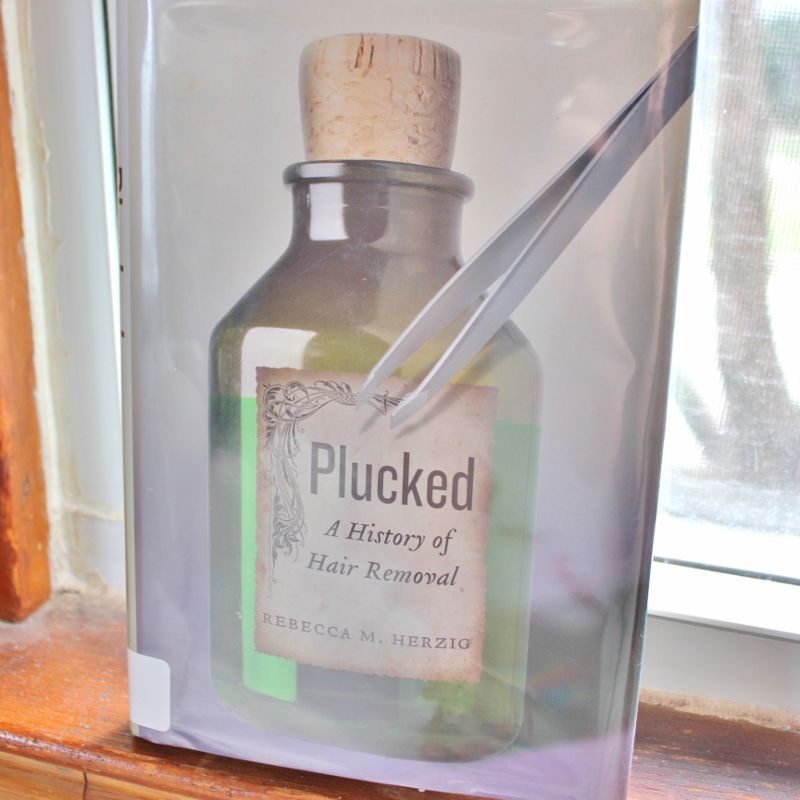
The perfect book was just published! Now I don’t have to cobble together research from dubious internet sources on what I want to know about the history of shaving. Plucked: A History of Hair Removalis at my house and ready to be read. First I have to write my rant so as to not be tainted by knowledge (HA!). I am already a bit tainted because I listened to the author’s interview on the Midday Show (a local NPR show) and now I’m even more frustrated.
In the meantime, I’m interested in hearing from any of you who either currently refrain from shaving or did so for a time in the past. As part of my research, I’d love hear why you decided to do so, what (if any) reactions you’ve had from other people (both those you know and strangers), and how you reacted to your own changing body appearance. I’d like to hear from both women and men. Leave me a comment or contact me using the form below. With your permission and preference about whether or not to be anonymous, I’ll be sharing these stories in a future blog post.
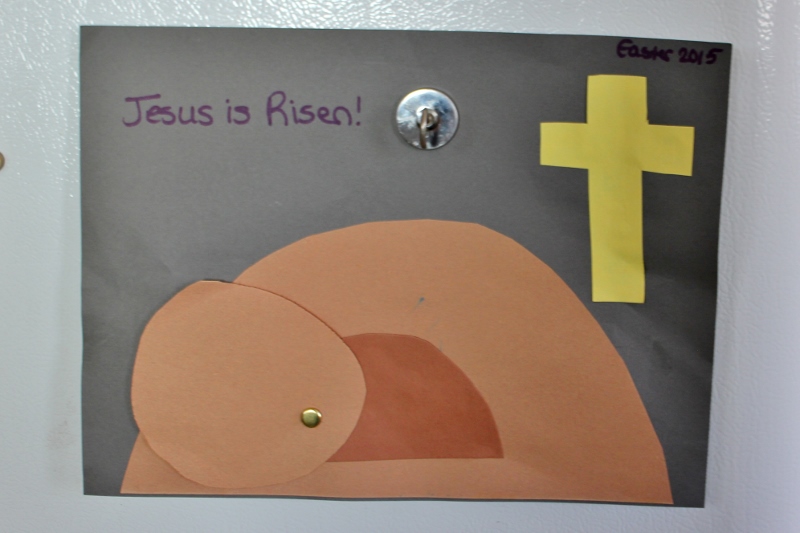
Up from the grave he arose;
with a mighty triumph o’er his foes;
he arose a victor from the dark domain,
and he lives forever, with his saints to reign.
He arose! He arose! Hallelujah! Christ arose!
P.S. I love this hymn but every time I sing it, if I’m not careful, I end up singing, “he lives forever with the king of Spain”. Am I the only one who always gets that line wrong? 🙂
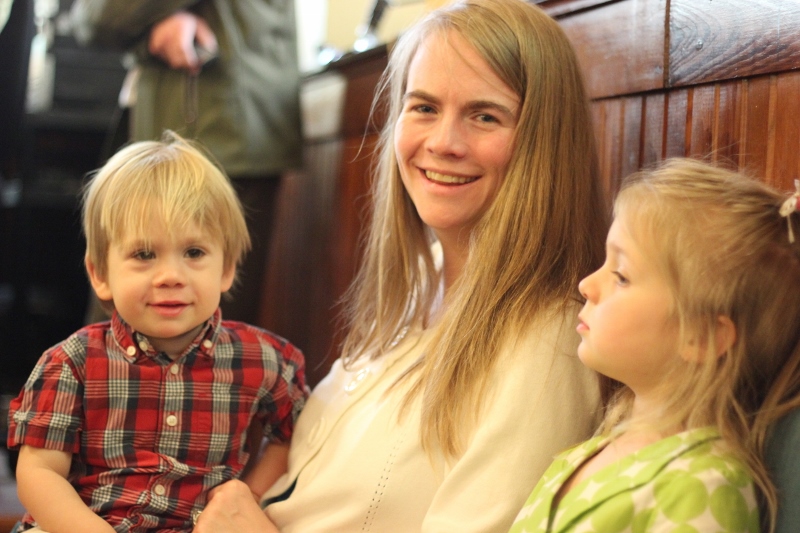
P.P.S. This year’s Easter family picture did not go according to plan (in many ways) but Nik did get this shot of the three of us at one point at our church’s Easter service. There’s no forcing kids to smile (or even look at the camera), is there? Thankfully, this doesn’t change the risen character of our Lord Jesus!
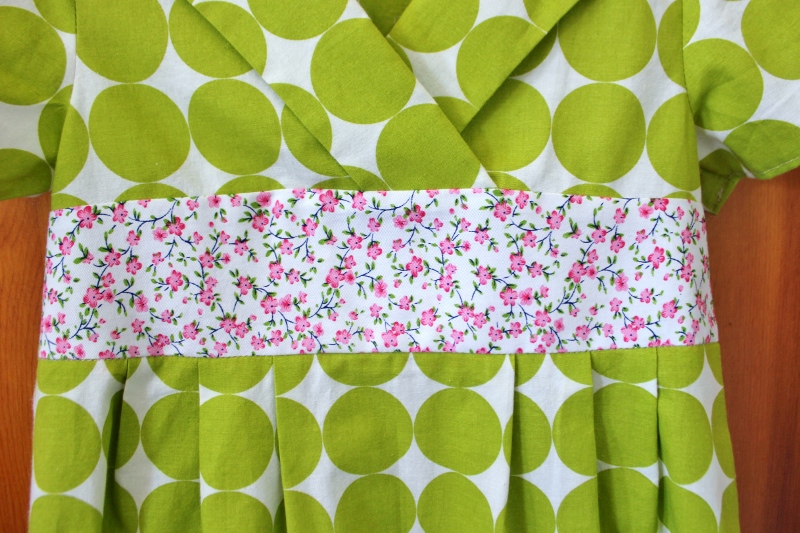
This year, Ellie and I collaborated on her Easter dress. This was a stretch for me as she choose both fabric (giant polka dots!) and buttons (glitter!) that I never would have chosen. She also chose between two different Oliver+S patterns that I have, eventually choosing the Library Dress over the Family Reunion dress (last year’s Easter pattern). I’m hoping that this means she’ll actually want to wear the dress I made her. I’m also glad that it helped us both practice allowing her to have a significant voice in the way she lives her own life. (How’s that for deep meaning in a dress?)
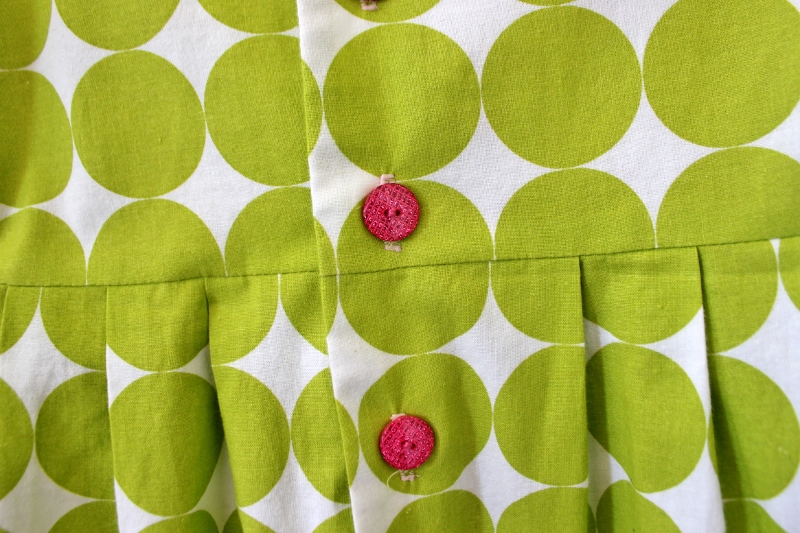
back pleats with those fancy buttons that delight Ellie’s soul
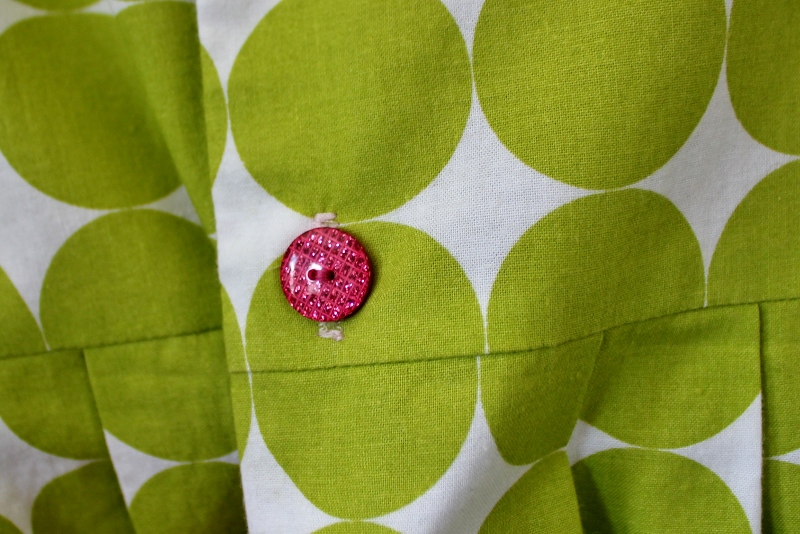
so you can fully appreciate the glitter
**********
A word about the pattern – as has been true with every Oliver+S pattern I’ve sewn, this one was easy to follow, had lovely details, and I’m super pleased with the result. My only complaint is that the waistband is only on the front, rather than carrying over to the back as well. I have this pattern in sizes 5-12 so the next time I make it, I’m planning to figure out a way to add the waistband to the back too. I think it will be pretty easy to draft a pattern for doing that.
These sourdough rolls are addictively crispy on the outside and have a lovely subtle sourdough flavor. I have a white sourdough starter, given to me by a Baltimore friend. It was given to him by a baker who he met in a bar in Vermont. So, we’re eating a bit of Vermont every time we eat these rolls!
I followed the original recipe’s method the first time and found that my rolls spread almost flat when following her technique (i.e. delicious but not very visually appealing). I had learned the following two-step baking process from a Cook’s Illustrated recipe for rustic dinner rolls and although it seems a bit involved, it results in perfectly shaped rolls with all-around crispy edges every time.
I also don’t see the sense in making a few rolls when I can make a lot and then have several meals worth in the freezer at once. If you have the luxury of extra freezer space, as I do, you’ll want to make the larger amount. They freeze and reheat really nicely. If you do plan to make the large amount but don’t have a large capacity stand mixer (as I discussed here), you’ll need to make two batches of the smaller amount. Your mixer bowl won’t be able to hold the larger amount. Once you’ve mixed both batches, combine them into one bowl and let them rise as if you had mixed them together.
Finally, although the process takes about a day and a half, there is very little hands-on time involved. So don’t let the “day 1/day 2” instructions scare you off!
[Almost] Foolproof Sourdough Rolls
As adapted by Laura from this recipe
Makes 30-34 rolls when using the larger amounts
Day 1, morning:
Refresh your white sourdough starter so that you’ll have enough mature starter to use in the dough in the evening. I keep around 80 g of white starter so that when refreshed, I end up with around 240 g. Then I have 150 g to use in the recipe plus around 80-90 g to save for the next time.
My helper, demonstrating that these rolls don’t need much starter (before refreshing)!
Day 1, evening:
150 (75) g mature/refreshed white sourdough starter
1030 (515) g warm water
700 (350) g white bread flour
400 (200) g white all-purpose flour
300 (150) g whole wheat flour (use this amount regardless of your kind of WW.)
In the evening, combine the starter with the water and add all the flours. Mix in a stand mixer* until thoroughly combined. This will probably take around 5-10 minutes. Let the dough rest, covered by a damp cloth, for around 45 minutes.
no need to take the bowl off of the mixer
30 (15) g salt
Add the salt to the dough and knead on low speed until well combined, probably around 4-5 minutes. Put the dough into a very large, well-oiled bowl and cover with a wet towel.
Let it rest for 30 minutes. Then fold the dough in half, turn the bowl a quarter-turn, fold it in half again, and then do this two more times.
Let it rest for another 30 minutes. Repeat the folding process again.
after the folding (oil pooling is obviously OK)
Cover with the damp towel and let it rest at room temperature until the following morning.
Day 2:
**All the rising times for day 2 are very approximate. If you’re in a hurry, you can rush it. If you get distracted, the dough is very forgiving and so you can stretch out the times as needed.
When you check it in the morning, it should have roughly doubled in size and you should see big bubbles around the edges. Don’t deflate these – you want them! For the rest of this process, you’ll want to handle the dough as gently as possible. We want every bubble the dough will give us. All the folding helps increase the airiness of the final product.
yay! lots of bubbles!
Depending on the overnight temperature of your house, you may need to allow it to rise longer, until it has doubled. When it has risen sufficiently, gently transfer the dough to a well-floured surface and repeat the folding process again. Let it rest 10 minutes and then fold again. These two times, folding in half three times (rather than four) is sufficient. Gently flip the dough upside-down, sprinkle the top of the dough with flour, cover with the damp towel (which you probably will need to re-wet) and let it rest for around an hour.
after coming out of the bowl for the first time
after first fold
after the second fold
after the third fold (maybe that was folding in thirds instead of halves – same idea)
after being flipped upside down (after the folding, 10 minute rest, folding again)
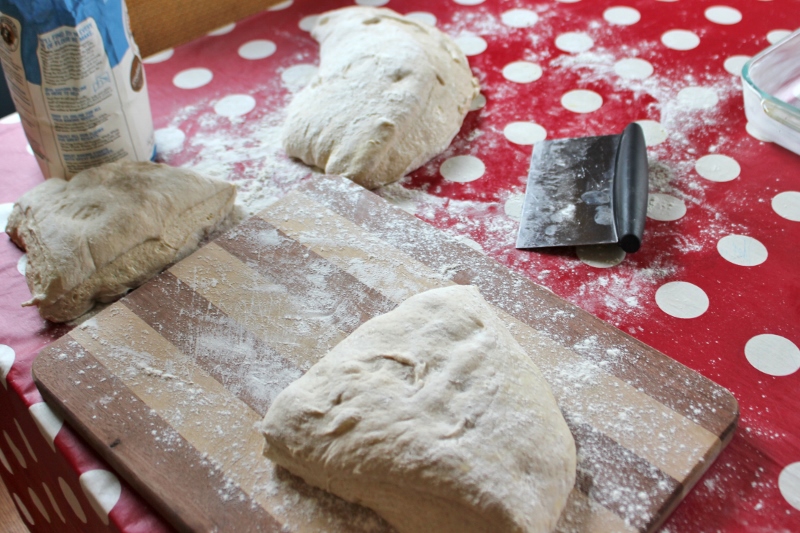
Grease two (or one for the small batch) 9×13 pans. Using a floured bench scraper, divide the dough in half. Working with each half at a time, divide that dough in half and then each quarter into approximately 7-8 pieces, so that you end up with 15-16 rolls from each half of the dough. All your pieces will NOT be the same size. Embrace the variety!
the smaller ones are useful for giving to the kids…
Before cutting each half into rolls, do your best to gently stretch the piece of dough into a rectangle. It won’t be perfect but will make the cutting easier.
before stretching out
after (slightly better at least)
cut off weird shaped pieces and form into a roll (tuck that tiny end under)
working with one quarter of the dough at a time, cut into 7-8 rolls
about the right size…
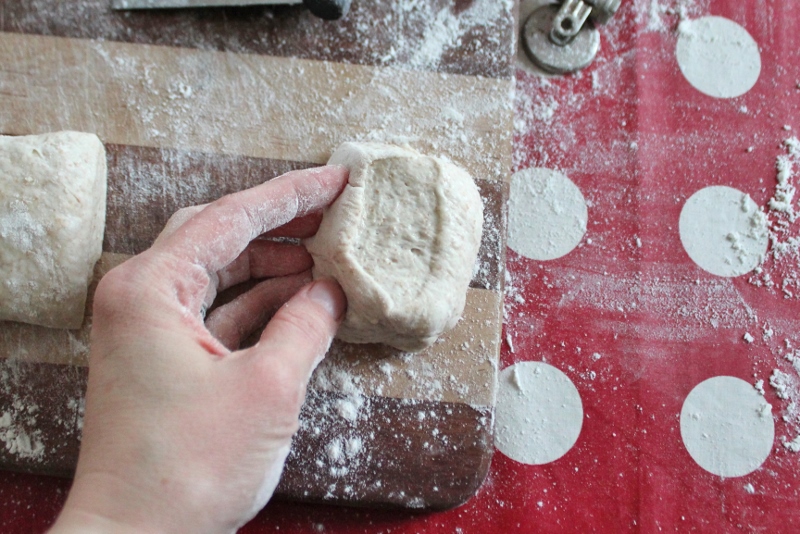
For each roll, well-flour your hands and make sure that each piece is really well-floured. The parts of the rolls that are cut will be particularly sticky. Add enough flour so that they aren’t sticky to the touch any more. Then gently toss each roll from one hand to the other to get off extra flour. Place each roll into the pan with the cut-side up.
Place the roll into the pan cut side up for the cool “rustic roll” top.
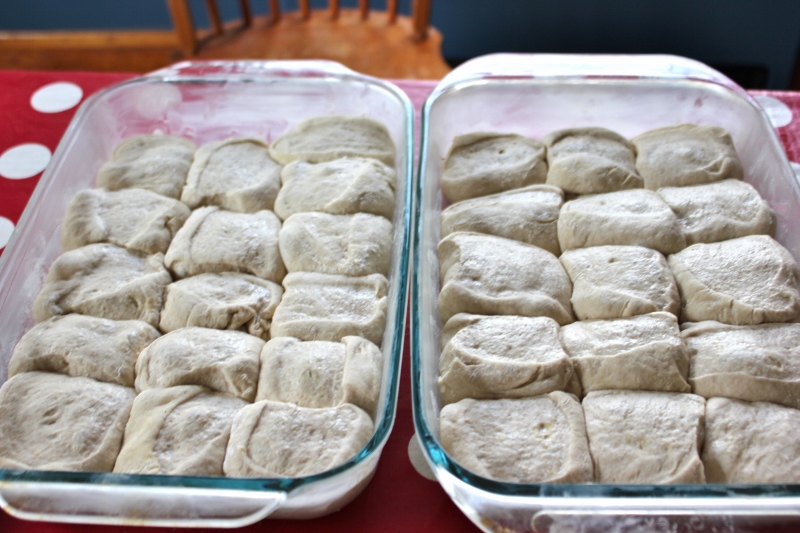
Repeat for the second piece of dough (if making the large batch). Allow to rise for about an hour. The dough has a surprisingly large oven spring so they will get bigger through the baking process also.
just after being cut, before rising
After rising for around 90 minutes, the change is slight but they did get bigger. (These rolls are also obviously from a different batch than the earlier irregular shaped ones. Some days my perfectionist side comes out more and I try harder to get them evenly shaped. Other days – I just don’t care.)
Approximately 30 minutes before you’re ready to bake the rolls, preheat your oven to 450 degrees.
When you’re ready to bake them, place the pans into the hot oven. Bake at 450 for approximately 10-15 minutes, rotating top to bottom and front to back after 7 minutes. You are watching for brown spots to appear on the bottom and top and for the dough to become set between the rolls.
what the edges of your rolls should look like
brown spots just barely appearing on top, no raw dough visible
When this has happened, take the pans from the oven and flip each pan of rolls onto a half-sheet pan (which does not need to be greased). Flip the whole batch of rolls right-side up, then use two forks to separate the rolls. (They will come apart easily because you floured them so well before putting them into the pan.) Spread them out on the half sheet pan so they aren’t crowding each other.
Work quickly so you don’t burn your fingers when flipping them over!
after flipping
Using forks – the dough is just barely set in between the rolls (and in places, still raw).
Spread out on the pan to allow the hot air to circulate freely, for maximum crispness
Reduce the oven heat to 375 and bake for approximately 15 more minutes until the bottoms are well-browned. Serve warm or allow to fully cool on a cooling rack before freezing. If you are planning on freezing them and perhaps also have children who complain if rolls are too crispy, then you might want to under-bake them, just until the bottoms are barely browned. (Not that I know about that or anything.)
what fully-baked rolls should look like
your delicious final product!
the lovely, airy crumb (texture) you worked so hard to create!
These are best stored in the freezer if you’ll be keeping them around for longer than a day. To reheat, take them out of the freezer and allow to thaw (if you have time). Place on a baking sheet and reheat in a preheated 400 degree oven until warmed through and crispy. If they’re still frozen, you may want to cover with foil for a few minutes until they’re thawed, to prevent the outside from become too crispy.
Enjoy! Just try not to eat them all immediately after they exit the oven! 🙂
**********
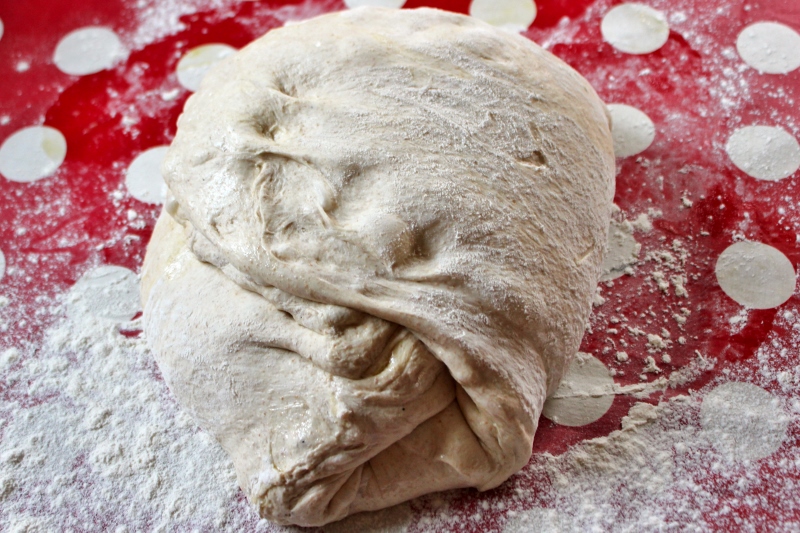
This is one recipe that will be difficult to make if you don’t have a stand mixer. The dough is exceedingly wet (or, in proper terms, has a very high hydration level). This is great because it allows for more steam creation while baking and lots of holes for the butter. It also means it’s almost impossible to knead by hand.
1. Mark has taught himself to read? He’s been using Willa Cather’s novels as his reading primers.
2. Houghton College will be spending $84 million to construct a giant geodome around it to eliminate winter entirely from the campus? I’m so proud to call Houghton my alma mater!
3. Gmail has developed a “Smartbox” which will revolutionize the way we interact with our “snail mail”?
The other day, Mark asked me to help him put Bunny and Puppy on his back. He seems to have fond memories of being worn because now he’s helping out his animals in the same way! 🙂
I made him the bunny for his first Easter. My dad gave me that puppy when I was a baby! The carrier is technically Ellie’s but she puts up with Mark borrowing it.
I had the privilege of attending a baby shower on Saturday for a friend who is expecting a little girl in May. I made her a little baby blanket and wanting to add a bit of pink to the otherwise not super-girly (but so fun) fabrics, I added a little embroidered heart with the baby’s name. There’s so much love surrounding that little girl, I thought a visual reminder might be good too!
For some reason, I never tire of making that triple-stitched edge!
I’ve never tried doing embroidery like that before but it was fun. It might be making an appearance again! 🙂

 Mark and Ellie, who was too busy peeling her stick to look at the camera
 still peeling that stick, even though Mark was fed up with waiting for her!
 holding Ellie’s stick for the photo, at her request
 my first hike while wearing my new zero drop, minimalist “barefoot” shoes = success! (more blogging to come on that eventually)
 Mark’s big stick! (just like his sister)