This is my second post about 2015’s books for The Classics Club. I’ll be reading one classic book a month through 2018. Track what I’m reading for the Classics Club here. I’ll try not to include too many spoilers in my review but I may need to discuss some in order to fully review the book. I’ll warn you if I’m going to mention one.
Les Miserables by Victor Hugo (unabridged, translated by Norman Denny)
Despite reading for almost two months, this is still staged, post-completion of reading (in case it’s not super obvious.)
Year Published: 1862
Reread? Or new to me?: new to me
Number of Pages: 1200 (I did not read the appendix, which contained two sections of the original text that the translator deemed unnecessary to be included. It would have been closer to 1300 pages if I’d read the appendix too.)
Date Finished: 6/1/15 (I’m still counting that as a May finish!)
Number of Days it took me to read it: 54
Page/Day ratio: 22:1
Will I reread this?: I highly doubt it.
Review:
I loved the core story of Les Miserables – the saga of Jean Valjean, his love for Cosette, the priest’s sacrificial love for him and all that. I saw the musical on Broadway just after I graduated from college. It was my parents’ graduation gift to me that my whole family (minus my just-married brother) got to go. Still, that was 16 years ago and I didn’t remember much at all. So it was as if I was reading a new book and I loved it.
I will never read it again though, because I also hated it.
What did me in was all the chaff that I had to wade through to get to the story. First of all, the book was so heavy that my hands ached terribly while reading it.
Almost two pounds!
It was so heavy that I stopped reading any books for much of April and May. I knew I needed to finish Les Mis (Miz? how do you spell that?) and so didn’t want to pick up another book but also couldn’t force myself to heft that book for one more minute. What did I do instead? Mindless scrolling on my phone. Boo hiss about that.
Somehow, I slogged through, trying to force myself to read every word (but not really succeeding either), until I realized that I only had four more days before I HAD to return the book (out of renewals). With the determination to find out the ending but not keep the book even a day extra, I started skimming. By skimming, I mean I was skipping entire pages, even entire chapters, just looking for a character’s name I recognized. I managed to “read” over 300 pages in a weekend!
Mark’s idea of what that huge book was good for
It’s a mark of the greatness of the book that I was sobbing by the end, even if I was so mad at it for being so ridiculously long.
How about you? Have I ticked you off for calling the history/philosophy/politics chaff? Can you convince me that I should have tried to understand it?
Ellie’s contribution to the photo shoot
***************
Would you like to join me in reading The Door in the Wallby Marguerite De Angeli in June? It’s a blessedly short Newbery Award winner, published in 1949. (Short is the main reason why I chose it for June.) I’ve already read it but probably won’t get around to reviewing it for a couple more weeks. So you have time to read it and join in on the discussion!
This post contains affiliate links, meaning any purchases you make through them support our blog. See the full disclosure here.
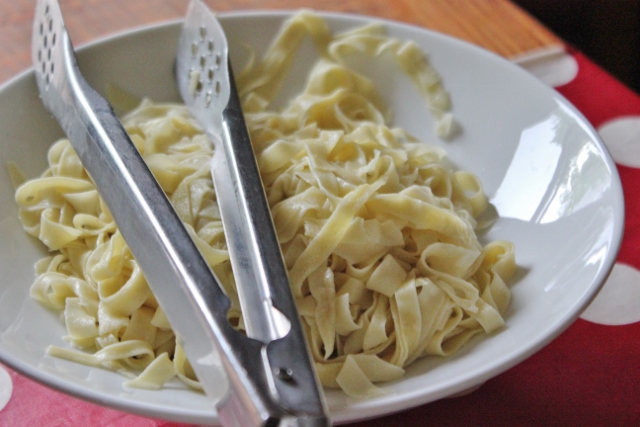
Every year, we are THRILLED when fresh shelled peas arrive at the farmers’ market. When I see them, I buy a pound and then immediately head over to the dairy stand to buy a pint of cream. After I get home, I head to our local Italian deli to buy prosciutto, Nik makes the dough for fresh pasta, and we can hardly wait until dinner time to eat our favorite meal of the year: peas and prosciutto. It’s incredibly delicious, perhaps all the more so because we only eat it once a year. We also only make fresh pasta once a year because it’s so much work. For this dish though, it’s totally worth it. If you don’t want to make your own pasta (and I can understand why – it takes a lot of time), then consider finding some fresh pasta at the grocery story to splurge on just for this meal.
This past Saturday, the peas appeared and we had a lovely weekend full of delicious food. We had enough ingredients to make it twice – on both Saturday and Sunday nights. And now we’ll think of it with great fondness until next year. You haven’t missed your chance though. The farmer told me shelled peas should be around for several weeks. If you don’t have access to fresh shelled peas but still want to make this, I think the next best option would be frozen petite sweet peas although I’ve never tried this recipe that way.
Peas and Prosciutto
as adapted from a recipe by Nik’s former co-worker, Bonnie
serves 2 adults and two kids generously (doubled would probably be good for six adults)
1/2 pound of pasta (fresh is best) (I’m just guessing on the 1/2 pound. That’s how much I usually cook for our family for one meal but I don’t know if that translates the same with fresh pasta. So you might want to cook a bit more to be on the safe side.)
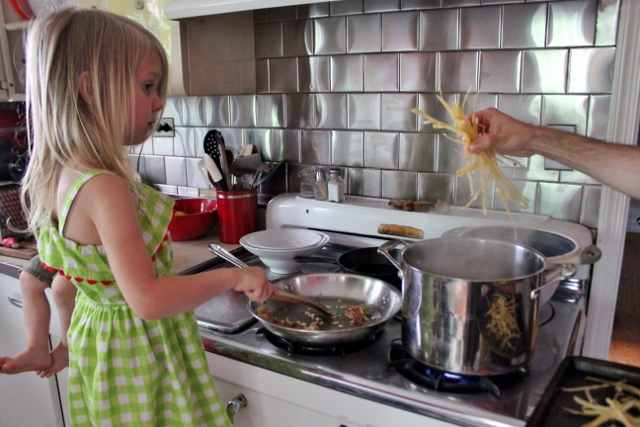
Boil the pasta in about four quarts of water and 1 T of salt. Cook until just al dente, drain, stir in a bit of olive oil to keep it from sticking together and set aside, covered, until the sauce is ready. When boiling fresh pasta, we do it in batches (fishing each batch out with tongs) and the pasta takes approximately the same amount of time to cook as the sauce.
Timing proof: Ellie stirring the onions, garlic, and prosciutto while Nik boils pasta.
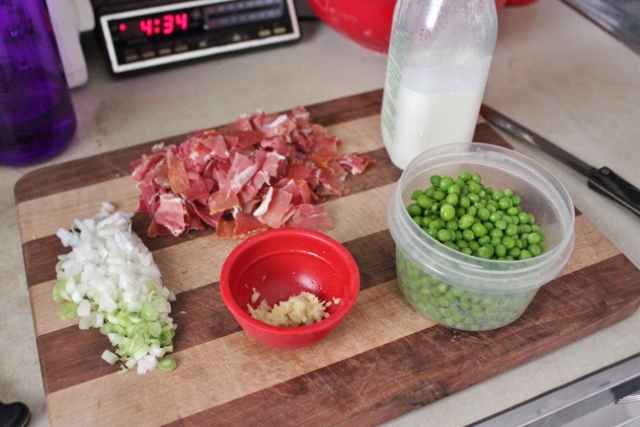
all that you need for an incredible meal
1/4 pound of prosciutto (if you are having the deli slice it fresh for you at the deli, as you should, ask that they set the slicer to a slighter thicker setting than usual)
Dice up the prosciutto into bite-sized pieces (as if you were making bacon bits). Set aside about a third of it. Heat a small frying pan until quite hot. Add the prosciutto and fry until it’s nicely browned and crisp. Turn the heat off and leave in the pan to cool until the sauce is ready.
2 T olive oil 1 onion, diced fine (this time I used some new onions so a bit of it is green) 3 cloves of garlic about a third of the prosciutto that you diced in the first step
While the prosciutto is frying, saute the onion in the olive oil, over low heat until the onions are very soft and just barely starting to brown. Add the garlic and the reserved portion of prosciutto and saute for a couple more minutes until the prosciutto is just starting to brown.
1 C heavy cream
Pour in the cream, increase the heat to medium, and simmer the cream until it’s reduced so that a trail remains when you pull your spoon through it. As needed, add a little bit of salt to season the sauce to taste. Prosciutto is very salty so you probably won’t need much.
1 to 1.5 C peas (depending on how much you love peas), rinsed and drained
Add the peas to the pan, bring the sauce back to a low simmer, and cook until the peas are bright green and just barely cooked through. This may take as little as 3-4 minutes so start checking them at that point.
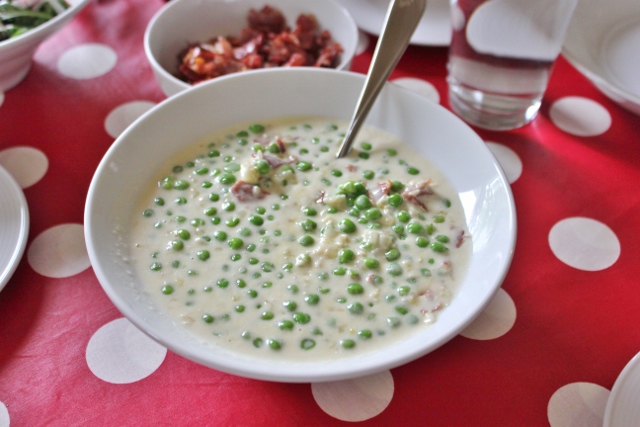
When the peas are cooked, turn off the heat. Serve over cooked pasta with the crispy prosciutto sprinkled on top and some freshly ground pepper, if desired. (Nik likes it with pepper. I like it better without.)
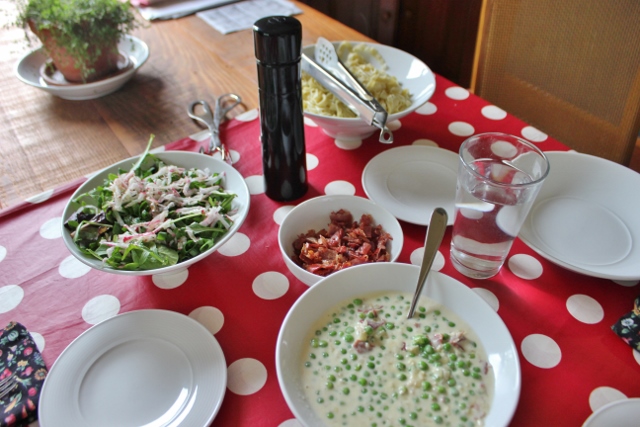
local everything (except for garlic and prosciutto)
A totally local salad for accompaniment: salad greens (including lots of arugula, our favorite), new onion tops, French Breakfast radishes
Mark would have eaten that whole bowl plain if allowed!
Taken 6/14/14, last year’s feast day!
**********
If you want to make your own pasta, here’s the recipe we use. I’m not going to give extensive directions because there’s a lot out there on the web about the finer arts of making pasta. And frankly, we’re not that good at it because we only do it once a year!
Fresh Pasta
recipe and tutelage also from Nik’s former co-worker, Bonnie
This amount of dough made enough for us to eat this for two nights. We didn’t think to weigh the dough ball but my guess is that it makes close to a pound of pasta.
3 C unbleached all-purpose flour 4 large eggs
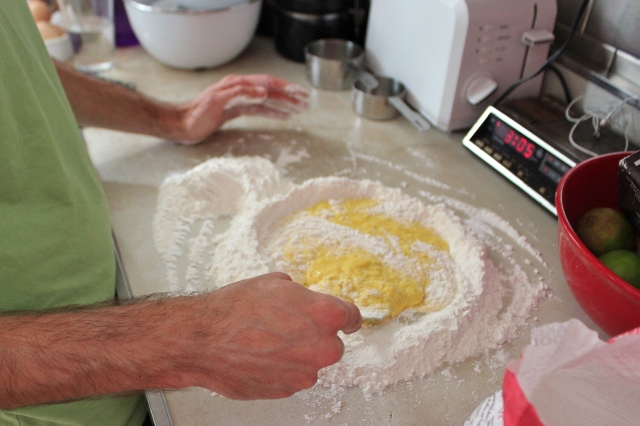
Make a mound of flour on your clean kitchen counter (or a very large cutting board). Make a well in the middle of the flour and crack the eggs into it. Using a fork, beat the eggs and begin incorporating the flour into them as you go.
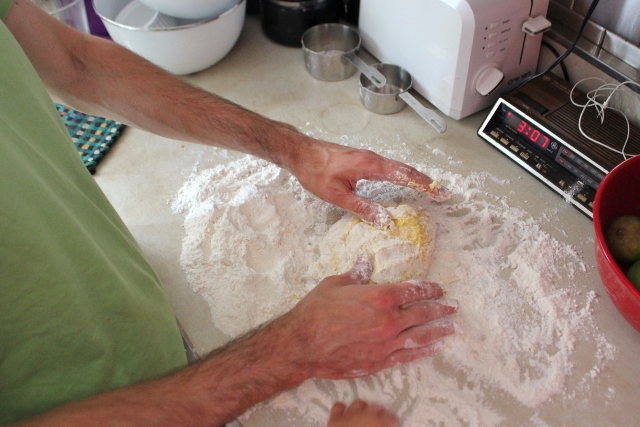
As you incorporate the flour, keep pushing up the outside edges of the flour to maintain the well until the eggs are no longer runny. Once the dough has started to come together, use your hands to knead the dough and incorporate more flour until it’s not very sticky any more.
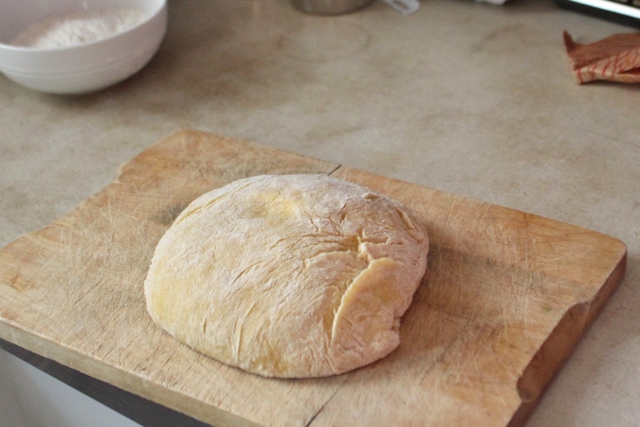
At that point, if there is a lot of flour left, put the dough onto a cutting board and continue to knead it for about 3 minutes, adding flour to the cutting board as necessary to keep it from sticking. Cover the dough with a bowl and let it sit for at least 20 minutes (ideally several hours) at room temperature.
after resting – The rest allows the dough (specifically the gluten) to relax so that it’s easier to roll out
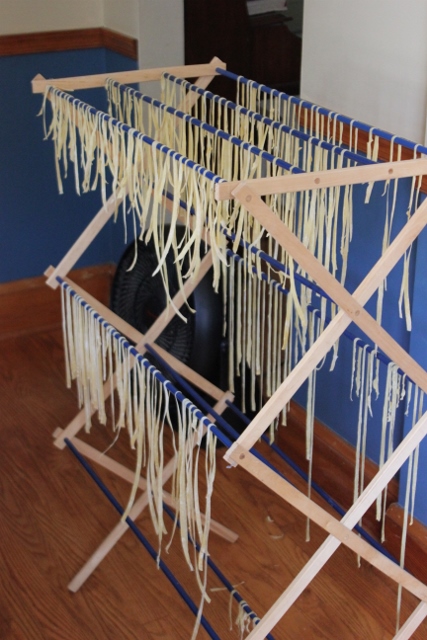
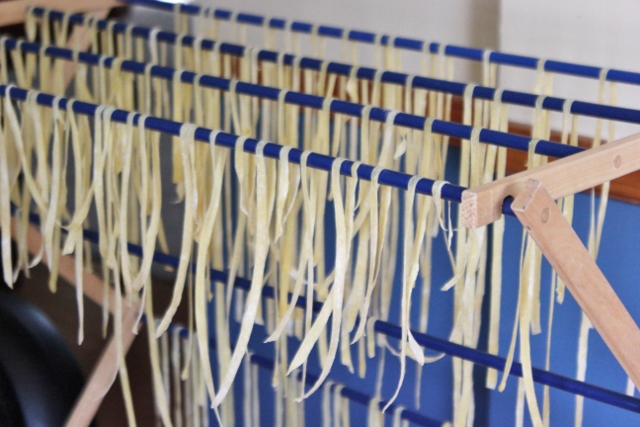
If you have a pasta maker, follow the directions to roll and cut the pasta. If you don’t, use a rolling pin to roll out pieces of the dough until they are as thin as you can get them. Then use a pizza cutter to cut into fettuccine-shaped noodles. A very kind friend gave us a hand-crank pasta maker and we love it.
We use our clothes drying rack to let the noodles dry slightly while they are waiting to be boiled. It keeps them from sticking together again before we can get them in the water.
**********
Finally, you may be wondering about the cost of such a fine meal. The peas, cream, and prosciutto cost around $20 total. This fed the four of us for two meals. So, at $10 a meal for four people, we consider this to be a screaming deal for what we’re eating!
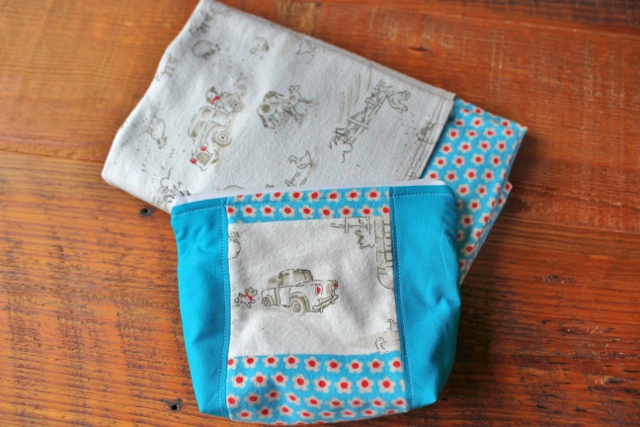
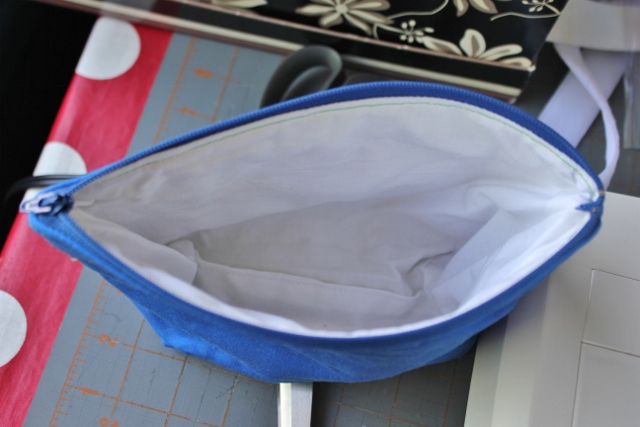
Back in April, I went on a bit of a baby blanket sewing frenzy. For these four blankets, I made matching little pouches to go with them. Two of the blankets were for second-born babies, one was for a third-born, and one for a fourth-born. The first-borns get all the good stuff. So the later kids deserve something new and fun, right?
Here’s all the blankets.
Here’s all the pouches. I used both sides of the blanket in each center panel. I used this tutorial, which I have almost memorized at this point, I’ve made so many of them.
And, lest you be disappointed with so few pictures, here’s each matching set.
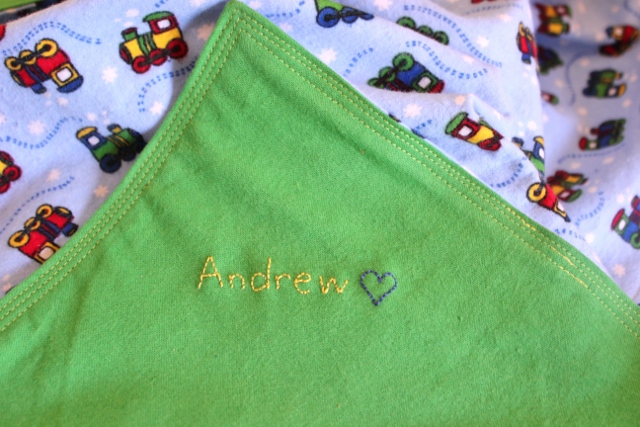
This last blanket set was for my newest nephew, born to my brother and his wife who live in Northern Ireland. For him, I added some embroidery! 🙂
I lined all the pouches in bright white, assembly-line style.
(I also sewed the pouches assembly-line style, thanks to Yiayia, who had the kids come over to play one Saturday morning, giving me a couple uninterrupted hours to sew!)
(And one of these days I’ll find enough mental space and keyboard time to write about more than sewing…)
Back in 2004, I decided to sew the names of all my nieces and nephews (plus my honorary niece and nephew) in cross-stitch. As of 2008, I had finished three of them, finally got them framed, and gave them as Christmas presents at the end of that year. At that time, I had to face the fact that I was never going to finish. I started out planning to make five and it took me four years to do four. In the meantime, however, everyone just kept having kids (which is a good thing, of course!) and now, 11 years later, I would need to sew a total of 22 of these things to get all my nieces and nephews plus my friend’s kids (as seen in this post).
I don’t even really like to cross-stitch any more and it’s so slow that I knew I would never get them all done. However, I had made three of the five for my one brother’s family and I know what it’s like to be part of a family in which the older kids get stuff and the younger ones don’t. (Actually, I don’t personally know what it’s like because I’m the oldest so I always got everything. 🙂 But I have heard my younger siblings complain about it.) So I forced myself to slog through and seven years later, here are two more! (The pictures are terrible and taken pre-framing, but you get the idea.)
I do love this pattern. The individual letters are so fun. (Cross-stitch just isn’t my thing any more.)
Z for zebra, R for rainbow and rabbit (the R first seen in this post)
V for Valentine and violet (also Violet!), I for ice cream cone, O for Octopus,
L for ladybug and lamp, E for egg and elephant, T for top and turtle
So to Kaitlyn, Maria, Andrew, Adella, Alex, Annika, Gracie, Clara, Gabe, Ellie, Mark, Alex, Luke, Caleb, Abby, Ian, and Toby – your Auntie Laura/Aunt Laura/Mama loves you very much but she just doesn’t have it in her to sew any more of these. I’ll sew you something else, OK? Just not cross-stitch! It’s not you, it’s me! 🙂
Today, Ellie and Mark would like you to see their clips (in case you need some ideas for how to get dressed up for your Memorial Day weekend festivities). Ellie put in her own (her new skill, remember?) and Mark chose his for me to put in. I’ve include plenty of pictures, just to make sure you get the full effect (in case you want to copy it).
And in other news, Mark has a new favorite friend. He refuses to accept that it’s a racoon and insists on calling it his “possum”. Our friend the possum was actually a childhood friend of one of my brothers. My mother was getting rid of some stuffed animals last year and we came home with the racoon, ahem, possum.
Does it look like a possum to you?
We hope you have a lovely weekend, however you are dressed and whoever you are with!
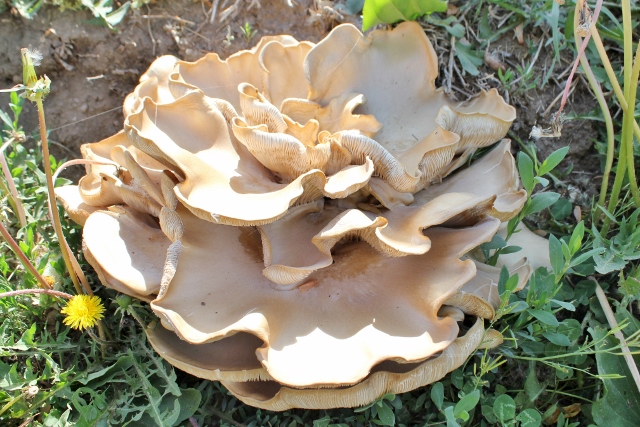
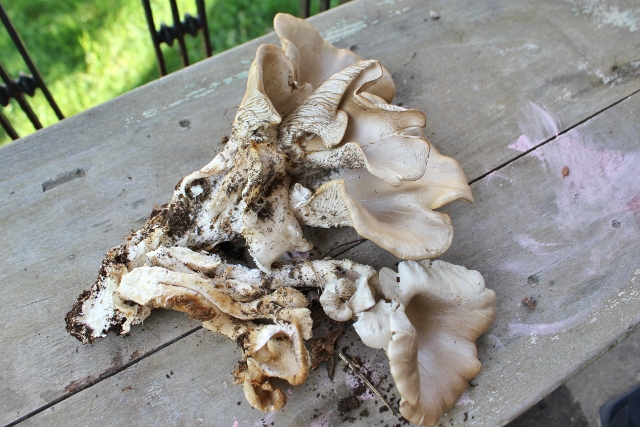
Last week, the kids and I were walking to our park and I spotted this lovely thing on our neighbor’s corner.
Over the past few years, Nik and I have loved being a part of a group called the Baltimore Foodmakers. There are a lot of foragers/mushroom hunters in the group and from them, I’ve learned a bit about the art of searching for mushrooms. One thing I’ve learned is that big edible mushrooms often grow on trees, or dead logs. I also knew that underneath that dirt, there was a huge stump left behind by the tragic loss of a tulip poplar back in 2012. So I took a picture of it and emailed it to the group, mostly out of curiosity to find out what it was. A couple different people replied, guessing that it might be an oyster mushroom. One exceeding kind friend, who has a lifetime of foraging experience to share (including TONS of mushroom knowledge), very kindly came over a couple days later and conclusively identified it as an oyster for us. (Make sure you read clear to the end for some important mushroom safety information.)
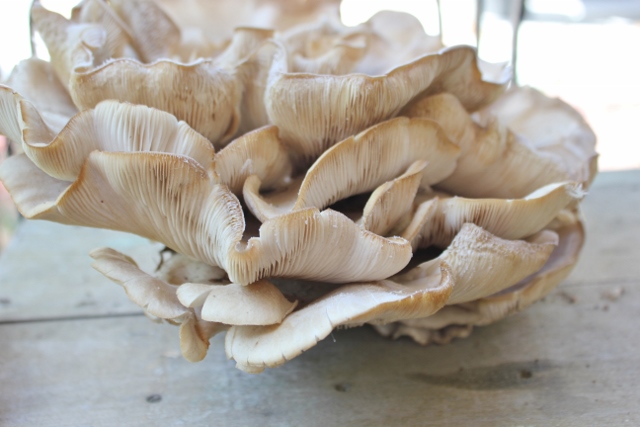
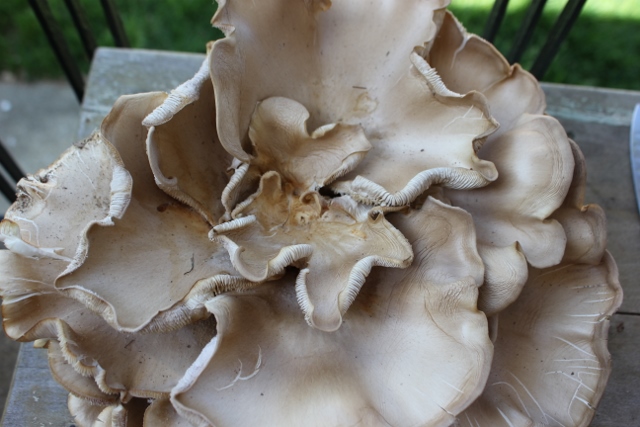
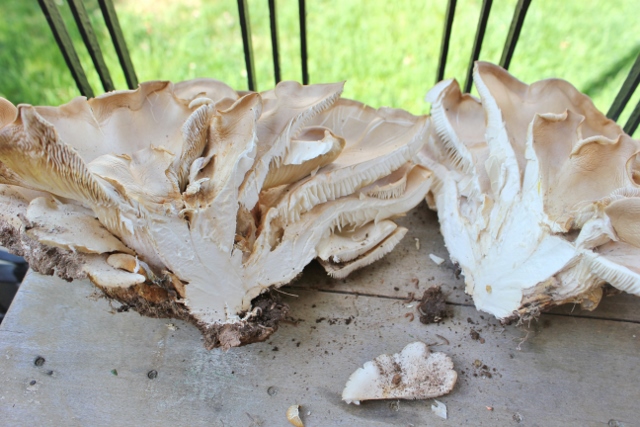
This particular presentation of an oyster is evidently atypical. The fungus must have been desperate to flower and so forced its way through the dirt! Here’s a few more shots of it for the curious, wanna-be mushroom hunters out there.
bottom
side
top (after picking, in the shade)
cross-section
By the time I picked this one, it weighed just over two pounds and was definitely past its prime. The edges were dried out and tough and the inner section was pretty tough too. My friend also identified an almost fishy smell to it, which meant it was old. (It just smelled like mushroom to me.) Even after cutting off the tough parts, I was able to slice up a good amount of it and we ate it sauteed with asparagus in a creamy garlic thyme sauce over pasta (as inspired by this recipe). The mushrooms were delicious but definitely on the rubbery side (because it had grown too big by the time I picked it).
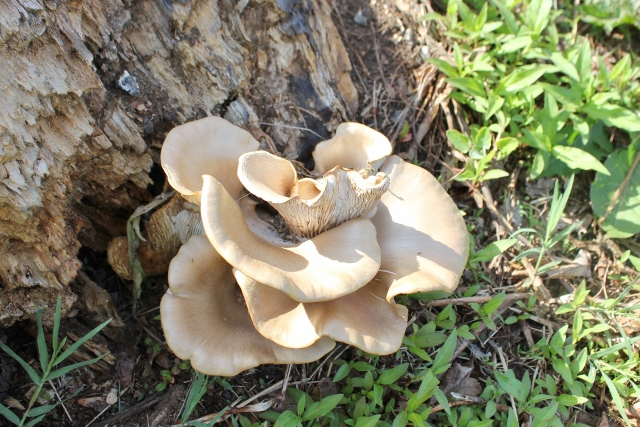
I still have a lot more to cut up because, beside the original mushroom, I found another one yesterday! This one was growing on the other side of the stump (which is still exposed). It only weighed 7 ounces and is noticeably more supple. We’re definitely going to eat all of this little one! (I likely will use most of the other huge one to make mushroom stock for soup.)
Not that I know much at all about mushrooms, but judging from pictures I’ve seen on the internet, I think this particular oyster growth is much more typical of the way that oysters usually grow.
My amazingly knowledgeable friend also asked me if I’d seen a particular kind of black beetle on them and I said, “Yes! Tons of them and so weird, I’ve never seen that kind before!” As it turns out, they only like to live on oyster mushrooms! (Read more about them in this article. Those beetles are another way to positively identify it as an oyster.)
I’m not sure if we’ll get any more off of that stump. There’s no shade there, which makes it non-ideal for mushroom growing. We count ourselves really lucky to have found two of them and also to have a friend who could help us positively identify them so we could feel safe eating them. I’m going to keep watching that stump like a hawk though!
**********
A bit about foraging etiquette: I did ask my neighbor’s permission to pick the mushroom before I picked it. I asked my foraging friend what I should do and she said that it’s common courtesy to ask permission if it’s clear that what you want to pick is on someone’s private property. This evening I’m planning to take some of the good one over to him, to see if he’d like to eat some of it. His tree did house it after all.
**********
We would NOT have eaten the mushroom with only a visual identification from one picture. Mushrooms can kill you or make you extremely sick. The best way to learn about foraging for wild mushrooms safely is to find a super knowledgeable friend who can teach you. My friend also taught us how to look for morels on a foraging walk several Aprils ago. I now feel fairly confident that I can safely identify oysters and morels. Any other mushrooms? I’ll be asking for help again! In sum, (to quote my friend) please do not EVER eat a mushroom that you are not 100% certain of in terms of identity and edibility, either because you yourself have experience with that mushroom, or because you’ve had an experienced mycologist identify it for you.
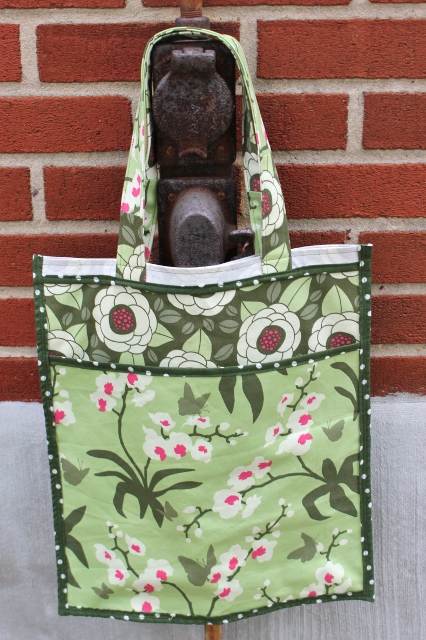
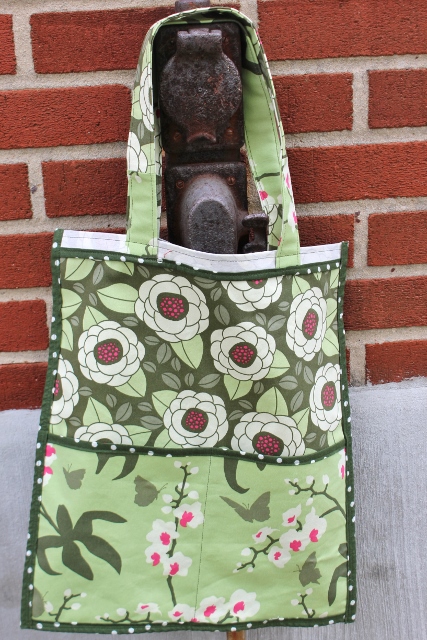
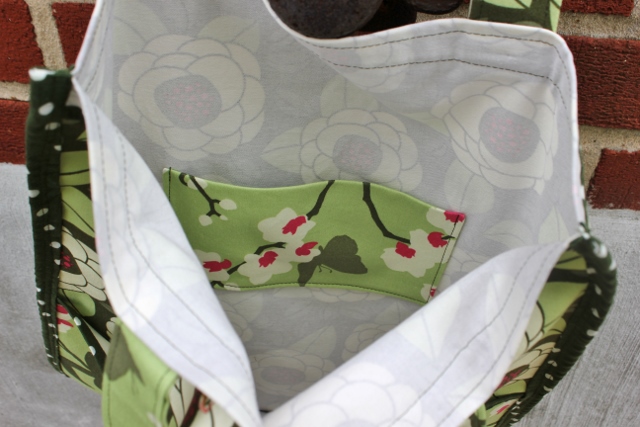
I made a tote bag for my friend Katie for her birthday five years ago. Recently, she had a disastrous occurrence with her apartment and I decided that the least (and really only) thing that I could do to help her was to make her another tote bag, with a different pattern but the same fabric combination!
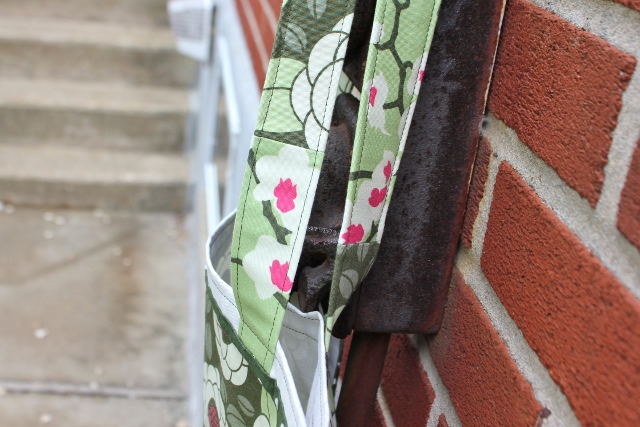
I also made pieced straps (rather than using the webbing called for in the tutorial.)
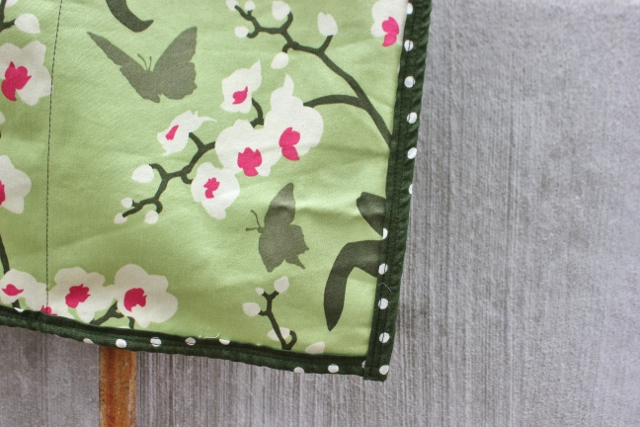
Finally, I also made my own bias tape and cut it on the bias so the dots would run across the edges.
This was a fun, fairly quick, and relatively easy bag to sew. Bias tape can be a bit fiddly so it probably would be a bit frustrating for a beginning bias tape use. Other than that, it was easy and quick because it doesn’t have a lining. I’m scheming about making one for myself now! It might be my treat to myself for finishing up those dining room shades! 🙂
Since the blog has been lacking in cute kids pictures for awhile (close to a month), here’s an assortment to brighten up your day!
Ellie is very proud of her new skill (just discovered yesterday)!
Putting in her own clips! (usually there’s close to 9-10 of them.)
What are Mark’s new skills?
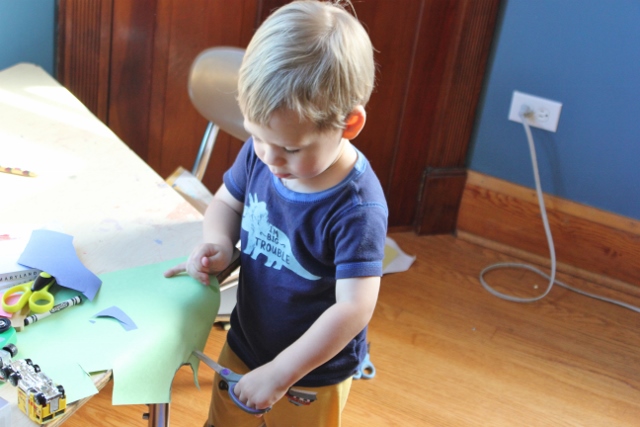
Cutting with scissors! I blame the state of our dining room floor on him. (It has absolutely nothing to do with my total lack of desire to sweep every day.)
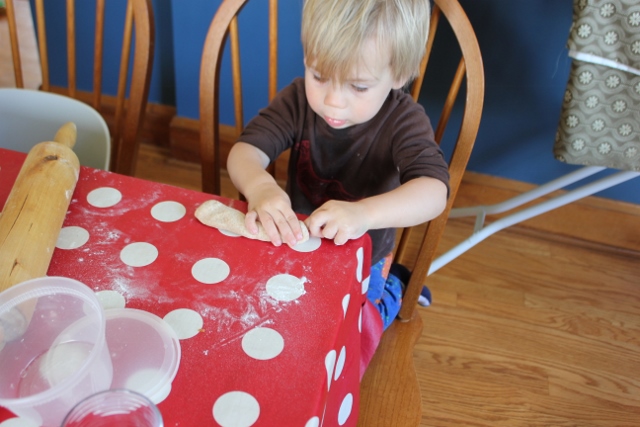
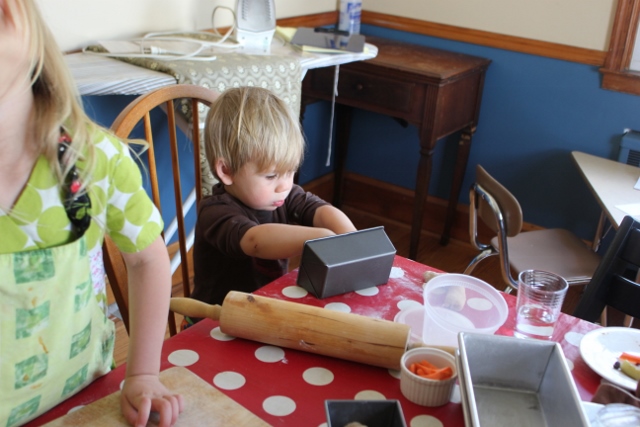
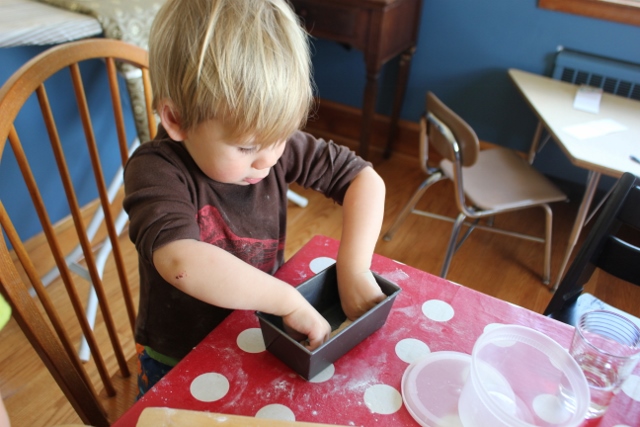
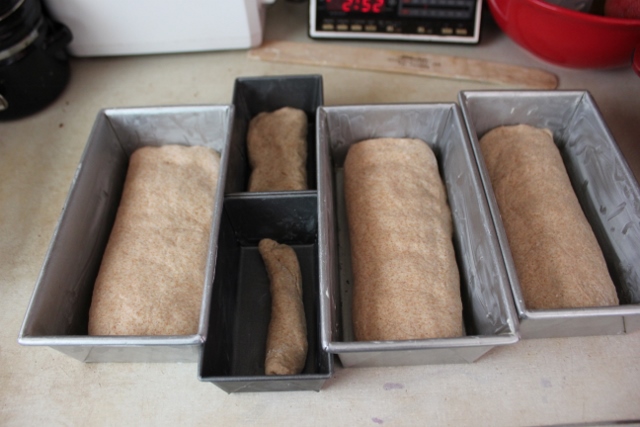
Making bread! Roll it, tuck in the ends, …
place it gently…
pat it down…
and make your own bread!
My beloved son with his new big boy hair cut (as done by Nik):
At a late April “It’s spring! There’s tulips!” play date in Sherwood Gardens:
Here we are at a Tiny Tots Baltimore Symphony Orchestra concert, three days after the riots swept through Baltimore. Although the Meyerhoff was nearly empty (because so many field trips had been canceled), we were grateful to be part of the audience as the BSO claimed Leonard Bernstein’s words (written just after JFK’s assassination):
This will be our reply to violence: to make music more intensely, more beautifully, more devotedly than ever before.
Finally, this picture was taken the day after Christmas so I know, I’m posting it a little late. I just found it on Nik’s phone and it’s the only picture (I think) that we’ve managed to get of the matching hats that Yiayia knitted them for Christmas!
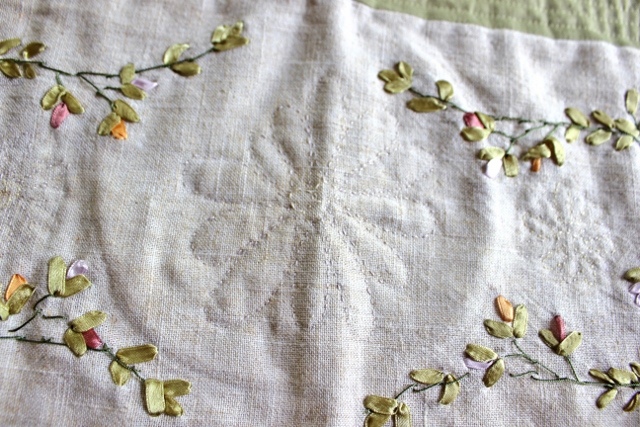
Last May, I decided that our table runner needed some help. I had brought it home as a souvenir of our amazing trip to Greece in 2008. I loved the ribbon embroidery on it and using it brought back all those great memories from that trip, particularly of Thassos, the island where we bought it. Unfortunately, it also really annoyed me because it would never lie flat. The outer layer of fabric had been sewn on incorrectly and it didn’t matter what I did, it always looks a bit messy.
(Now I look at it and think, “I’m crazy, it was fine.”)
So, last May (as in 2014), I chopped off the outer edge, sewed on another linen border, turned it into a quilt sandwich, quilted it, and bound it. (Basically, I turned it into a mini-quilt.) Then I realized three things:
Even though I pinned it within an inch of its life, it still doesn’t lie flat after the quilting. AARGH! (Talk about not accomplishing my number one goal in doing this project.)
The quilting I had done on the border was not enough to keep the batting in the middle from falling apart in the wash. So I needed to hand quilt it. NOT MY FAVORITE. (Plus I don’t really know how to do it. Plus I was so de-motivated by the lack of flatness that I didn’t want to look at it ever again.)
It sat for almost a year until I picked it up sometime in April (purely because it was on my list), and started hand quilting on some flowers. I have NO idea what I’m doing with hand quilting. I have no idea how you make the back look as good as the front. Luckily, the back of mine will never see the light of day. So here it is, in its unwashed, wrinkled, and way imperfect glory.
The two left corners don’t even lie flat – boo hoo.
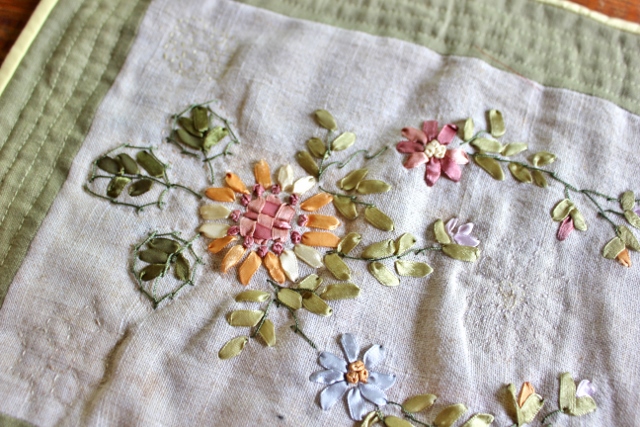
center flower
That section is my favorite of the ribbon embroidery!
There’s the imperfect back, where you can at least see what I sewed.
I’m going to wash and dry it and hopefully it will shrink up some and look less wonky. And then I’ll probably put it away and never use it. Or maybe I will. We’ll see. Anyway, it’s done and off my list of projects hanging over my head!
**********
This is my entry for Finish it Up Friday at Crazy Mom Quilts. I only have one more item on my list and I”m happy to report we’ve seen some progress on that front. Hopefully, I’ll have something to show in the next couple weeks!
This is the dough that we use when making homemade pizza. It’s also delicious as pita on its own. We bake it in the oven on our baking steel as well as grill it outside in the summer. We use it for thin crust pizza and it has a really nice bite to it. I haven’t tried it as a thicker crust although it does taste good as a thicker pita so it should be fine as a thicker crust as well. You’ll notice that this is only about 50% whole wheat. I probably will experiment with upping the whole wheat flour in this but it’s so good this way, we don’t really want to change it!
We made pizza last Friday and I took some notes and pictures. Look for an upcoming post about how to use this to make really delicious pizza at home!
pizza dough in action! 🙂
Soaked Whole Wheat Pizza Crust dough
As adapted by Laura from a recipe in the Simply in Seasoncookbook Yield: depends on how big you like to make your pizzas and how thick/thin you like your crust. You should get approximate three to four 8-10-inch thin-crust pizzas from this.
Day 1
80 g yogurt (replace with raw apple cider vinegar if you want this to be dairy free) 215 g water 425-460 g whole wheat flour (see this post for more about how much ww to use)
Mix the water and yogurt together thoroughly.
A whisk works best for this.
Add the flour and stir until fully combined.
I usually get about this far with a spoon and then do the rest of the combining by hand.
After mixing
Cover with a damp cloth and let it rest for at least 12 hours up to 24.
Day 2
6 g active dry yeast 300 g warm water
Stir the yeast into the water until combined.
440 g bread flour 60 g extra virgin olive oil 12 g salt
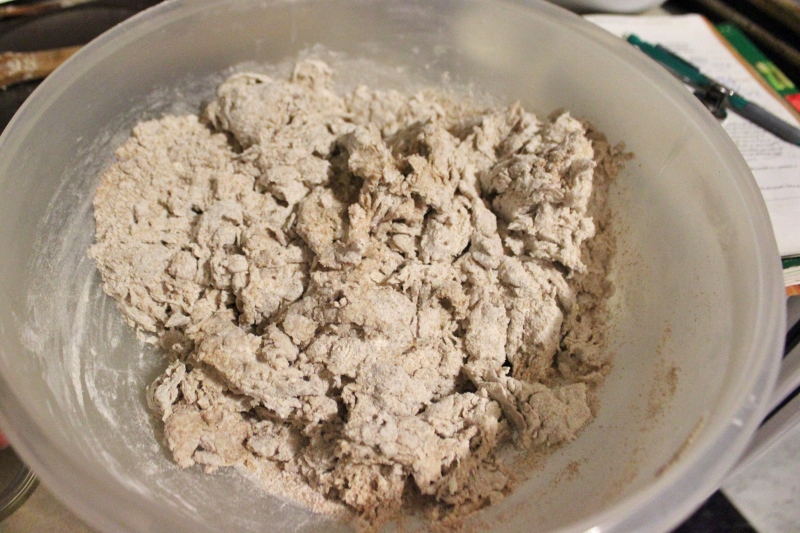
Stir into the yeast/water mixture until mostly combined.
It will look rough like this – that’s fine.
Get out your whole wheat dough that has been soaking. You might notice that the outside layer of flour is signifcantly dark than the inside. This is normal and just fine.
hard to tell in this picture but the outer layer is darker.
Into your stand mixer bowl, layer clumps of both kinds of dough until you’ve put in all of both doughs. This process isn’t totally necessary but really eases the combination of the two different doughs.
full of dough
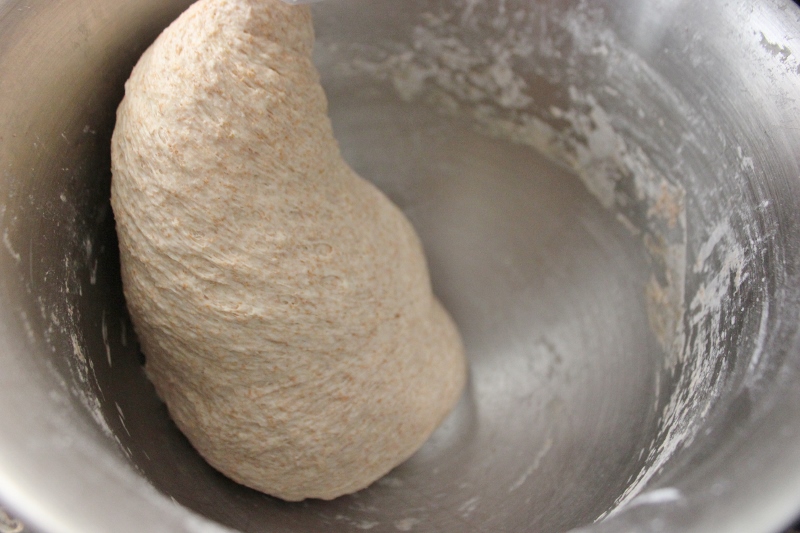
Start your dough kneading on low. Fairly quickly, the two doughs will incorporate into one cohesive and uniformly colored dough.
just at the beginning of kneading
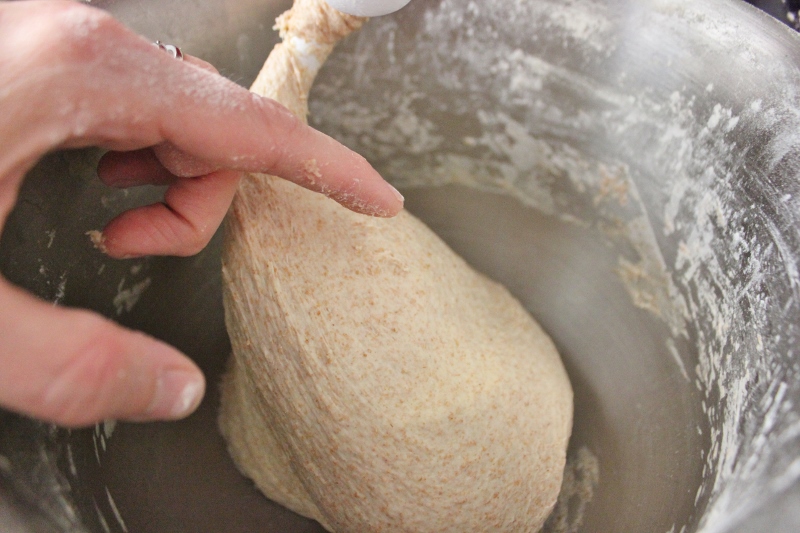
Knead for approximately ten minutes or until smoothy and stretchy. You will probably need to add more bread flour to get to the right consistency. This dough shouldn’t be very sticky because we’ll be rolling it out for crust or pita. It should clear the sides and bottom of the mixing bowl.
See how it’s sticking at the bottom? I had to add a bit more flour.
Now it’s clearing the bottom of the bowl.
not really sticky at all
Place into a large floured bowl, cover with a damp cloth, and allow to rise until doubled, about 1-2 hours.
This is a double batch and I let it rise a bit too long. Luckily, it’s a very forgiving dough!
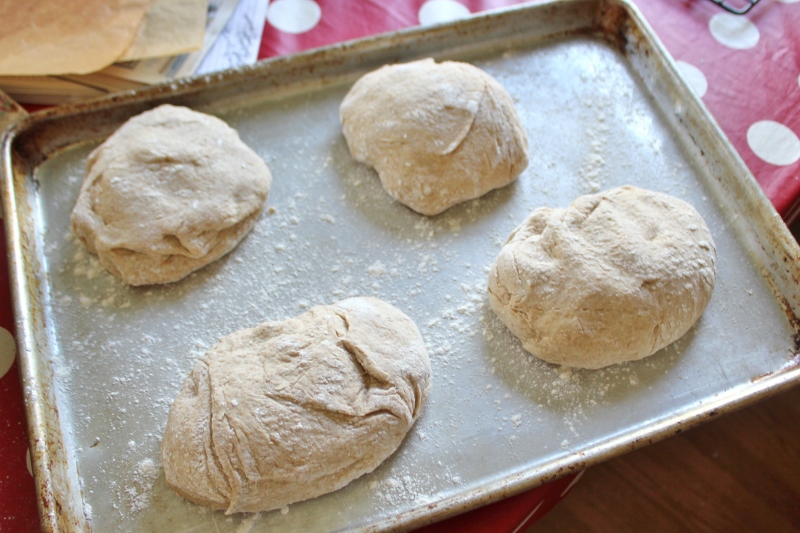
At this point, you can either bake it for pizzas or pita or you can freeze it to use later. We freeze ours in 300 g balls. 300 g is about right for one pizza for us. You’ll probably have to experiment to see how much dough you want in each dough ball. To freeze, sprinkle a baking sheet with flour and place the balls of dough on it so that they aren’t touching. Freeze until solid and then place in a freezer bag for storage in the freezer.
To use from the freezer, allow for ample thawing time. It does NOT work to defrost it in the microwave (big disaster, don’t ask me how I know). I usually get it out in the morning and by early afternoon, it’s ready to use. As soon as the dough has warmed to room temperature, you can use it. It doesn’t have to rise again.
Happy pizza making!
This post contains affiliate links, meaning any purchases you make with them support our blog. See the full disclosure here.

 Despite reading for almost two months, this is still staged, post-completion of reading (in case it’s not super obvious.)
 Almost two pounds!
 Mark’s idea of what that huge book was good for
 Ellie’s contribution to the photo shoot