Writing. Someday.

As you may or may not have noticed over the past few weeks, I haven’t been writing much at all.  I’ve been keeping up with my Color Book Tutorial/Sew-Along, I’ve posted a few KIOS posts, I’ve put up some cute pictures.

But real thoughts?  They’re not coming out.  My “Blog Post Ideas” list has sixteen ideas on it – big ideas, things I’ve been thinking about a lot, things I’d love to get out of my head and down in writing, things others have asked me to write about.

But it’s hard to write when you’re tired and you’ve been awake since 5:30 and you have a baby in your arms and your toddler doesn’t nap anymore.

It’s hard to take the time to write when you feel like there are sixty million other things that you should do instead.

It’s hard to write when your toddler is crying all. the. time.  It’s hard to write when really you should be paying attention to her, to see through the crying to the root of things, to not just tell her that “Crying makes Mama mad” and walk off.

It’s hard to write when you’re a perfectionist and you just don’t think there’s enough time here and there to write a post worthy of publishing.

So I’m here to say, I’m going to try to write more.  I need to get these thoughts out of me.  I might have to lower my standards a bit, might not have time to edit ten times before hitting “Publish”, might have to give myself some grace.

But I’m going to do it.  I will.  Just not today.  I have too much to do!

Posted in parenting, reflecting | 7 Comments

Color Book Tutorial/Sew-Along, Part 5: Adding the solids to the page corners

This is Part Five of my Color Book Tutorial/Sew-Along.  For an introduction to this tutorial plus the finished book and links to all the other parts of this tutorial, see this post.

To finish our pages, the last step is to add the solid quarter-circles to the outside corners.  You should have already prepped your quarter-circles and your pages, using the instructions in this post.

1.  Match your first block with its partner quarter-circle.  At this point, if you’ve never sewn any curves before, you’re going to question my sanity because it will look like this:

041 (640x640)042 (640x640)There’s no way this will work, right? 🙂

Trust me on this one!

2.  Place your quarter-circle on your page, right sides together, just below the curve and pin it at the top edge.

pin here

3. Pull the quarter circle over to the other side, align the corners and straight edges, and pin it in the same place on the other side of the quarter-circle.  This will feel awkward and the fabric will NOT lay flat as you pin it.

pin over there

(Pretend there’s already a pin in the first corner.)

013 (640x640)

4. Beginning at one end, ease the edges of the fabric together until they line up perfectly.  Put in several, closely-spaced pins.  All the fabric won’t lay smoothly until you’ve put in the last pin so don’t despair.  Remember that the fabric will only fit together perfectly at the point where you sew it (where both curves are from 3-inch circles).  So the page will feel a bit bunchy relative to the quarter-circle.  Also important in this step is to be careful not to pull out your seams on the page.  The stitches are not secured in the curve and so you could easily start to pull them apart.  Just be gentle with your page as you’re fitting it to the quarter-circle.

014 (640x640)

5. Once you have the fabric pinned, sew it with a 1/4″ seam allowance.  Be sure to secure your stitching at both ends.  It’s a little tricky when sewing to keep the fabric smooth as you sew.  Sew a few stitches, adjust the fabric underneath and continue.  As you sew, the only place where the fabric will be lined up at the 1/4″ seam allowance mark is directly across from the needle, due to the curve.  So you will constantly need to be moving the fabric through your machine at a curve, rather than a straight line.

015 (640x640)This looks weird but is how your fabric should look when you begin sewing the curve.  Also, note that I have sewn [very slowly] over the pins.  I cannot in good conscience recommend to you that you do this because it’s quite dangerous (due to the danger of flying, broken needles).  However, I do find it much easier to keep the fabric in place if I don’t take out the pins until I’ve sewn past them.  Do so at your own risk!

Repeat this process nine more times!

6. After you’ve sewn the quarter-circle on, you may think you’ve messed up because it still won’t lay smoothly, like this:

046 (640x640)007 (640x640)times ten!

To fix this problem, you need to clip the entire curve, up to but not into the stitching.

006 (640x640)

7. After clipping, press the seam open with a hot iron.  Press the front until it’s smooth.

008 (640x640)

After pressing the seams open, you’ll have ten finished pages!

009 (640x640)

010 (640x640)I’m not sure where the rest of the pages are in this picture! 🙂

Next task: some hand embroidery!

Posted in sewing, tutorial | Tagged , | 1 Comment

Linguistic Firsts (from this past week)

First Joke:

“It’s a joke, Mama.  Why did the chicken cross the road to get to the park?”

pause.

laughter!


First Prayer:

“Jesus, Baby Mark nurse, sleep.”

pause.

[I whisper, “If you’re finished, you can say ‘Amen’. “]

“Amen!”

laughter!


Bonus [non-linguistic] first:

034 (640x640)eating peas like candy!

Posted in Ellie, linguistics | 5 Comments

Merry, Mary, Marry

How do you say, “Merry, Mary, Marry”?  Do all three sound different to you?  They do to my sister-in-law, who grew up in South Jersey.  She recently posted a video of her saying them and indeed, when she says them, they do sound different.  But when I say them to myself, they all sound the same.

Here’s a video of me saying them, in context so you know which ones I mean.


Do my pronunciations sound the same to you?  Do these words sound the same or different to you when you say them to yourself?

Evidently, unless you grew up in Massachusetts, Long Island, or New Jersey, they are likely to sound different.

See this map to find the specifics for where you grew up.

Linguistics fun!

P.S. It took me three tries to make a video that felt only slightly awkward.  This is why I usually just post videos of my kids, not myself! 🙂

Posted in just for fun, linguistics | 1 Comment

Color Book Tutorial/Sew-Along, Part 4: Preparing the solids and pages for the corners

This is Part Four of my Color Book Tutorial/Sew-Along.  For an introduction to this tutorial plus the finished book and links to all the other parts of this tutorial, see this post.

To finish our pages, the last step is to add the solid quarter-circles to the outside corners.  This post just covers preparing the solids and the pages for the fancy corners.  The next post will explain how to sew them on.  (It was becoming too unwieldy for one post!)

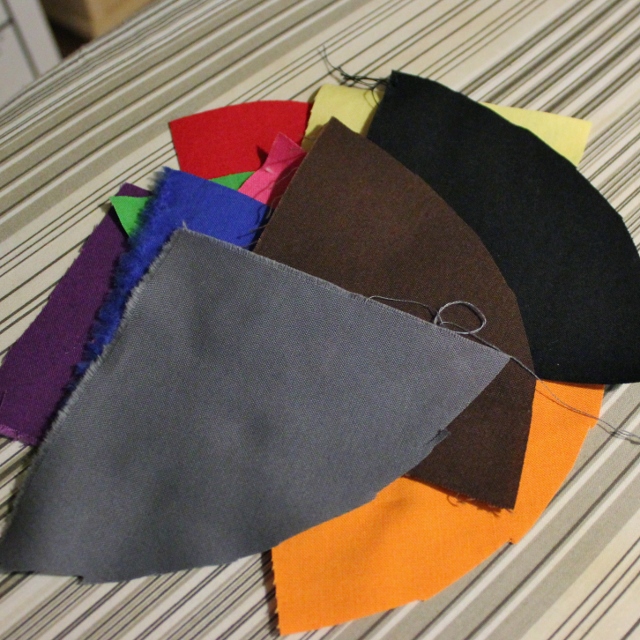
For this portion of the project, you’ll need all your solids along with your medium-weight fusible interfacing.  Also useful (but not required) is a piece of lightweight cardboard, such as from a cereal box.

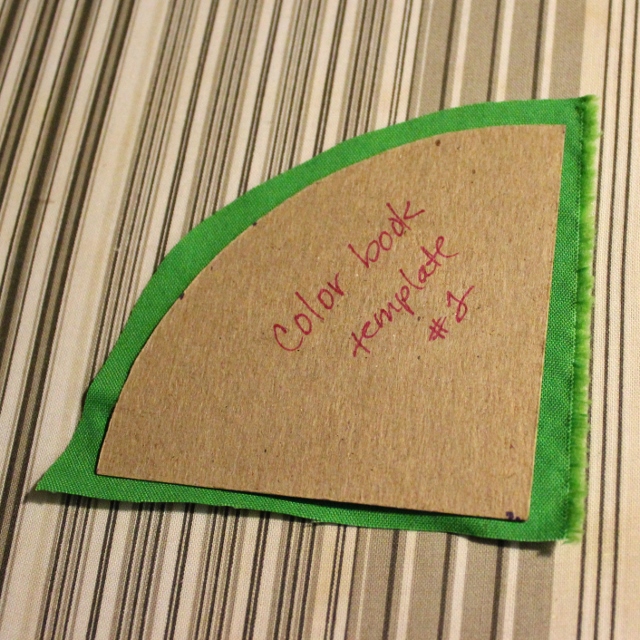
1. Print the three PDF files for the templates: Color Book Template #1a, Color Book Template #1b, and Color Book Template #2.  Follow the directions to make Template #1.  [Optional] Transfer both templates to cardboard for easier tracing.  (You probably will need to download and then print the PDFs, making sure to print to actual size.  If you print from your browser, they will probably come out a little bit too small.)

2. Using template #2, cut out rough quarter-circles from each of the solid colors.  Leave a bit of extra around all sides of the template.

012 (640x640)013 (640x640)

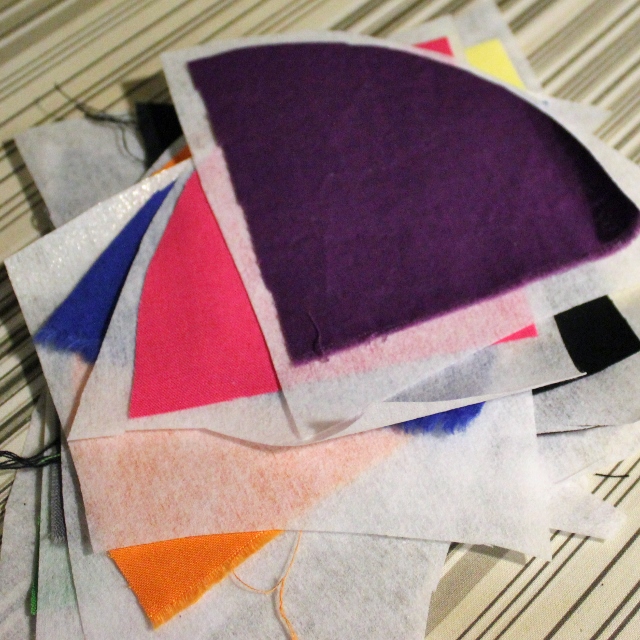
3. Put each shape onto the shiny (glue) side of the interfacing and cut out a similar rough shape of interfacing.  If your solid has right and wrong sides, be sure to put the wrong side against the interfacing.

015 (640x640)

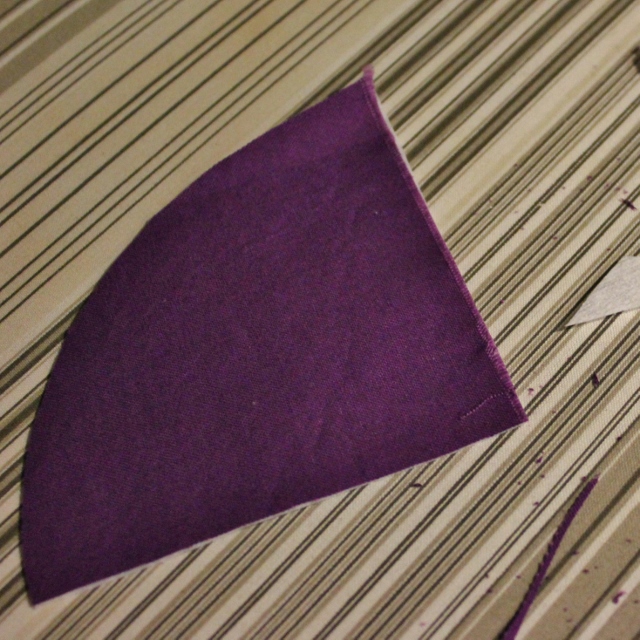
4.  Trim each shape closely so that no extra interfacing is extending past the edges of the fabric.  Turn the fabric/interfacing piece over so that the interfacing is on the top and fuse it to the fabric according to the directions for your interfacing.  Mine calls for dry heat, a hot iron, and pressing each section for approximately 30 seconds.  Allow them to cool.

016 (640x640)

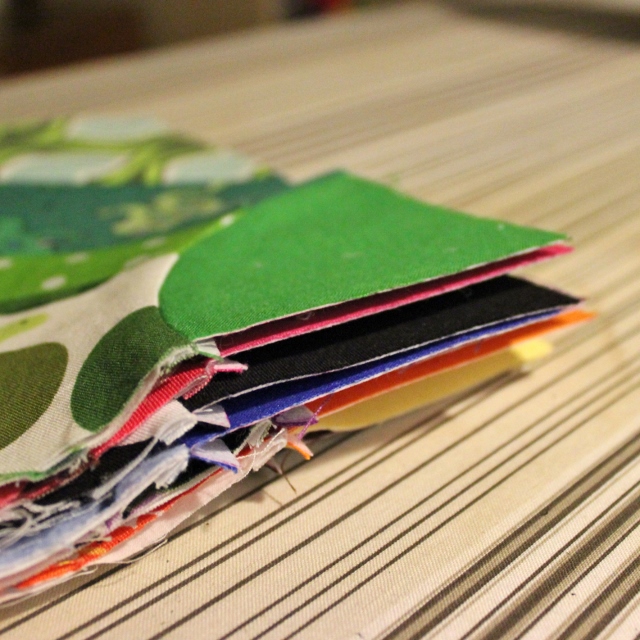
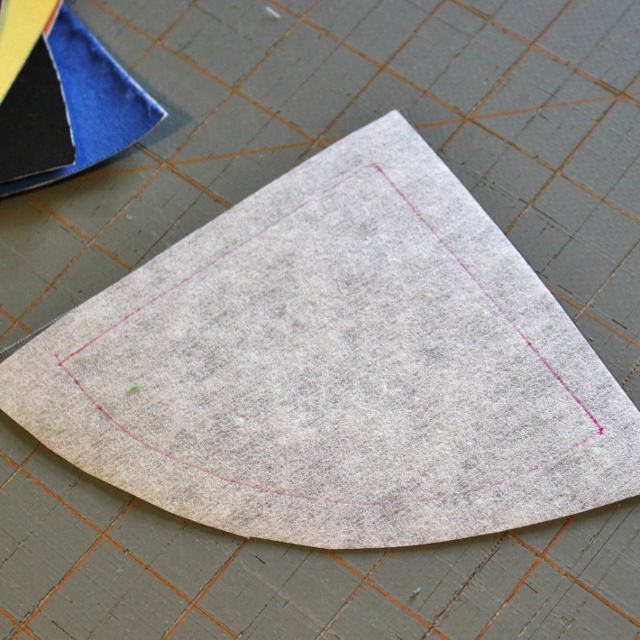
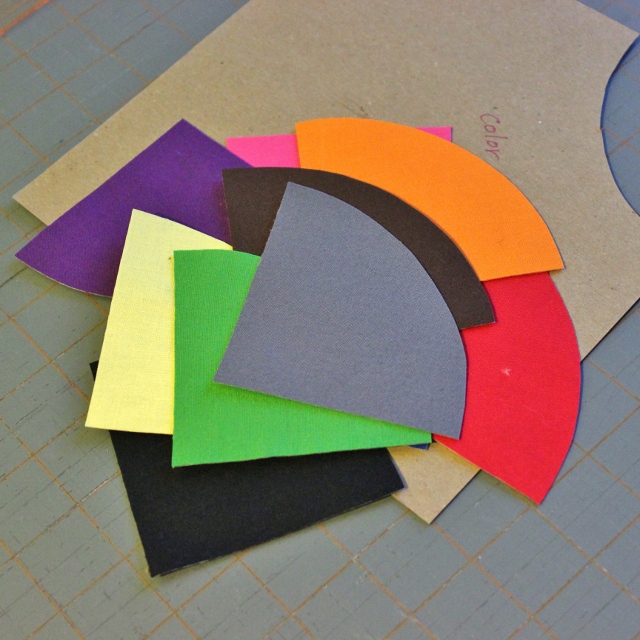
5. Once you have all ten colors fused, turn them over so the interfacing is showing.  Trace Template #2 onto each piece.  (I like to use an ultra-fine tip Sharpie for this kind of work.)  Cut out all the shapes and set them aside for a moment.

018 (640x640) 019 (640x640)

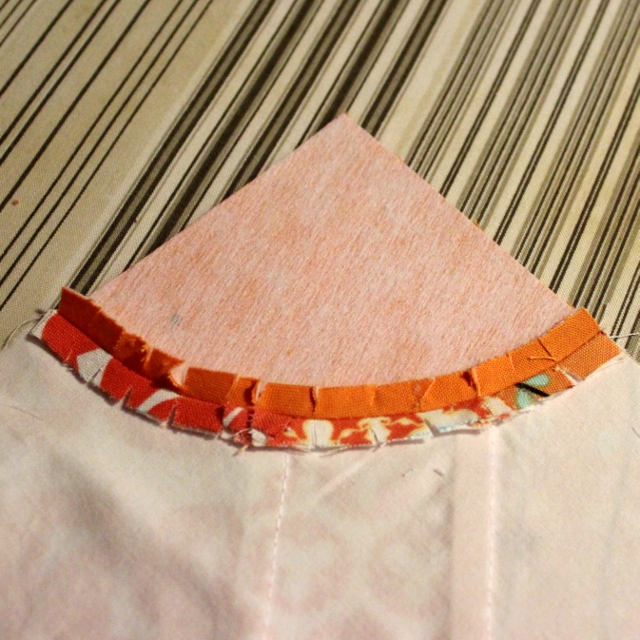
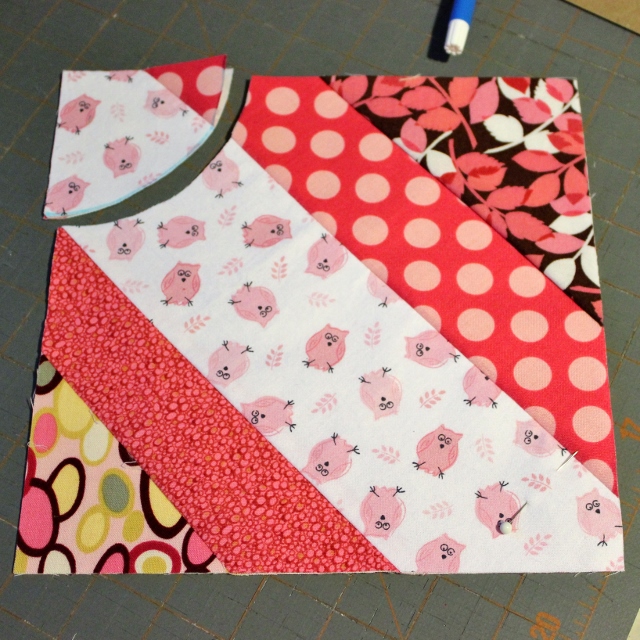
6. Take out the trimmed pages.  Arrange them (most easily on the floor) in five rows and two columns, like this:  black/red, blue/orange, purple/yellow, green/brown, and pink/gray.  Lay the appropriate quarter-circle on the top outside corner of each one.  Make sure your stripes are also angling in opposite directions, as in this picture:

022 (427x640)
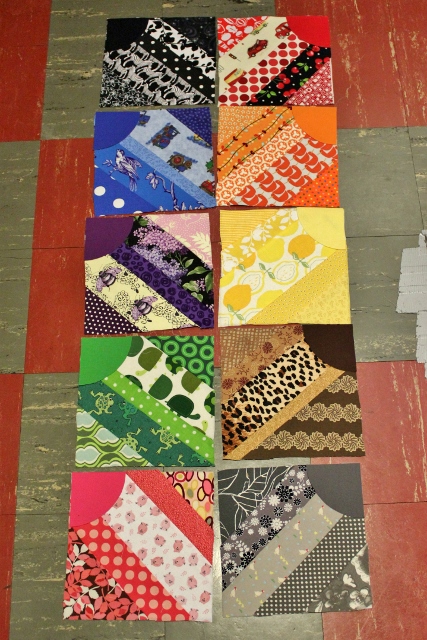
You may notice that my blocks aren’t trimmed yet in this picture.  I decided it would be easier to trim them before this step! 🙂

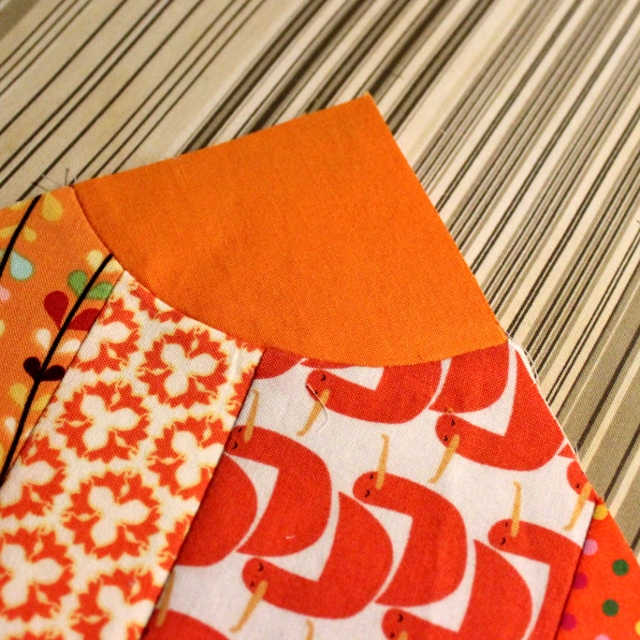
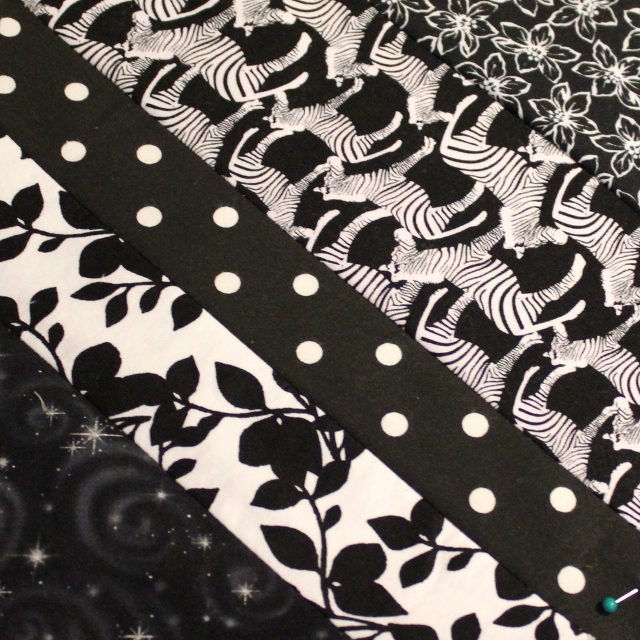
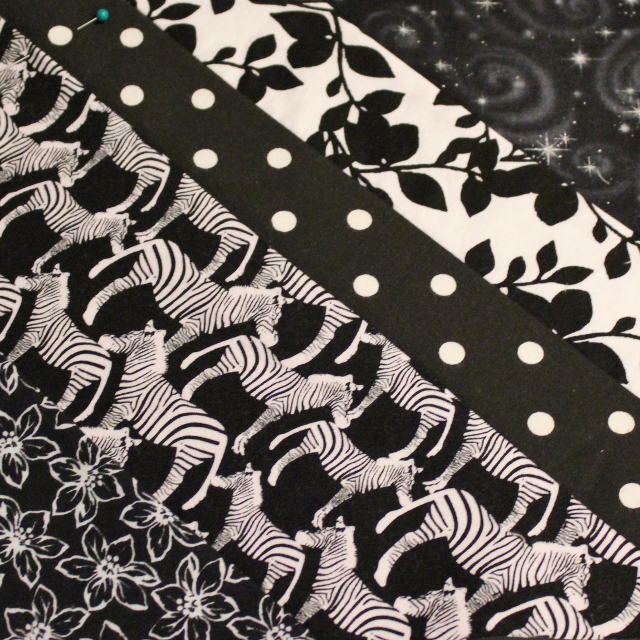
7.  Verify that you’re happy with how each block looks.  Make sure that any directional prints look OK.  For example, look how the zebras change in this block when I rotate it.

025 (640x640)incorrect (upside-down)

024 (640x640) correct (right-side up) Hi, zebras!

When you are happy with the arrangement of your blocks, remove each quarter-circle and put a straight pin there in its place.  Make two piles – one for each column (black through pink and red through gray).

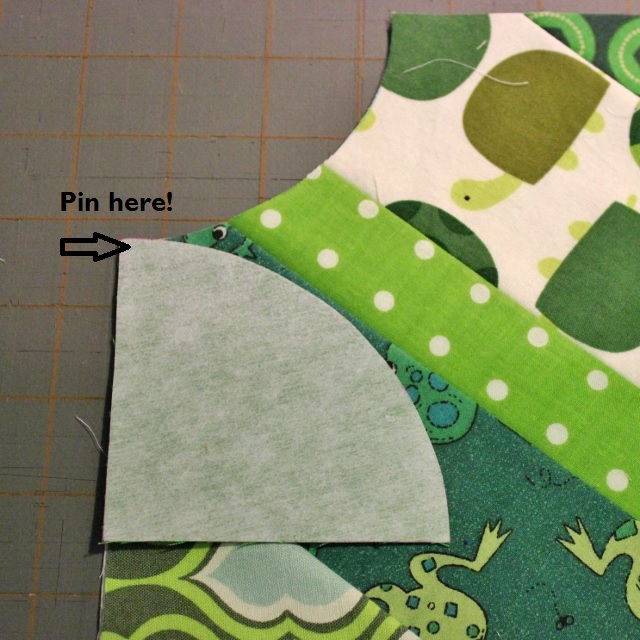
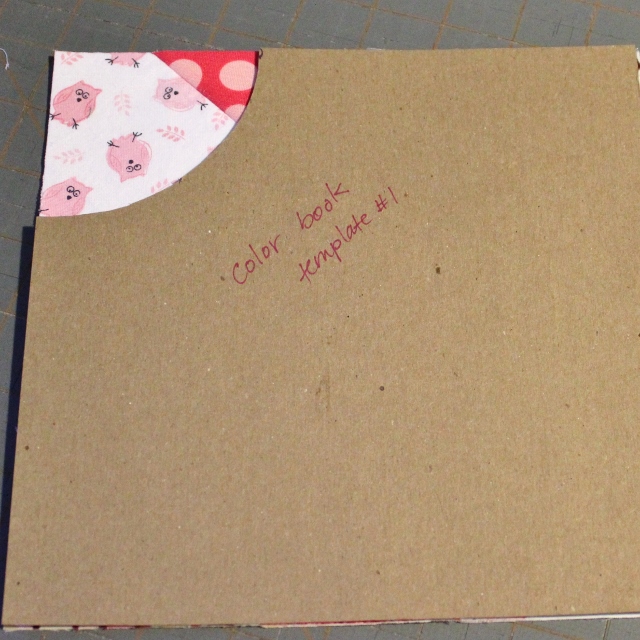
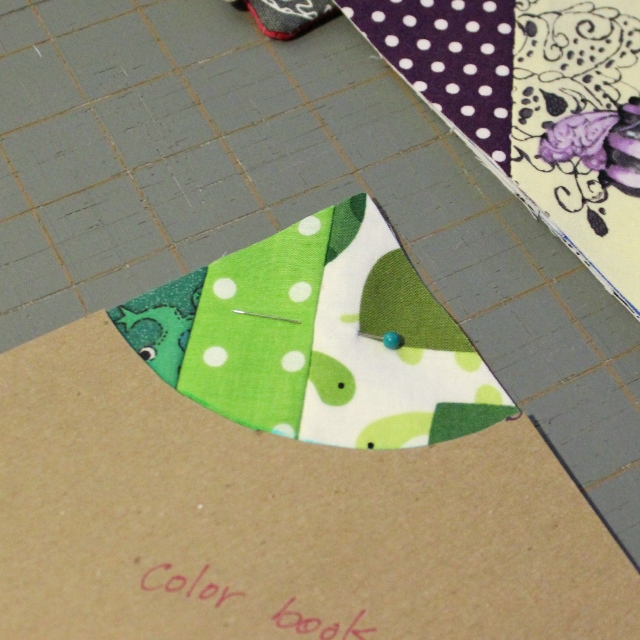
8.  Take out Template #1.  Put it on your first block like this but don’t make my mistake!  Make sure your pin is showing!

035 (640x640)

There’s the pin, where it should be!

038 (640x640)

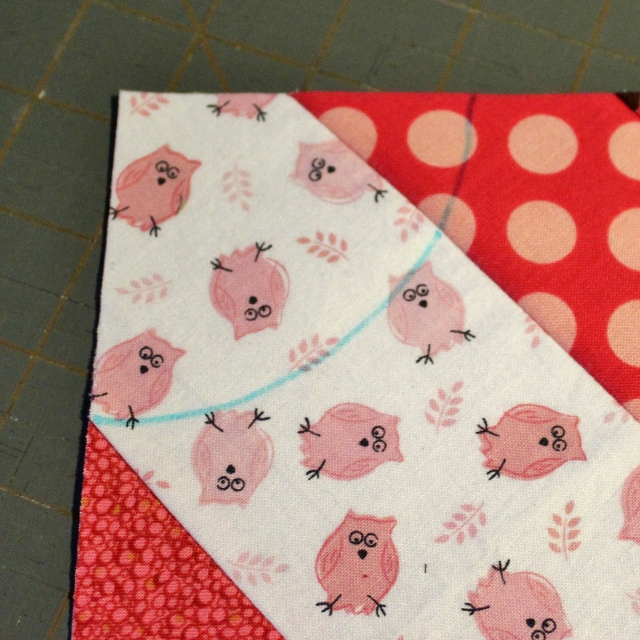
Trace the curve with a fabric marker or ultra-fine-tip Sharpie (very carefully) and then cut out the quarter-circle.  Repeat nine more times.  Remove the pins from the quarter-circles.

036 (640x640) 037 (640x640)As you can see, I cut off the wrong corner (the pin is down in the other corner).  It doesn’t matter with this block but I would have been really upset if I had a directional print that ended up upside down!

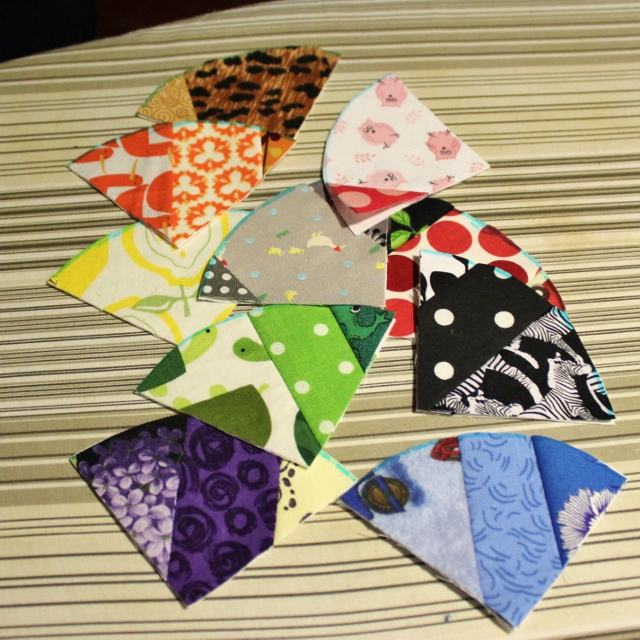
Save those quarter-circles for later!

040 (640x640)

Next time (I promise), we’ll be sewing curves!

Posted in sewing, tutorial | Tagged | 2 Comments

Fine, Have Some Tummy Time

Mark seems to love being on his stomach.  Sometimes, he rolls over almost as soon as I lay him down on the floor.  I just leave him that way until he fusses at me and then I turn him back over.  Recently, he has started turning himself back the other way also.  I think we’re going to have a fairly mobile baby pretty soon.

029 (640x427)smiling at Ellie

This is fairly ironic considering that I announced to the world that we don’t believe in our babies doing tummy time.

031 (640x426)Ellie doing tummy time too

I suppose I need to qualify that statement by saying that we don’t believe in doing forced tummy time but if Mark wants to spend time on his tummy and puts himself there of his own accord, that’s fine with us!

030 - Copy (640x427)Ellie, clearly aware that she’s being silly

Ellie hated being on her tummy.  Mark loves being on his (at least for short bursts of time).  I just have to remember not to lay him down close to dangerous or immovable objects.  Otherwise, I’ll just keep finding him with his face in the dresser. Sorry, my boy!

028 (640x427)It’s more fun to be on your tummy when you have a silly sister to entertain you.

Posted in Ellie, Mark | 4 Comments

May Sewing: One More Baby Blanket

Kelly and Drew are having a baby girl!  Hooray!

When choosing fabric, I like to look at the couple’s baby registry to try to get a feel for the aesthetic of the mom.  Kelly’s registry gave me a cool, calm feeling (lots of white furniture, neutral bedding, etc) so I decided to go with cool, calm colors.  (By “cool”, I mean “cool” colors such as greens and blues as opposed to “warm” colors like reds and oranges, rather than as opposed to “geeky” :)).

032 (640x640)Those whales are still pretty girly, don’t you think?  Look at all the hearts!

I threw in some pink top-stitching to bring out the girlishness a bit.

033 (640x640)my favorite way to finish a blanket, with triple-stitching

Congratulations Kelly and Drew!  We can’t wait to meet your little girl!

Posted in sewing | 3 Comments

First Pigtail!

Ellie’s hair has finally started to grow! Today she wanted to look like me (a common theme these days) so I pulled her hair back into her first pony tail!

035 (640x427) 036 (640x427)Those are fussy faces because she didn’t like it and demanded that it be taken out almost as soon as I’d finished.  I had to cajole her into letting me take a picture!

So cute!!

P.S. Isn’t that a rockin’ mullet?! 🙂

Posted in Ellie | 1 Comment

Jam Making Party

To my friends in Baltimore:  I’m planning on making strawberry jam next Saturday, June 8th, in the morning.  If you want to learn how to make strawberry jam (or any kind of jam for that matter) and/or if you want to learn how to use the water bath canning process, this is your invitation to hang out and observe.  I’ll also most likely put you to work!

IMG_5755 (640x480)Email me if you want to come and I’ll be in touch with the specifics.

Fair warning:  Canning is a hot and humid process (due to lots of boiling water) and our house does not have central air.  Be prepared to leave feeling hotter and sweatier than when you arrived.

Posted in cooking | 2 Comments

KIOS: Grooming, Part 7: DivaCup Love (second half)

This post is part of my series, “Kickin’ It Old Skool: Why and How We Are Old-Fashioned” or KIOS for short.  If you’re new to the series, please read my disclaimer before continuing on.  I’m keeping a table of contents to this series here so you can see what I’ve already written about and what more there is to come.

Today, I’m featuring two guest posts written by friends of mine who both love using the DivaCup, which is a reusable alternative for tampons.  I haven’t used the DivaCup myself and I wanted to give you their perspective about a reusable option other than cloth pads.  They’ve both written fairly extensive posts so I’m going to publish them in two parts.

Many thanks to them both for taking the time to write their thoughts for us!

Here’s the second one, from Katie:

OK, ladies, some of you may be a little squeamish talking about something this personal, but I’m a nurse so talking about personal things is my job!

Onto the merits of the DivaCup…

If you’ve never heard of it, the DivaCup is a silicone menstrual cup; it is a cone-shaped device that sits in the vagina and replaces pads or tampons. It is reusable – you simply remove it, empty the contents into the toilet, rinse it out, and replace it. It is meant to be worn only during your period and should be emptied every 12 hours.

Before I move on to the reasons I love it, some of you may be reacting to the thought of a reusable menstrual device. The idea has actually been around since the 1920’s, but women’s hygiene products became disposable with everything else in the mid-century. I promise it’s not as gross as it sounds.

Reasons I love it:

  1. It’s good for the environment – I love the fact I’m not sending mounds of used tampons to the dump any more.
  2. It’s good for your body – pads and tampons are full of scents, weird fibers, and other synthetic things that are no bueno for your body. The DivaCup is made of medical grade silicon and the chances of your body reacting to it are much less than with tampons.
  3. It’s good for your budget – you can buy a DivaCup on Amazon for $30 and it’s recommended you replace it every year or so. Much cheaper than disposable products!
  4. I never have to worry about remembering to bring tampons with me. It always used to be a worry – do I have tampons, do I have enough tampons etc…since the DivaCup is attached to your body, it’s impossible to forget.
  5. You can measure your menstrual flow – the cup has milliliter markings so you can get an accurate measure. This is important especially if your flow is heavy. Normal flow is 30-40ml (around 1 oz.), and this offers a way to know where you stand. Heavy flow puts a woman at risk for iron deficiency and anemia so this is valuable information. Tampons and pads can’t offer a reliable estimation of flow because there are so many different absorbencies and sizes.
  6. It doesn’t leak and you can go much longer in-between changes than with pads/tampons. If you have a normal flow, you will not need to empty the DivaCup more than once every 12 hours. If your flow is heavy, you may need to empty it one additional time during the day.
  7. It doesn’t smell! Nuf’ said!

Concerns:

  1. You may be wondering if it’s sanitary. Besides rinsing it when emptying, the company recommends boiling it at the end of every period to sanitize it fully. They also sell special soap if you really feel like you want more than water to rinse it off. You can’t use regular soap because it will break down the silicone.
  2. You may be wondering if it’s comfortable. When worn properly, you don’t even realize it’s there. I would compare it to the feeling of wearing a tampon.
  3. You may be wondering if it will disrupt the hymen (i.e. you are a virgin). I was a virgin when I started using the DivaCup, and it was a bit painful to put in and take out the first 2-3 times. It didn’t hurt at all once it was in, and after the first couple times, it was no biggie. According to the company it is safe for women of all ages to wear and will not completely disrupt the hymen. You can’t use lubricant to put it in or take it out because lubricant will break down the silicone.
  4. You may be wondering what you do if you are not near a sink and you need to empty it (e.g. a public bathroom with stalls). In this case you can empty it and replace it without rinsing. Just rinse the next time you empty. (Awful story: I once was emptying my DivaCup in a public restroom so I didn’t have access to a sink, and I accidentally dropped the DivaCup IN THE TOILET! I am now very careful to not drop it in the toilet!)

I think that’s the end of the DivaCup love manifesto. If you want to know more you can visit the website: www.divacup.com. You can buy them on Amazon or at Whole Foods, but they are less expensive on Amazon.

Posted in health and beauty, KIOS | Tagged | 1 Comment