Your Skin Isn’t As Thick As A Man’s (SO WHAT??)

Tonight, we were at my mother-in-law’s house for dinner.  Ellie and Mark were playing with Yiayia and I was resting on the couch, reading fluffy magazines – a rather lovely way to spend the evening!  I found a article about his and hers toiletries – basically, telling me what toiletries we should have feminine and masculine versions of and which were OK for me to share with Nik.

Along with annoyingly implying that both men and women need A LOT of personal care products in order to look and feel good (which I’ve already written about), there was also a very definite underlying assumption of inferiority on the woman’s part.  There were sentences like, “A man’s skin is 20% thicker than a woman’s.  So he can get away without moisturizing.  But to keep the wrinkles away and keep up with him, you need to buy this really expensive anti-wrinkle product to put on your inferior skin.”  Obviously, it didn’t say that exactly but it certainly implied it.

Clearly, the goal of this article was to sell products.  It wasn’t an advertisement per se but every single item in the article was something to buy and I’m sure the manufacturers of those products either provided the product for free to review and/or paid for the product placement.

The message that they managed to convey in that article was that women are not enough.  We’re not enough if we let the fine lines around our eyes show as we age.  We’re not enough if we don’t use special hair products to make our hair something that it’s not (straighter if it’s curly, full of volume if it’s straight, lighter if it’s dark, darker if it’s light).  We’re not enough if we let our own skin tone show through because it would be a crime if it was uneven.  We’re not enough because our God-given skin isn’t as thick as a man’s and so our skin wrinkles faster (because we’re certainly not allowed to look like we’re older than 25 even if we’re 36).  We’re just not enough.

THESE ARE ALL LIES.

You are enough.  “Body and soul, [you are] marvelously made!” (Psalm 139:14)  Your wrinkles are beautiful.  They show me that you’ve lived (and are living) a good, full life.  Your hair is beautiful, just the way it grows out of your head.  Your skin in its varied tones is beautiful to me.

YOU ARE ENOUGH.

IMG_2767 (800x532)  with my beautiful mother and my beautiful daughter (when Ellie was 9 months)

Posted in reflecting | 6 Comments

Ellie’s Puzzle Skillz (for Auntie Julie)

Auntie Julie gave Ellie some really cool wooden puzzles for her birthday last fall.  Recently, Ellie has started putting them together almost entirely independently.  The puzzles are great for puzzle learners because once you set aside the two inside pieces and lay out the four corners (as Ellie has learned how to do), every other piece fits in easily.  So the amount of frustration is minimal.

Here is some videographic evidence of Ellie’s newly-acquired puzzle skills, for Auntie Julie and anyone else who wants to sit through a relatively boring movie (which has the boring middle already edited out)! 🙂


“We made the pig! Yeah!”

Thanks Auntie Julie!

Posted in Ellie, movie | Leave a comment

Early Morning Baby-Wearing Fun

We believe everyone (human or not) deserves to be worn while still a baby! 🙂

021 (533x800)

Posted in Ellie | 1 Comment

First Peach!

Finally, finally, finally, we’re starting to accomplish our goal of having edible landscaping around our house.  We’ve been talking about doing this for years and this summer, finally managed to plant some fruit trees.  So we now have three blueberry bushes, two fig trees, a peach tree, and an apricot tree.  We also have space allocated for two apple trees, hopefully to be planted in the fall.

Here’s Ellie proudly showing off the first peach ever harvested from our yard!

006 (800x537)

The peach tree came with about six peaches on it and we’ve now eaten all but one of them.

007 (800x581)Beautiful!

We’re looking forward to many years of fruit!

Posted in Ellie, gardening | 3 Comments

Post-Vacation Jet-Lag Sleeping-In Coma


001 (800x534)Taken at 9:30 in the morning (last Thursday)!  Unheard of!  Sadly, we’re now back to our 5:30-6:00 am wake-ups.  I suppose it couldn’t last forever.

Posted in Ellie, Mark, travel | 1 Comment

We’re Home! (with the best souvenirs ever)

We are home and finally feeling recovered from our big trip to Montana!  My whole family converged on my dad’s family’s place in southwest Montana for two weeks of fun.  We had a great time, driving through the West and playing with cousins!

montana 003 (800x533)our first morning in Montana

I’ll share more pictures soon, as soon as we get them all sorted out.  In the meantime, here’s the awesome souvenirs we brought home!

002 (800x533)Those fruit and vegetable prints are destined for color books – they’re perfect!!

My goal is always to bring home something memorable but also useful, preferably locally-made.  I almost always get a mug and now have a nice little collection of locally-made pottery to drink tea out of!  This mug is from Whistle Creek Pottery and we found it at the Good Food Store in Missoula.  (The Good Food Store had, by far, the most amazing bulk food section I’ve ever been in.  It’s worth stopping there just for that!)

The fabric came from the #1 Ladies’ Quilt Shop in Dillon (they don’t appear to have a website).  That’s, by far, the best local quilt shop name I’ve ever seen, particularly because I love those books.  The shop owner and I had a little moment where we shared our love of all things Alexander McCall Smith.

The wool balls are dryer balls that Mom and I found at the Missoula Farmers’ Market.  We bought them from a super nice elderly couple.  The man told me that he doesn’t raise the sheep anymore but he does buy all Montana wool and they make the dryer balls themselves.  Sadly, I forgot to grab their card but if I figure out who they are, I’ll add their information to this post.

All in all, I’m really happy with the treasures we brought home from our trip!  We had a wonderful time with my family and I’m glad that using these things will remind us of that.

montana 061 (800x533)

Posted in Ellie, family, travel | 6 Comments

Color Book Tutorial/Sew-Along, Part 8: Assembling the Pages of the Book

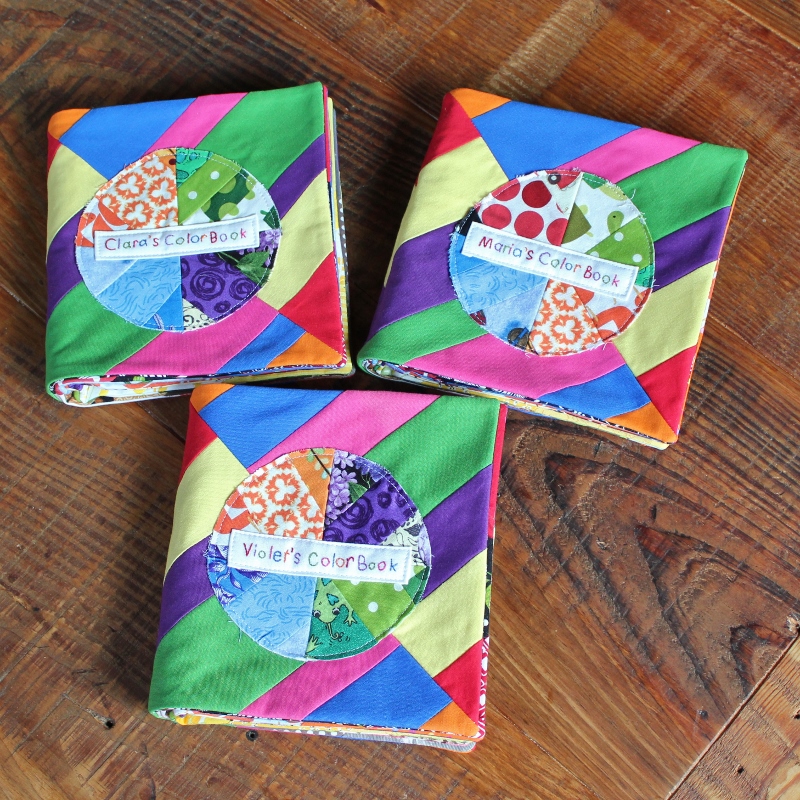
This is Part Eight of my Color Book Tutorial/Sew-Along.  For an introduction to this tutorial, the finished book and links to all the other parts of this tutorial, see this post.

These instructions are to finish the book so that it will look like the books in this post.  If you want it to look like my older version (as seen in the original color book post), then DON’T FOLLOW THESE INSTRUCTIONS!!  Email me and I can fairly easily type out some instructions for how to do it.  I won’t have step-by-step pictures but the other way is pretty easy.  The finish is much less polished (with some raw edges visible at the spine) but it does feel slightly more like a book.  So let me know if you want those instructions. 

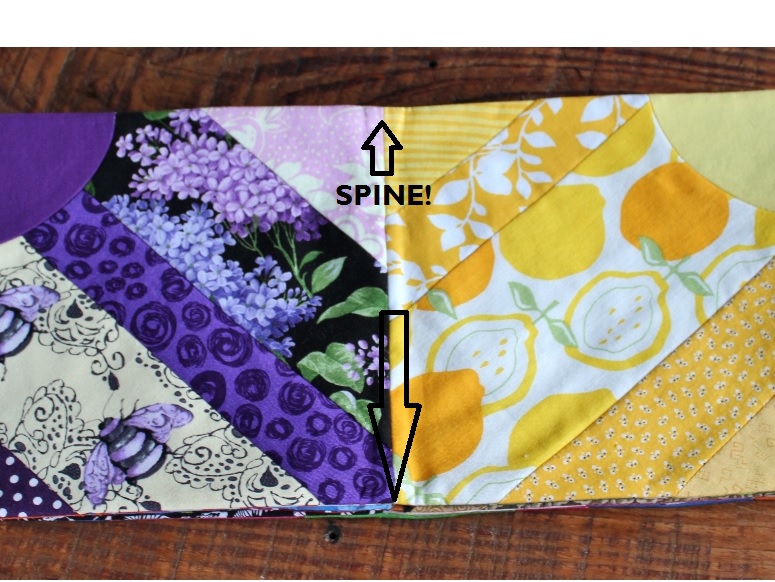
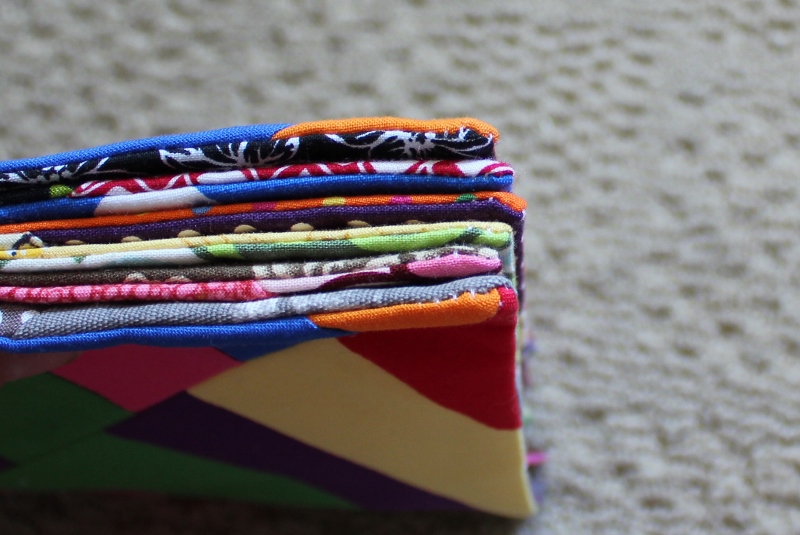
We are very nearly finished with the book!  All that’s left is to assemble the pages and then bind it.  For the next two posts, I’m going to be referring to the “spine” of the book quite often.  Similar to a paper book, the spine means the part of the book at the center, where all the pages meet.

SPINE
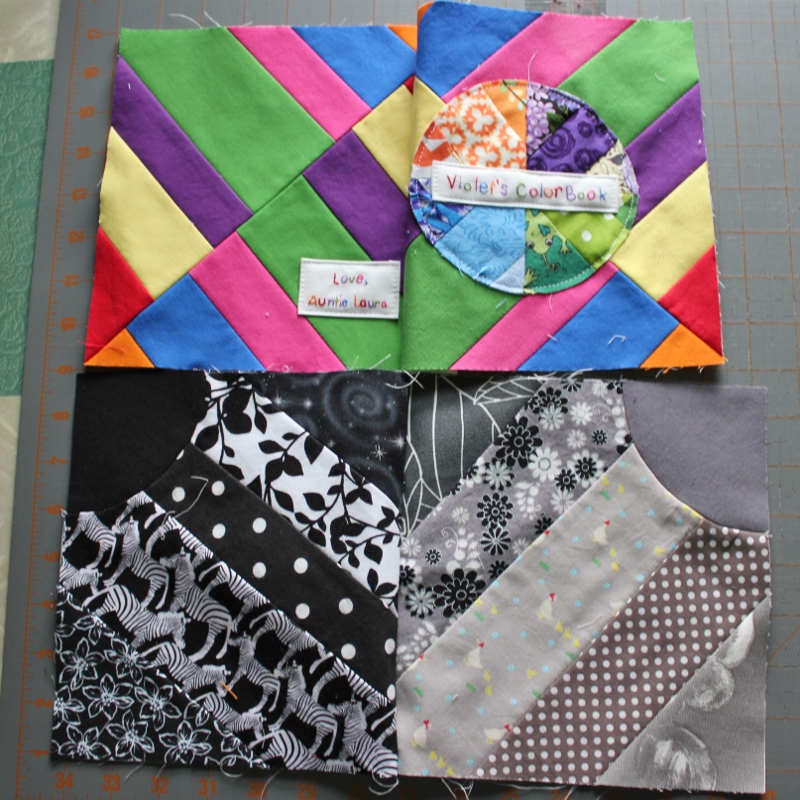
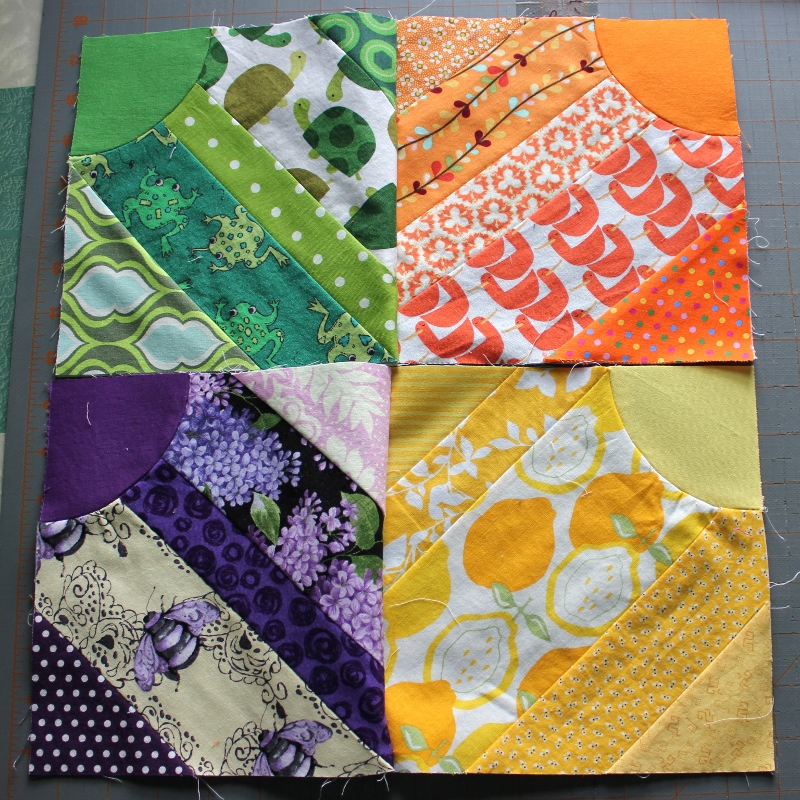
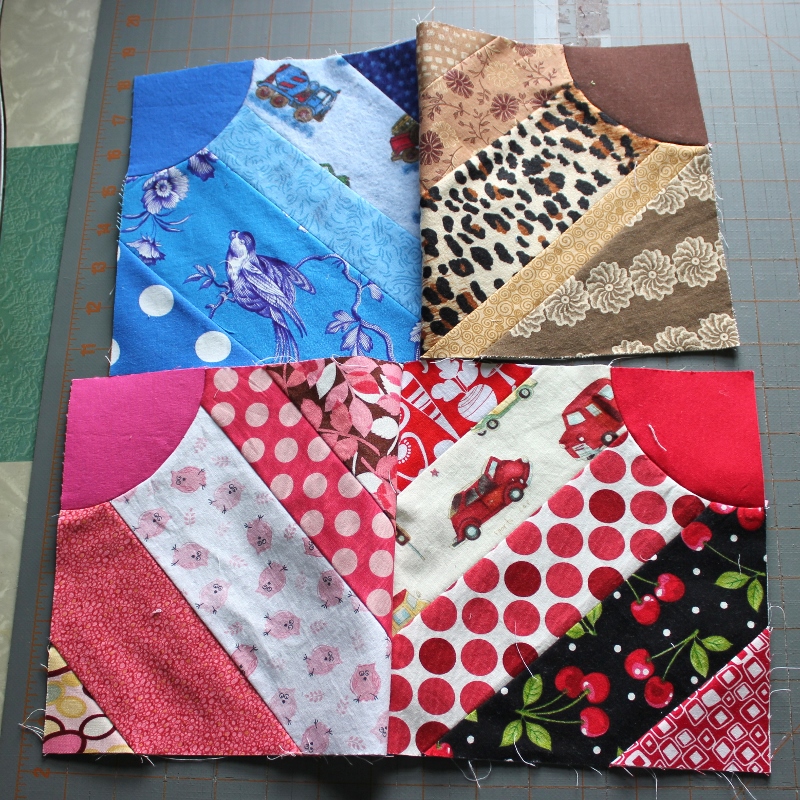
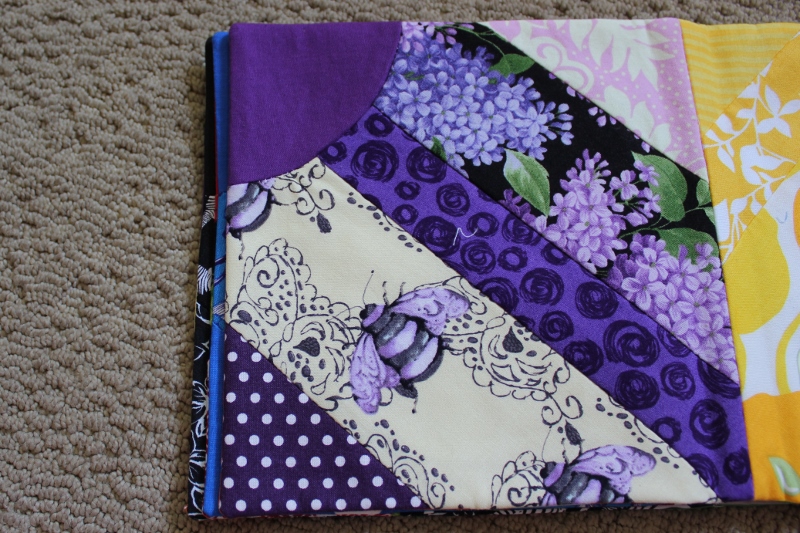
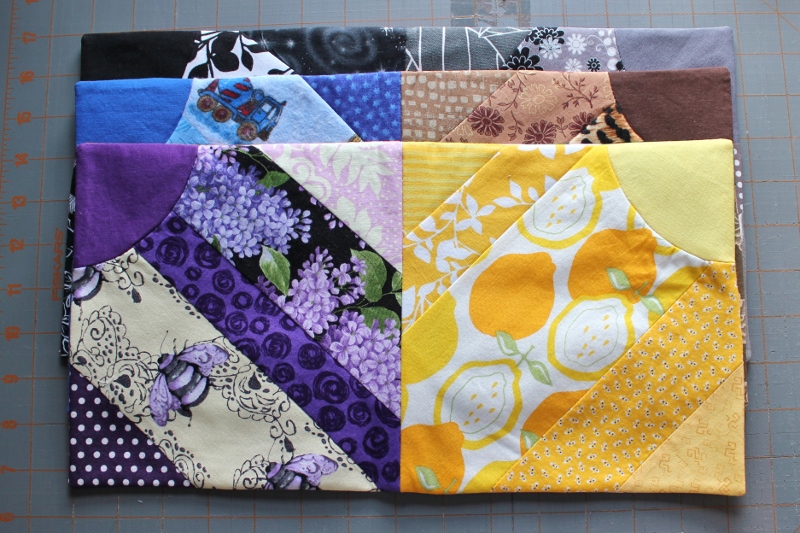
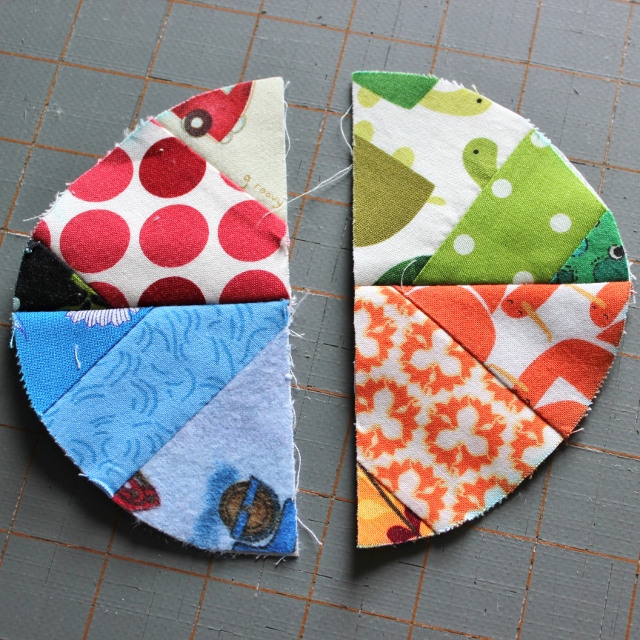
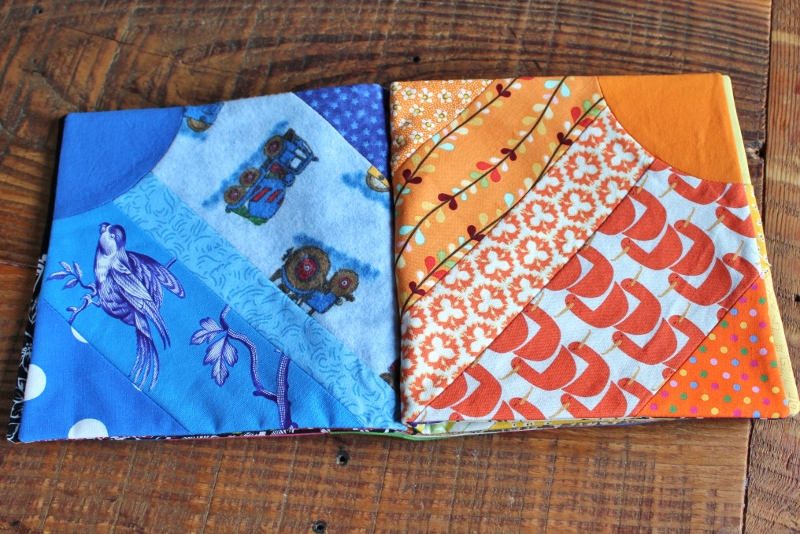
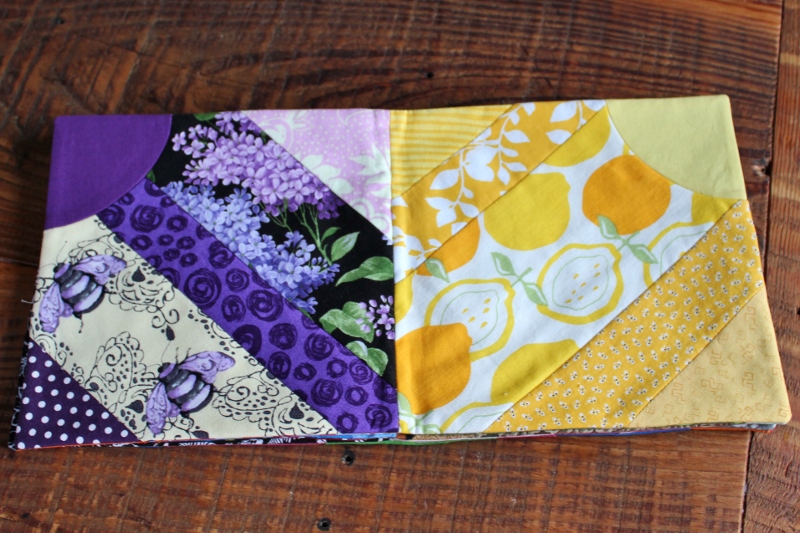
1.  Pair your pages and lay them out like this, as pictured (first one listed on the left, second one on the right, with the spine in the middle):

  • back cover/front cover
  • black/grey
  • green/orange
  • purple/yellow
  • blue/brown
  • pink/red

For all pairs (excluding the cover), make sure that the solid quarter circles are on the top outside edges, opposite the spine.

055 (800x800) 056 (800x800)053 (800x800)My pages were already pinned at this point, yours will still be lying flat.

2.  Separate out three pairs: green/orange, pink/red, and black/grey.  On all six pages, sew a row of stitching at 1/8″ along the spine, to lock those seams into place.  Lay out the pairs correctly again, as in #1 above.

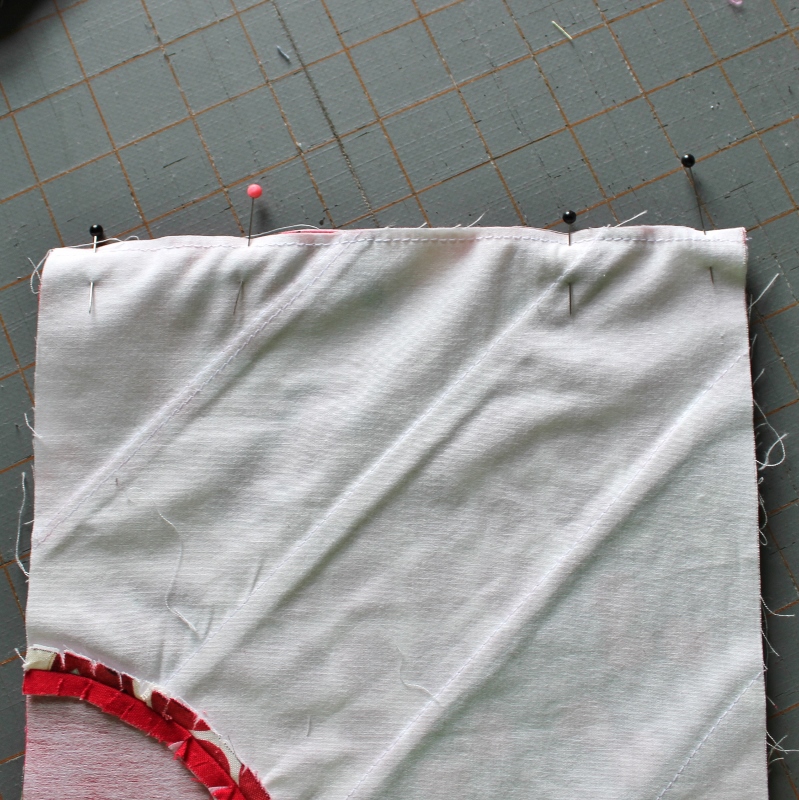
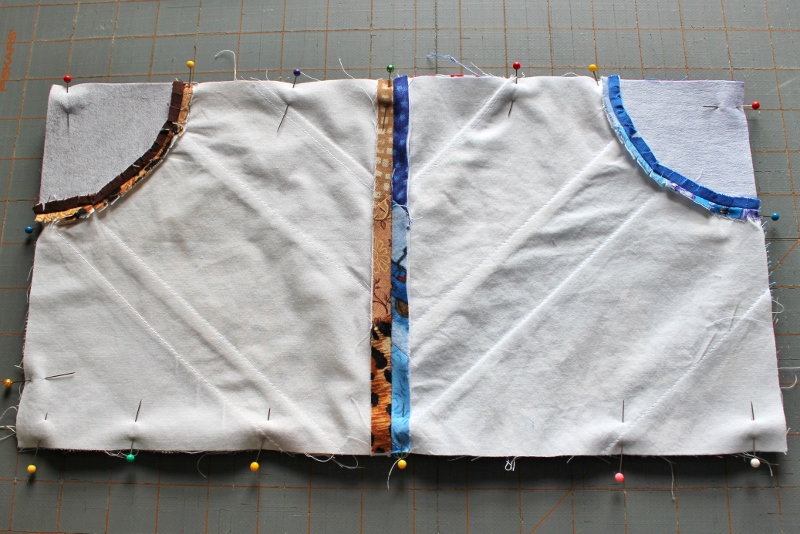
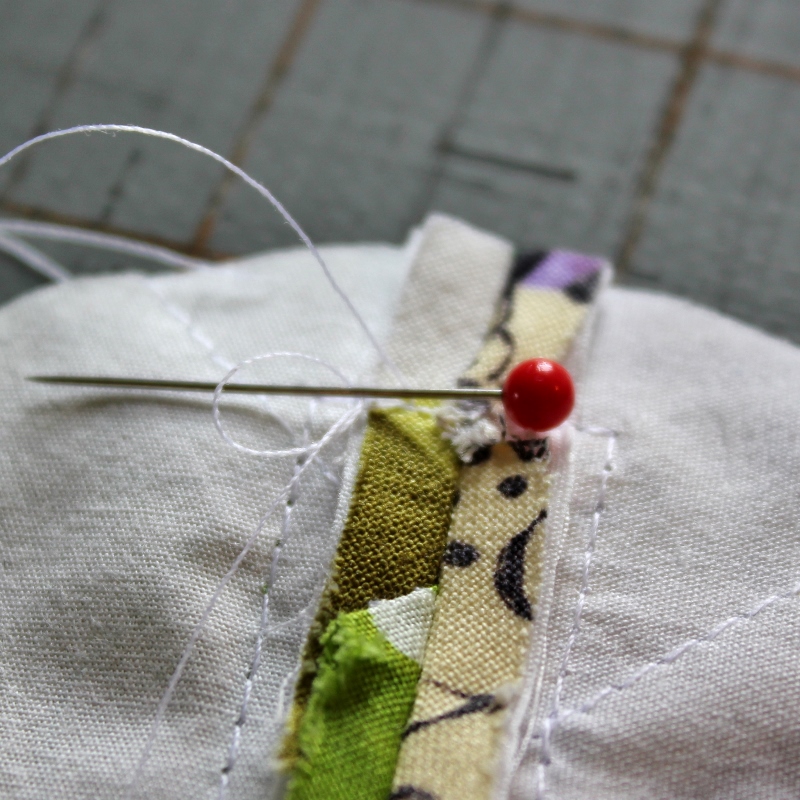
3.  Pin all six pairs along the spine.  Three pins are sufficient (beginning, middle, end) for these pairs:  purple/yellow, blue/brown, and back page/front page.  The other three pairs need four pins: green/orange, pink/red, and black/grey.  Place one pin at the beginning and the end and then one pin at about two inches from the top and another at about two inches from the bottom.  You will be leaving a turning hole in the middle of these three pairs.  The middle pins are to remind you where to leave the hole.

054 (799x800)Here are the four pins for the pairs with the turning hole.  My pins are not exactly in the right place.  I never really measure but just eye it.  Feel free to do so, too! 🙂

4.  At this point, you have to decide how you want your final product to look.  Due to the nature of fabric book binding (at least as far as I’ve figured it out), you can either have the pages look perfectly aligned when the book is open or perfectly aligned when the book is closed, but not both.

Option A: Sew the center seams the same.  The book will look perfect when open but the pages will not align when the book is closed.

009 (799x800) 010 (800x534) 014 (800x533)

Option B:  Sew the center seams as directed below.  The book will look perfectly aligned when closed but the pages will be slightly off when the book is open.

012 (800x800) 013 (800x535)011 (800x533)

I ended up sewing one book with Option A, realizing what was happening and then sewing two more using Option B.  It’s your choice what’s more important to you – the outside or the inside.  In the end, it’s fabric, it shifts around, and it’s never going to look “perfect” regardless of which option you choose.  So don’t worry about the choice too much!

5.  For Option A (skip if you doing Option B):  Sew all the spines with a 1/4″ seam allowance.  Use your pins to help you remember to leave a 4″ turning hole in these three pairs: green/orange, pink/red, and black/grey.  The other three pairs should be sewn with a complete seam.

5.  For Option B (skip if you are doing Option A):  Sort your pairs into three piles and sew the spines as directed:

  • Pile #1 – back page/front page and black/grey – a 1/4″ seam allowance
  • Pile #2 – blue/brown and pink/red – a 3/8″ seam allowance
  • Pile #3 – purple/yellow and green/orange – a 1/2″ seam allowance

Use your pins to help you remember to leave a 4″ hole for turning in these three pairs: green/orange, pink/red, and black/grey.  The other three pairs should be sewn with a complete seam.

6.  For all pairs, iron both seams to one side.  Press from the front, to make sure that each seam is lying completely flat.  I almost always press all of my seams open but pressing to the side is important for binding the book – to ensure structural integrity.

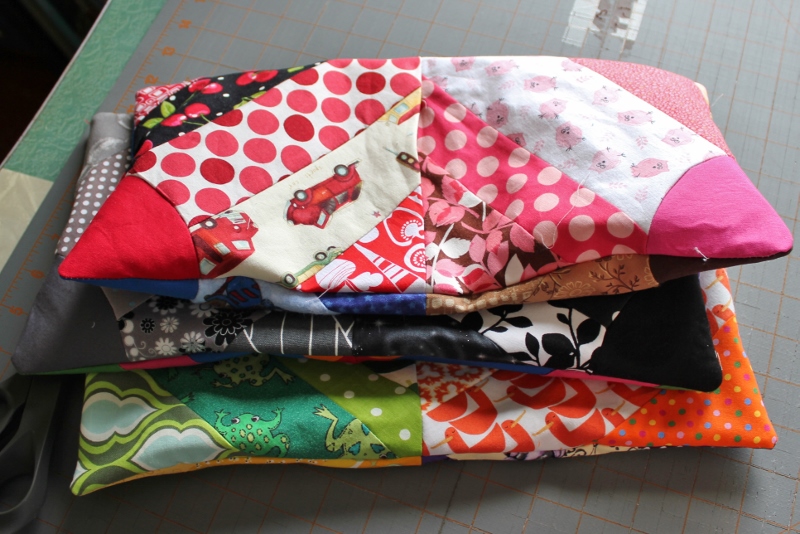
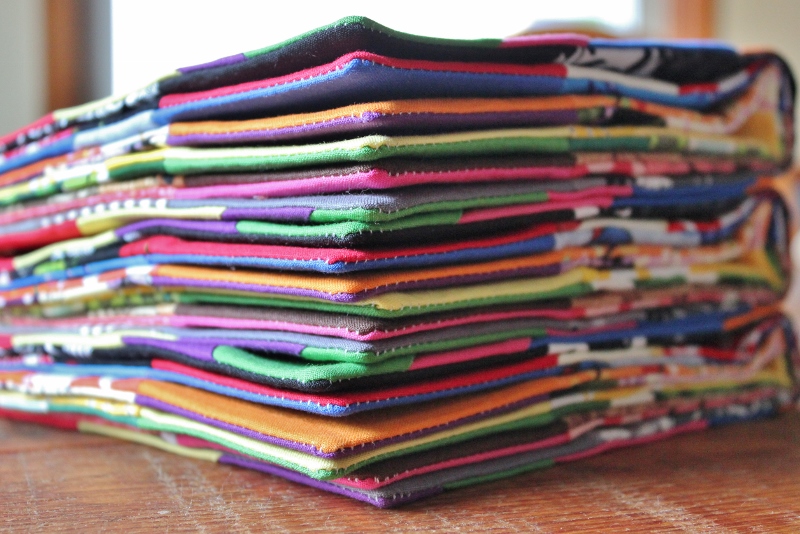
7.  Now you should have six double pages.  Placing them right sides together, combine two double pages to make three pairs:  

  • back page/front page with black/grey
  • red/pink with blue/brown
  • purple/yellow with orange/green

To double check the combinations, make sure that the following pages will be sewn to each other, verifying that the solid corners are touching each other correctly:

  • back cover to grey
  • front cover to black
  • red to blue
  • pink to brown
  • purple to orange
  • green to yellow

Additionally, confirm that your front and back pages are oriented correctly, so that the top of each page is touching the top of the black and grey pages (i.e. the top of the page where the solid quarter circle is).

All of this may seem a bit excessive but it’s far easier to to obsessively check the order now rather than pick out a whole lot of stitches later on.  (Don’t ask me how I know.)

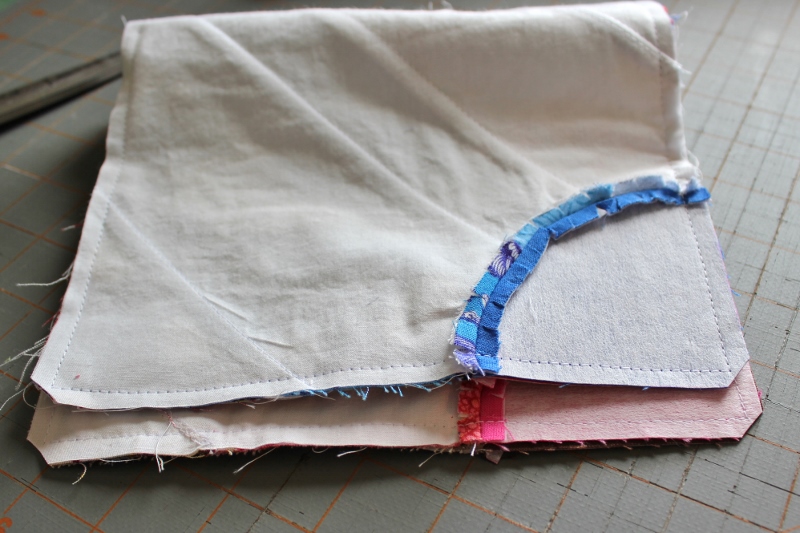
8.  Pin the pairs, first at the center (spine) seams and second at both sides of the quarter-circle.  Your pages may not line up correctly (probably due to a bit of wonkiness from curve sewing).  The bottom corners should line up perfectly though so line up the whole bottom edge and then do the top edge.  Prioritize perfection on the spine and do your best to get the sides of the quarter circles to line up also.  Then finish pinning all the way around.  Sew the entire perimeter of the page with a 1/4″ seam allowance, securing your stitches at the beginning and end.  No need to leave a turning hole – we did that already in the spine.

059 (800x534)

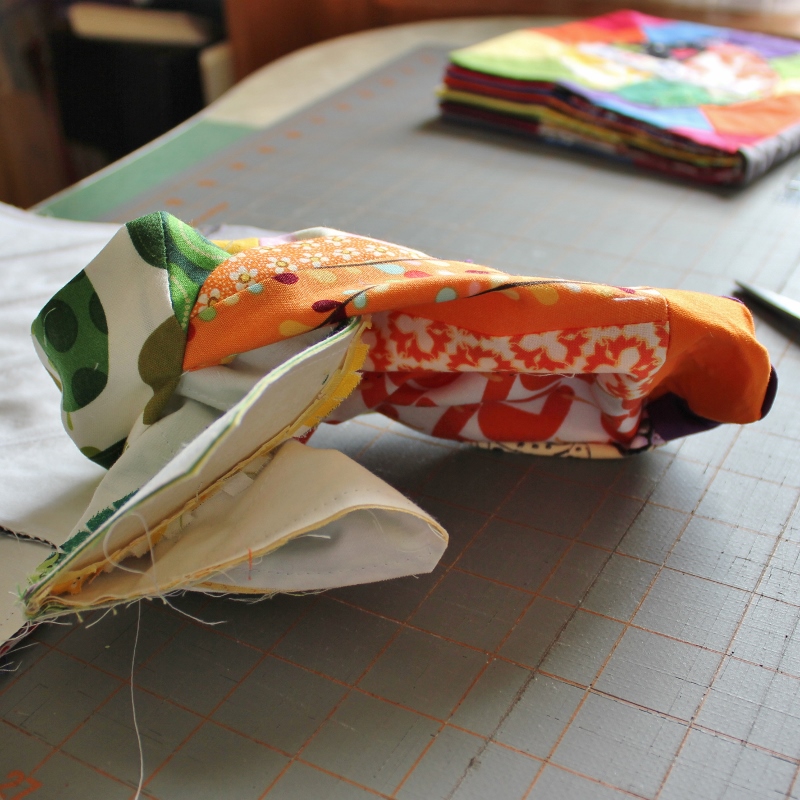
9.  Trim all corners and then turn the pages right-side out through the turning hole. You’ll notice that the pages will be quite wrinkled and puffy.  Use a chopstick or another implement to help you completely push out the corners.  This will be a bit difficult because of the interfacing on the solids.  Do your best to get the corners to look square.

061 (800x533)

060 (800x800)062 (800x534)10.  Carefully and thoroughly press each page, paying particular attention to the solid quarter-circles.  Due to the interfacing, then tend to get more wrinkled.  Make sure to pull out the edges completely so that they meet perfectly at the edge, ensuring that you won’t see the other side’s color.  Also, pay careful attention to the fabric at the turning hole, pressing it so that it’s straight again.  At this point, all three pages should be flat.

063 (800x533)Congratulate yourself on being almost finished!

Next week (and the final post): binding the book!
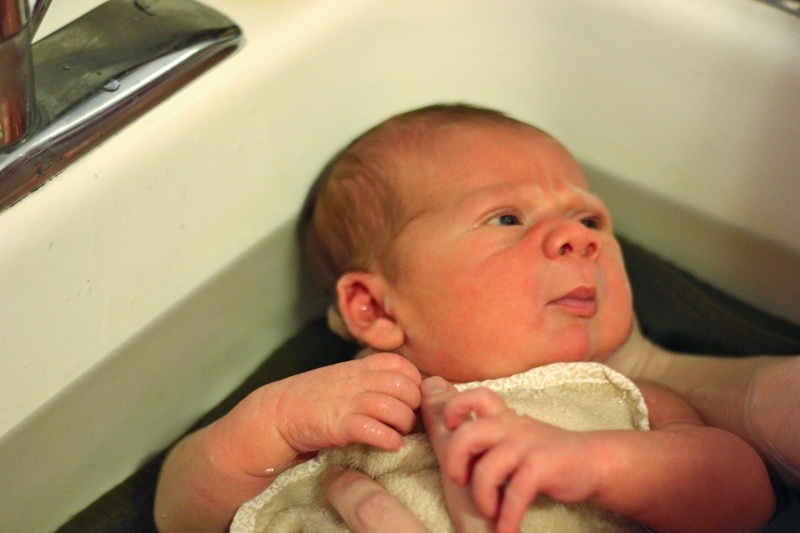
Posted in sewing, tutorial | Tagged | 2 Comments

First Bath! (It’s About Time!)

I have lots of pictures to post, particularly related to Mark, that I’ve gotten behind on.  So you’ll be seeing some older pictures over the next few weeks.

I promise, Mark didn’t get his first bath at 5.5 months!

Mark’s umbilical cord fell off really quickly so we were able to give him his first full bath at eight days old.  He was very calm when in the water…

014 (800x533) 021 (533x800)

look at those cheeks!  already at eight days! 🙂

022 (800x533)

…but not so happy when we took him out!
027 (800x533)

Here’s big sister Ellie helping get him dressed after his first bath.029 (800x533)

And here’s big, grown up Mark enjoying a real bath in the bath tub at 5 months!

006 (800x800)

Posted in Mark | 1 Comment

Color Book Tutorial/Sew-Along, Part 7: Finishing the Cover

This is Part Seven of my Color Book Tutorial/Sew-Along.  For an introduction to this tutorial, the finished book and links to all the other parts of this tutorial, see this post.

Assemble all the parts for your cover page:  the cover pages sewn from solids (see this post), the quarter-circles left over from trimming your pages, and your hand-embroidered pieces.

1. Choose your four favorite quarter-circles from the ten that you have.  I like to choose the ones with the most appealing combination of fabrics, particularly if there are any “objects to be discussed” visible.  Arrange the four into a pleasing circle.  (You can discard the remaining six quarter-circles at this point.)

2. Sew the right side and the left side together, using a 1/4″ seam allowance. Press the seams open.

018 (640x640)

turtles and ducks!

3.  Sew the two halves of the circle together, also with a 1/4″ seam allowance nd press the seams open.  It’s OK if your seams don’t make a perfect point in the middle.  It will be covered by the embroidery.
019 (640x640) 020 (640x640)4.  If necessary, trim the edges so that the circle is relatively symmetrical.  Set aside.

5. Iron both embroidery pieces so that they are as wrinkle-free as you can get them.  Trim each piece so that there is approximately 1 and 1/4 inch of excess fabric on all four sides.

001 (1280x1280)I use my ruler’s markings to help me get a relatively straight edge at 1 & 1/4 inch.

6.  Iron in all the sides of the Front Cover embroidery piece (“________’s Color Book”), so that there is approximately 1/4 inch of white space on all four sides of the embroidery.  You may need to trim the fabric slightly more to get it to fold onto itself smoothly.  You do want the fabric to overlap significantly at the back so that the cover fabric won’t show through.  Iron in the long sides first, then the short sides.  Trim the short sides to a point to lessen the bulk.  You should end up with a piece like this:

003 (1280x1280)004 (1280x1279)

7.  Lay out your two cover pages so that they face each other and arrange your embroidery as pictured here.  Make sure your stripes are facing the correct direction.

047 (800x533)

(The “Author” piece isn’t fully ironed and ready to sew at this point in this picture!)  This arrangement looks wrong when seen like this but remember that this is a book cover so it will be wrapped around the rest of the pages.  The left side becomes the back cover. 

8.  Center the piece of embroidery on your patchwork circle.  Sew on, using white thread and a scant 1/8″ seam allowance (just sew very close to the edge).

005 (1280x1280)Yes, now I’m letting you see the names because they’ve already gotten their books! 🙂

9.  Sew your patchwork circle to the front cover, using white thread and a scant 1/8″ seam. making sure to center the circle top to bottom and side to side.  Also, refer to the picture in #7 and orient it correctly, as shown.

006 (1280x1280)

Don’t worry about the circle edges fraying.  Fabric cut on the bias like this (i.e. around the circle) doesn’t fray far.  I think it adds a nice textural dimension to the cover!

10.  Repeat step 6 for the “Author” embroidery piece and sew it directly to the back cover, placing it in the lower right hand corner (or somewhere else, to your liking).  Sew it directly onto the back cover, using white thread and a scant 1/8″ seam allowance.  075 (800x800) (2)

Your cover is finished!

Next time: Assembling the pages of the book!  (We’re getting close!)

************

Bonus Advice:  

When sewing detail stitching, particularly when the stitching will only be seen from the top, it’s better to pull both threads to the back of the fabric, rather than sewing back and forth to secure your stitches.  If you pull both threads to the back of the fabric, you can knot them and the stitches on the front will look continuous, without any repeated stitches to mar the look.  To get the top thread to the back easily, tug on the back thread.  This will cause the front thread to come through and form a little loop.  Put a pin through that loop and pull it through.  If you are stopping and starting your sewing in the same place, you can pull all four threads to the back and tie them together in one knot.

I recommend doing this when sewing on both embroidery pieces and when sewing the patchwork circle to the cover.  It’s not necessary but does make for a slightly higher-quality finish.

048 (800x800)

Posted in sewing, tutorial | Tagged | 1 Comment

April, May, June Sewing: Color Books – Three of Them!

So I’ve been posting color book tutorial posts but hiding the fact that I’ve been sewing not one or two but THREE color books!  Three of my nieces turned two (or will be two soon) in the past year and so usually, I would have made these for them for this past Christmas.  We were otherwise occupied in December however so here we are in June!

The front covers:

066 (800x800) 067 (800x800)

Making three color books turned out to be beneficial for writing the tutorial because I was able to fine tune my process and take any missing pictures while sewing the other books.

068 (800x533)

069 (800x534)I love how they look, all stacked up!

Here’s the inside of one of the books:

070 (800x534) 071 (800x534) 072 (800x533) 073 (800x533) 074 (800x535)And the “Author” page:

076 (800x800)This was indeed a labor of love and it will probably be awhile before I can make myself sew another color book!  🙂  I hope those three little girls love having these books as much as I loved making them for them!

Auntie Laura loves you, Violet, Clara, and Maria!

Posted in family, sewing | 6 Comments