
This year, I decided that we should have a sheep as part of our church’s annual ornament sale. Because we made angels last year, I figured it would be fun to have some sheep, too
And there were shepherds living out in the fields nearby, keeping watch over their flocks at night. An angel of the Lord appeared to them, and the glory of the Lord shone around them, and they were terrified. But the angel said to them, “Do not be afraid. I bring you good news that will cause great joy for all the people. Today in the town of David a Savior has been born to you; he is the Messiah, the Lord. This will be a sign to you: You will find a baby wrapped in cloths and lying in a manger.”
Luke 2:8-12
I hope you enjoy making these cute little sheep!

Supplies you’ll need to make one sheep
- small amounts of cream and dark brown felt (I prefer premium acrylic felt for making ornaments. They end up feeling much nicer. Wool felt would be even better)
- ecru and dark brown embroidery thread (I used DMC #838 for the dark brown.)
- one 8-inch piece of cream ribbon
- the sheep template and cardboard to make the template, if desired (Click here – sheep template– to download the Word file that has the template in it. You can modify the size for a bigger or smaller sheep.)
- permanent marker, needle and sharp scissors
- Instructions for a knot-less start for thread (so EASY!) are at the bottom of this post.
1. Using the template, cut out two sheep bodies in dark brown and two pieces of “wool” in ecru. If you’d like, you can trace the shape onto the felt using a permanent marker. If you do this, be sure to cut just inside the marker line so that the marker doesn’t show on the ornament. Otherwise hold the template to the felt and cut out the shape.
You’ll find that the curves are a bit tricky to cut out properly. Just go slowly. I think cutting them correctly is the hardest part of making these sheep.
2. Fold the ribbon in half to form a loop and sew the two cut ends to the inside middle back of one of the sheep bodies.

3. Use a running stitch and dark brown thread to properly sew the head and legs. The rest of the stitching won’t show so just put a few big stitches through the body to baste it together. (When you sew on the “wool”, it will fully sew together the body.) Tie off your thread when you’re done.
 It’s hard to see but in this picture, I’ve only done some running stitches on the head.
 head and legs properly sewn, the rest just quickly basted
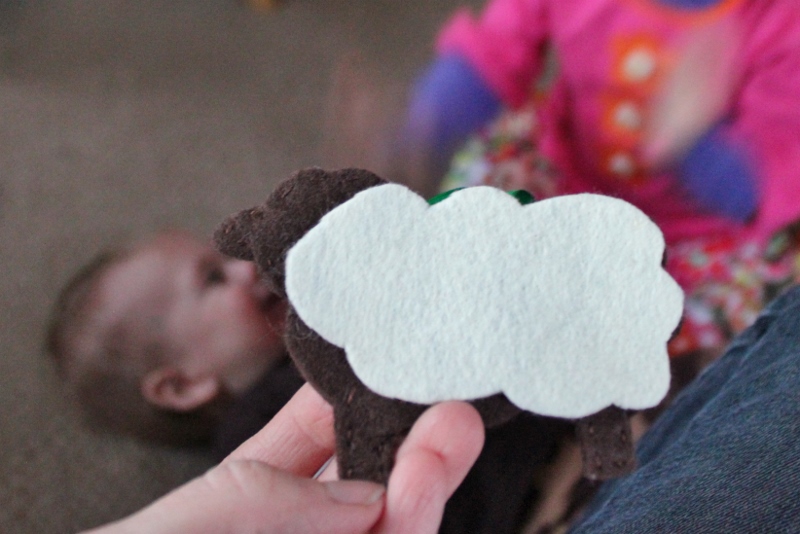
4. Put one piece of “wool” on either side of the sheep body. It matches the curves of the body perfectly so make sure it lines up.
 wrong!
 right!
Put your needle through all four layers of felt.

Using a running stitch and ecru thread, sew all around the outer edge of the “wool”, aligning all edges as you go.

Tie off your thread and you’re finished! You’ve made a simple, easy, beautiful felt sheep!
If you want, you can even make a flock of sheep!
 Ellie has requested a few more…they’re so cute nestled together!
And fair warning, if you have children around, be sure to sew that ribbon in securely. Your sheep is destined to be carried around to choruses of, “Baa Baa Black Sheep.”
 P.S. Do you like all the wrestling going on in the background of these pictures? 🙂 That’s how I get work done – in the chaos!

Pingback: September/October/November Sewing: Ornaments for the Advent Bazaar | Salmon and Souvlaki
Pingback: Handmade Christmas 2013: Trees and Sheep and Birds, Oh MY! | Salmon and Souvlaki
Pingback: Tutorial: Baby Jesus in the Manger (a felt ornament for your Christmas tree) | Salmon and Souvlaki