
Two years ago, I made a “Here We Go” bag for my sister, Rachel in celebration of her second child’s birth. Around the same time, my friend Steph was also expecting a baby and decided to make the same bag for herself. Alma was born and at some point in Steph’s maternity leave, I went over to help her get through a tricky part at the beginning of the sewing process (curves!). We made a little progress on the bag but didn’t complete it.
Fast forward two years – now, Steph and Ben are expecting the birth of their second child within the next month and so I asked Steph if she’d ever had time to finish her bag. She hadn’t and so I offered to finish it for her as our present welcoming Baby #2 into the world.
Here it is!
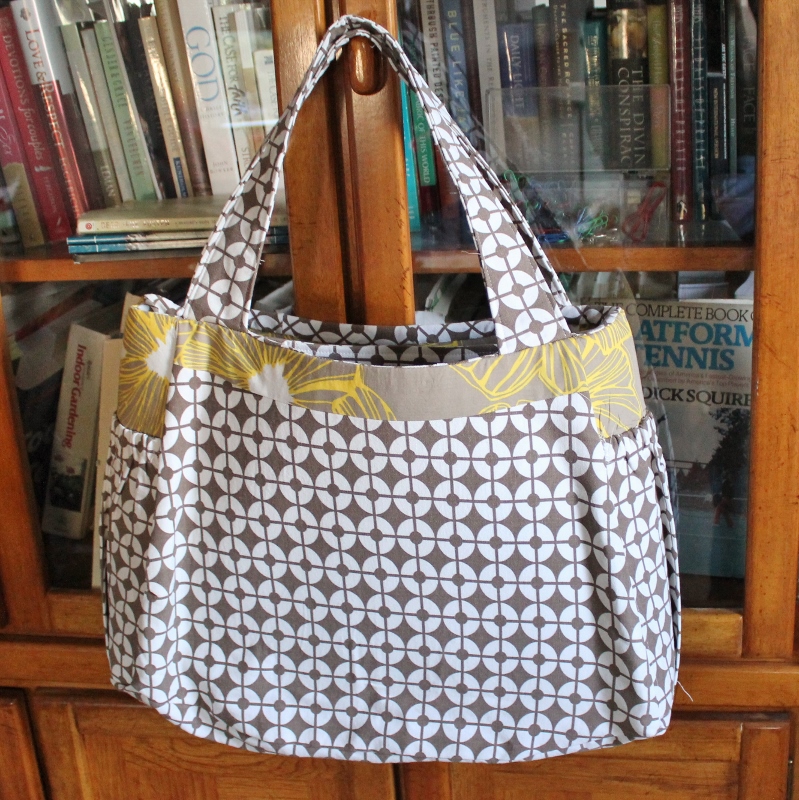
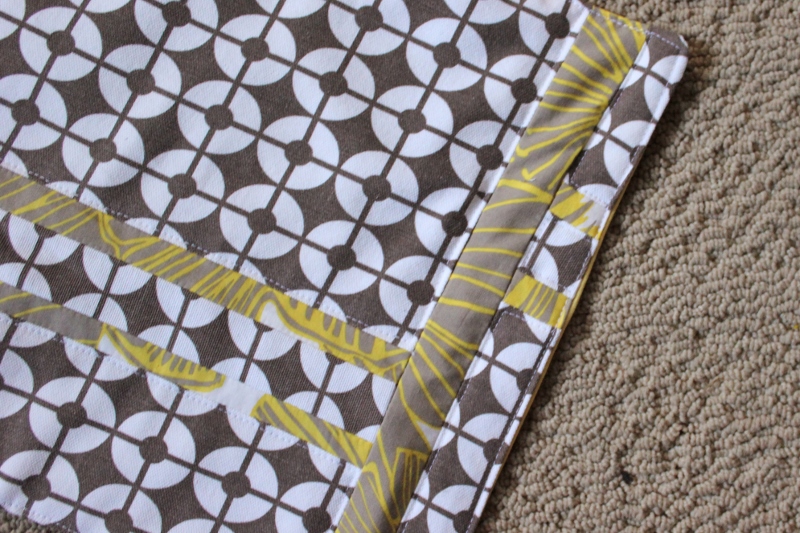
Steph had already sewn the outside and had cut out almost everything else. I added a bonus divided pocket to the divider panel, sewed the lining, and assembled the bag.
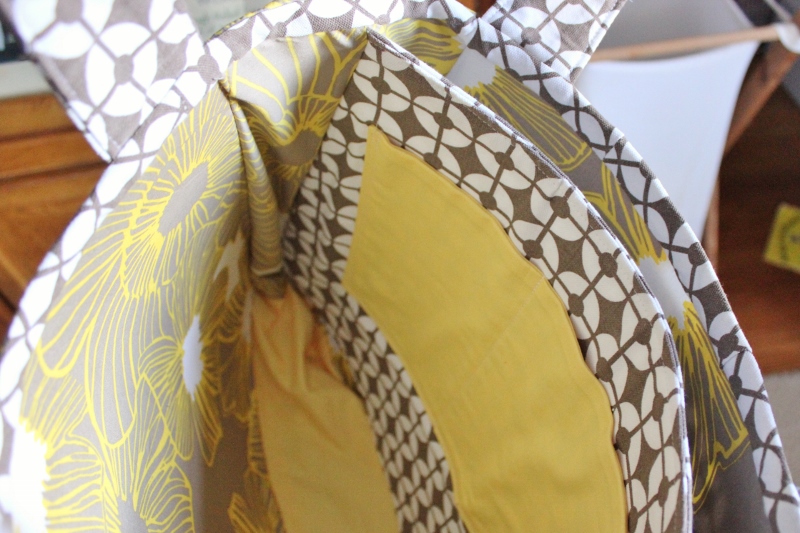 I also added the solid yellow bottom so that I could use that piece of patterned fabric for the changing pad. I like the surprise pop of yellow down there!
For the changing pad, the pattern calls for two solid pieces of fabric with quilt batting sandwiched between. I didn’t have enough of either of the yellows to do one solid piece so I did some piecing to come up with a pleasing changing pad with no noticeable seams (i.e. no seams between like fabrics).
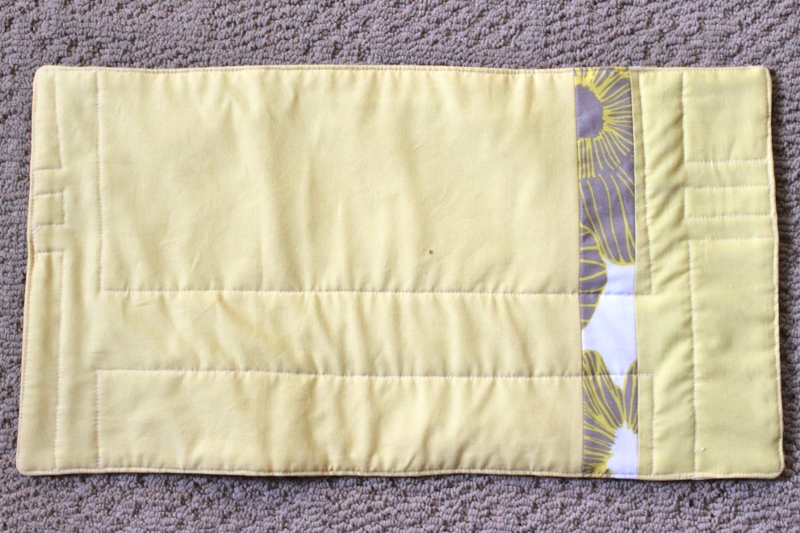 the “business” side of the changing pad
I should learn not to do calculations in my head though because I ended up cutting pieces that were too small and then had to slice up the front side more times than I’d intended to add extra fabric in order to make it big enough. This was far more complicated than I’d intended to make it!
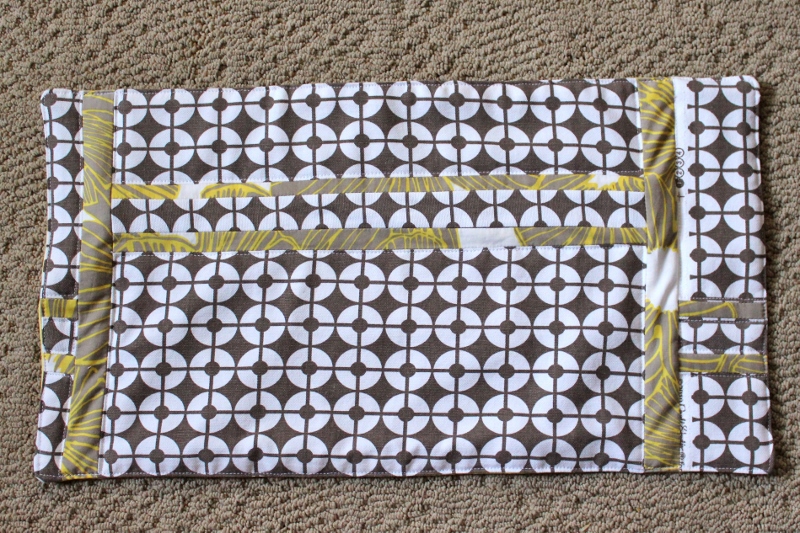 Pretty cool though, right? 🙂 You may also notice that I had to use the selvage strip in order to make it long enough (another measurement miscalculation). I decided to embrace that mistake, because selvage projects are so cool these days. I did it on purpose, actually, just so Steph’s changing pad would be extra cool. 😉
I quilted around the outside of the yellow strips. I like the detail it created on the back too.
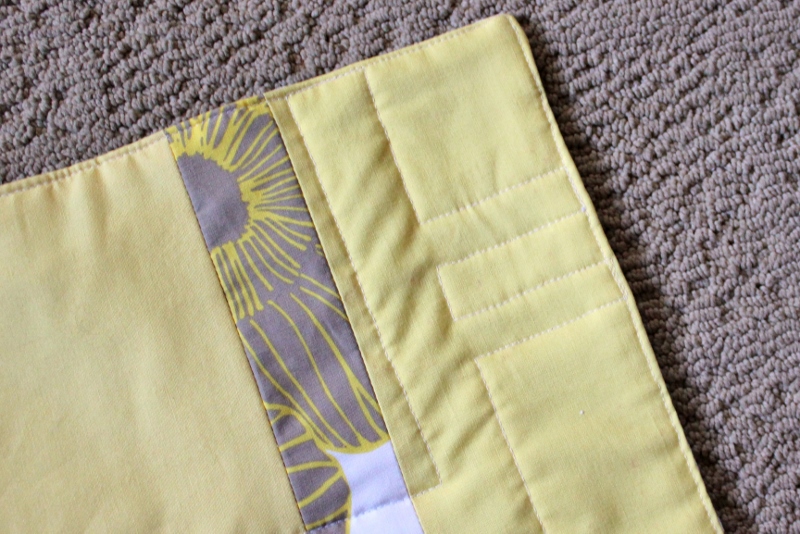 After all that work, I just realized that I forgot to add in the ribbon ties for the changing pad. Oh well!
As is my tradition with making diaper bags (as you can see in Meggan’s, Rachel’s, and Leah’s bags), I also included a baby in the photo shoot. Mark doesn’t like to sit so I had to con him into being in the picture (rather, I just put the bag where he was!).
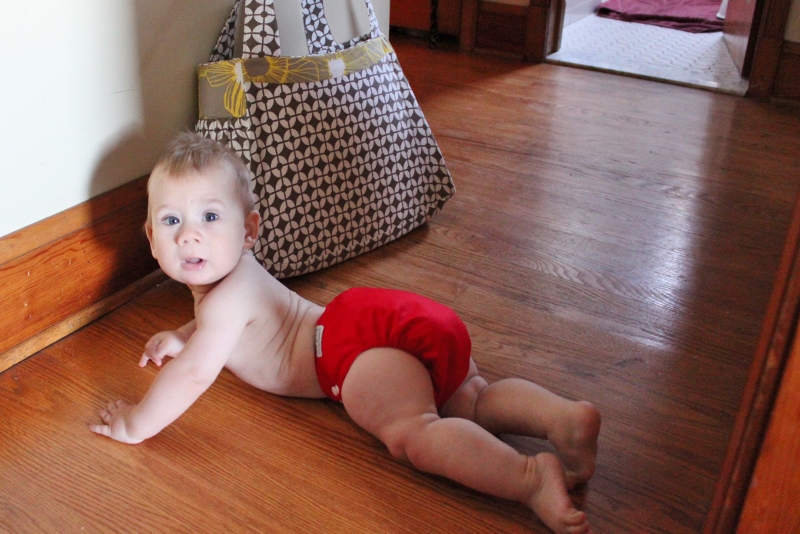
 a rather impressive pushup! 🙂
 ooh – what’s this?
We’re so excited to welcome your little one into the world, Steph and Ben!
****************
A few pattern review notes for the Here We Go bag, from Handmade Beginnings: (Steph, don’t read these if you don’t want the nitty-gritty on what I liked/disliked about making your bag! :))
1. Don’t assemble the two parts of the bag the way she tells you to. The bag assembly instructions in this tutorial are far easier and end up with neater seams. You’ll have to use a 5/8″ seam allowance (rather than 1/2″) but can otherwise follow the directions in step 6. I do, however, like the way that Horner uses bias tape to do the final assembly of the bag . That’s a good technique to know how to do.
2. Don’t make the straps the way she instructs you to. Rather than sewing and turning inside out, it’s worth the trouble to iron the seam allowances in and then top stitch. The strap gets really narrow in the middle and if you’ve used relatively stiff interfacing (I used Pellon 808, Craft Fuse), it’s practically impossible to turn them right side out after sewing. Also, if I made this bag again, I’d use a 3/8″ seam allowance on the straps to get a slight wider strap.
3. I really don’t like the ultra-thick double-sided fusible interfacing that the pattern calls for. This is the first time I’ve used it (I used something different for Rachel’s bag) and it was really difficult to use. I ended up not being able to fuse it correctly in the corners and had to leave it out of the bottom entirely. Clearly there’s a learning curve with using it correctly and I don’t think I’m willing to go through it. I just bought this pattern, which promises a method that allow for sturdy, stand-along bags without the use of heavy interfacing. So I’m excited to try that pattern and perhaps not have to use super thick interfacing ever again.
4. Definitely add pockets. It’s sorely lacking in them. I ran out of time with Steph’s bag but if I’d had more time, I would have put in at least two more pockets (as I did in Rachel’s bag). Either that or make a couple zippered pouches that coordinate with the bag!

Ooh… Nice push-up indeed!
Thanks Mom – I’ll pass that along to him! 🙂
i love that his toes are curled down…ouch, haha!! beautiful bag!!
I love those toes too! 🙂